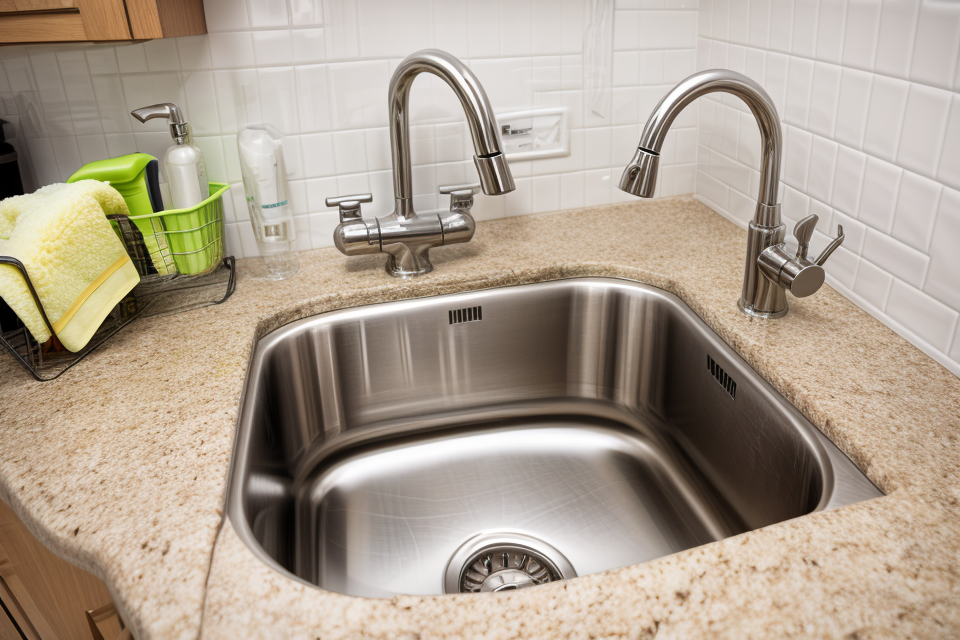
A sparkling sink is a sign of a well-maintained bathroom. But with constant use, it can easily become dull and stained. So, what’s the best way to clean your sink and keep it looking its best? In this ultimate guide, we’ll explore expert tips and recommendations for cleaning your sink, so you can say goodbye to stubborn stains and streaks for good. From natural remedies to store-bought cleaners, we’ll cover all the options and help you find the perfect solution for your sink. Get ready to learn how to give your bathroom a shiny, spotless makeover!
Understanding the Importance of Sink Cleaning
The Science Behind a Clean Sink
A clean sink is not only aesthetically pleasing, but it also has practical benefits. Understanding the science behind why a clean sink is important can help you appreciate the value of regular maintenance.
- Preventing Bacterial Growth: A dirty sink can harbor bacteria, which can lead to unpleasant odors and potentially harmful bacterial growth. Regular cleaning can help prevent this.
- Extending the Life of Your Plumbing: By removing buildup and debris from your sink, you can prevent clogs and extend the life of your plumbing.
- Improving Hygiene: A clean sink promotes better hygiene by removing germs and preventing the spread of illness.
- Easier Maintenance: Regular cleaning makes it easier to maintain your sink and prevents the need for more extensive and costly repairs.
By understanding the science behind a clean sink, you can make informed decisions about how to best maintain your plumbing fixtures and ensure they last for years to come.
The Benefits of Regular Sink Cleaning
- Preventing the buildup of bacteria and germs: A dirty sink can be a breeding ground for bacteria and germs, which can spread to other areas of your kitchen and home. Regular cleaning can help prevent this buildup and keep your sink and kitchen clean.
- Extending the life of your sink: A dirty sink can also cause damage to the surface and the faucet, which can lead to costly repairs or replacements. Regular cleaning can help keep your sink looking like new and extend its lifespan.
- Removing stains and odors: A dirty sink can also lead to stains and odors that can be difficult to remove. Regular cleaning can help remove these stains and odors, leaving your sink looking and smelling fresh.
- Maintaining a healthy environment: Finally, regular sink cleaning is important for maintaining a healthy environment in your home. A clean sink helps to reduce the risk of illness and helps to create a more pleasant living space.
Common Sink Stains and Their Causes
Hard Water Stains
Hard water stains are a common issue that homeowners face when it comes to their sinks. These stains are caused by the presence of minerals such as calcium and magnesium in the water supply. When hard water is used to wash dishes or hands, it can leave behind a white, chalky residue on the sink surface.
Over time, these stains can become more noticeable and difficult to remove. Hard water stains can also contribute to the overall dullness and discoloration of the sink surface.
Here are some tips on how to remove hard water stains from your sink:
- Use a mixture of equal parts of white vinegar and water to clean the sink. Apply the mixture to the stain using a sponge or cloth, and let it sit for about 15 minutes before rinsing with warm water.
- Alternatively, you can use a paste made from baking soda and water to scrub the stain. Apply the paste to the stain, let it sit for about 15 minutes, and then rinse with warm water.
- If the stain is particularly stubborn, you can try using a mixture of equal parts of white vinegar, baking soda, and water. Apply the mixture to the stain, let it sit for about 15 minutes, and then scrub with a non-abrasive sponge or cloth before rinsing with warm water.
By following these tips, you can effectively remove hard water stains from your sink and restore its original shine and luster.
Grease and Oil Stains
One of the most common sink stains is grease and oil stains. These stains are often caused by cooking oil, grease, or other food particles that are washed down the drain. Over time, these stains can build up and become difficult to remove.
There are several methods for removing grease and oil stains from your sink. One effective method is to use a mixture of equal parts water and vinegar. Simply pour the mixture into the sink, let it sit for a few minutes, and then scrub the stain with a non-abrasive sponge or cloth. This should help to break down the grease and oil, making it easier to remove.
Another option is to use a commercial grease dissolver or sink cleaner. These products are specifically designed to break down and remove grease and oil stains. Be sure to follow the instructions on the package carefully, as some products may require you to let them sit for a longer period of time before scrubbing the stain.
If the stain is particularly stubborn, you may need to use a more aggressive cleaning method. This could include using a mixture of baking soda and vinegar, or a commercial cleaning product that contains harsh chemicals. However, it’s important to be cautious when using these products, as they can be damaging to your sink and surrounding surfaces if used improperly.
In addition to regular cleaning, it’s also important to prevent grease and oil stains from forming in the first place. This can be done by wiping up spills immediately, not pouring hot liquids into the sink, and avoiding using harsh chemicals or abrasive cleaners that can damage the sink’s surface.
Overall, removing grease and oil stains from your sink requires a combination of patience, the right cleaning products, and a little bit of elbow grease. By following the tips and recommendations in this guide, you can keep your sink looking clean and pristine for years to come.
Mildew and Mold Stains
Mildew and mold stains can be a common problem in sinks, especially in areas with high humidity. These stains are usually black or green and can appear on the sink’s surface, faucet, or drain.
The cause of mildew and mold stains is due to moisture and humidity that are trapped in the sink’s crevices and porous surfaces. Over time, this moisture can attract mold and mildew spores, which then grow and multiply, causing stains to appear.
To remove mildew and mold stains from your sink, it is important to clean the area thoroughly and regularly. This can be done by using a mixture of equal parts of white vinegar and water, applying it to the affected area using a sponge or cloth, and then scrubbing the area gently with a non-abrasive sponge. It is important to rinse the area thoroughly with water after cleaning to remove any remaining residue.
If the stain is particularly stubborn, you can try using a mixture of baking soda and water, applying it to the affected area, and then leaving it on for several hours before rinsing it off with water.
In addition to cleaning the sink regularly, it is also important to ensure that the sink is well-ventilated and that any excess moisture is quickly evaporated to prevent the growth of mold and mildew. This can be done by using a fan or opening windows to allow for better air circulation.
Overall, prevention is key when it comes to removing mildew and mold stains from your sink. By regularly cleaning the sink and ensuring that it is well-ventilated, you can prevent the growth of mold and mildew and keep your sink looking clean and fresh.
Choosing the Right Cleaning Products
Natural and Eco-Friendly Options
When it comes to cleaning your sink, there are many options available to you. While some may opt for harsh chemicals that promise a quick and easy clean, others may prefer to go the natural and eco-friendly route. Here are some tips for choosing the right natural and eco-friendly cleaning products for your sink:
- Look for products made with natural ingredients: When selecting a natural cleaning product, look for those that are made with ingredients that are safe for the environment and your family. Ingredients such as baking soda, vinegar, and lemon juice are great options as they are all natural and effective at cleaning.
- Avoid products that contain harmful chemicals: Some cleaning products contain harsh chemicals that can be harmful to both the environment and your health. These chemicals can include phosphates, sodium lauryl sulfate (SLS), and triclosan. It’s important to read the labels of any cleaning products you use to ensure they don’t contain these harmful chemicals.
- Consider DIY cleaning solutions: In addition to purchasing natural cleaning products, you can also create your own cleaning solutions using ingredients you likely already have at home. For example, a mixture of baking soda and vinegar can be used to clean your sink and remove tough stains.
- Use microfiber cloths: When cleaning your sink, use microfiber cloths instead of paper towels or sponges. Microfiber cloths are highly absorbent and can be reused many times, making them a more eco-friendly option.
By following these tips, you can keep your sink clean and healthy while also being mindful of the environment.
Chemical-Based Cleaners
Chemical-based cleaners are a popular choice for cleaning sinks as they are readily available and effective at removing tough stains and buildup. These cleaners typically contain harsh chemicals such as bleach, ammonia, and acids that break down grease, grime, and other debris. However, it is important to use these cleaners with caution as they can be harmful to the environment and to human health if used improperly.
Benefits of Chemical-Based Cleaners
- Effective at removing tough stains and buildup
- Widely available and affordable
- Quick and easy to use
Risks of Chemical-Based Cleaners
- Can be harmful to the environment and to human health if used improperly
- Can cause skin irritation and respiratory problems
- Can damage certain materials such as marble and granite
Tips for Using Chemical-Based Cleaners
- Always read the label and follow the instructions carefully
- Wear gloves and other protective gear as necessary
- Work in a well-ventilated area to avoid inhaling fumes
- Never mix chemicals as it can create toxic fumes
- Always rinse thoroughly after use to remove any residue.
DIY Sink Cleaning Solutions
Cleaning your sink doesn’t have to be an expensive or complicated process. In fact, there are several simple and effective DIY solutions that you can use to keep your sink looking like new. Here are some expert tips and recommendations for DIY sink cleaning solutions:
- Baking soda and vinegar: Baking soda is a natural abrasive that can help to remove stains and odors from your sink. Mix equal parts baking soda and vinegar to create a paste, apply it to your sink using a non-abrasive sponge or cloth, and let it sit for several hours before rinsing off with warm water.
- Lemon juice and salt: Lemon juice is a natural acid that can help to break down grease and grime in your sink. Mix lemon juice with salt to create a paste, apply it to your sink, and let it sit for several hours before rinsing off with warm water.
- Castile soap and water: Castile soap is a gentle and effective cleaner that can be used to remove dirt and grime from your sink. Mix castile soap with warm water to create a soapy solution, apply it to your sink using a non-abrasive sponge or cloth, and let it sit for several minutes before rinsing off with warm water.
- Cream of tartar and hydrogen peroxide: Cream of tartar is a natural cleaner that can help to remove stains and odors from your sink. Mix cream of tartar with hydrogen peroxide to create a paste, apply it to your sink, and let it sit for several hours before rinsing off with warm water.
Remember, when using any DIY sink cleaning solution, it’s important to test it on a small, inconspicuous area of your sink first to ensure that it won’t damage the surface.
Cleaning Your Sink: Step-by-Step Guide
Preparing for Sink Cleaning
Before beginning the sink cleaning process, it is essential to prepare the area around the sink to ensure that the cleaning process is effective and efficient. Here are some steps to follow:
- Gather the necessary supplies: Before starting the cleaning process, gather all the necessary supplies such as a bucket, a sponge, a brush, soap, and water.
- Turn off the water supply: Turn off the water supply to the sink to avoid any water spillage during the cleaning process. Turn the faucet knobs clockwise to shut off the water supply.
- Remove any visible debris: Remove any visible debris from the sink, such as food particles, hair, or soap scum. Use a brush or your hand to remove the debris.
- Clean the drain: Use a plunger or a drain snake to clean the sink drain. Remove any hair or other debris that may be clogging the drain.
- Protect surrounding areas: Cover the surrounding areas with a plastic sheet or drop cloth to protect them from water or cleaning solutions.
By following these steps, you will be well-prepared to begin the sink cleaning process and ensure that the cleaning process is thorough and effective.
The Cleaning Process
- Remove any debris or loose materials:
- Clear the sink of any dishes, pots, or pans that may be dirty or wet.
- Check the sink for any loose items, such as soap dispensers or toothbrush holders, and remove them.
- Apply a mixture of hot water and baking soda:
- Mix equal parts hot water and baking soda in a bucket or large container.
- Scrub the sink with a non-abrasive sponge or cloth, focusing on any stubborn stains or areas with heavier buildup.
- Be sure to remove any excess baking soda from the sink before rinsing.
- Rinse thoroughly:
- Use a sponge or cloth to remove any remaining baking soda residue from the sink.
- Make sure to rinse the sink thoroughly with clean, hot water to remove any bacteria or odors.
- Dry the sink:
- Use a clean towel or cloth to pat the sink dry.
- It’s important to avoid leaving any water spots or residue on the sink, as this can lead to further buildup and staining.
- Inspect the sink:
- After the sink has dried, inspect it for any remaining stains or buildup.
- If necessary, repeat the cleaning process or use a more targeted cleaning solution for specific stains.
- Maintenance tips:
- Regularly clean the sink to prevent buildup and staining.
- Avoid using abrasive cleaners or scrubbers, as these can scratch the sink and damage its finish.
- Consider using a sink protectant or grate guard to help keep the sink looking new and reduce the need for frequent cleaning.
Finishing Touches
After completing the thorough cleaning of your sink, it’s important to add the finishing touches to ensure a sparkling and hygienic result. Here are some expert tips to help you achieve the best possible outcome:
Drying the Sink
It’s crucial to dry the sink thoroughly after cleaning to prevent water spots and the growth of bacteria. Use a clean, soft cloth or paper towels to wipe away any excess water, and allow the sink to air dry completely before using it again. Alternatively, you can use a hairdryer on a cool setting to speed up the drying process.
Polishing the Sink
Once the sink is dry, use a polishing cloth or a small amount of oil-based polish to add an extra shine. This step will help to protect the sink and make it easier to clean in the future. Apply the polish with a soft cloth and work in small circular motions until the sink is shining brightly.
Removing Limescale and Mineral Deposits
If your sink has limescale or mineral deposits, it’s important to remove them before they become harder to shift. You can use a limescale remover or a mixture of equal parts of vinegar and water to soak the sink for 30 minutes. Scrub the sink with a non-abrasive sponge or cloth, and then rinse and dry it thoroughly.
Disinfecting the Sink
Finally, it’s essential to disinfect the sink to eliminate any bacteria or germs that may have survived the cleaning process. You can use a mild bleach solution (1/2 cup of bleach per gallon of water) or a commercial disinfectant to wipe down the sink after cleaning. Make sure to follow the manufacturer’s instructions for safe and effective use.
By following these finishing touches, you can ensure that your sink is not only clean but also shiny, hygienic, and free from bacteria and germs. Remember to clean your sink regularly to maintain its appearance and prevent the buildup of dirt and grime.
Maintaining a Clean Sink
Preventing Future Stains
- Proper Care and Maintenance of Your Sink
- Avoiding the Use of Harsh Chemicals
- Using Eco-Friendly and Biodegradable Cleaning Products
- Natural Cleaning Alternatives
- Regular Use of Descalers and Deodorizers
- Ensuring Proper Drainage
- Removing Hair Trap and Strainer Regularly
- Avoiding the Use of Harsh Chemicals
- Keeping Your Sink Free from Odors and Bacteria
- Sanitizing Your Sink Regularly
- Use of White Vinegar or Baking Soda
- Using Hot Water and Lemon Juice
- Avoiding Cross-Contamination
- Using Separate Towels for the Kitchen and Bathroom
- Cleaning Utensils and Sponges Regularly
- Maintaining Good Hygiene Practices
- Washing Your Hands Regularly
- Disinfecting High-Touch Surfaces
- Sanitizing Your Sink Regularly
- Implementing Proper Food Preparation and Storage Practices
- Cleaning and Sanitizing Cutting Boards Regularly
- Storing Food Items Properly
- Disposing of Food Waste Properly
- Addressing Specific Stains and Odors
- Removing Hard Water Stains
- Using White Vinegar and Baking Soda
- Using Lemon Juice and Salt
- Removing Oil Stains
- Using Baking Soda and Vinegar
- Using Castile Soap and Hot Water
- Removing Urine Stains
- Using Hydrogen Peroxide and Water
- Removing Mildew and Mold
- Using White Vinegar and Water
- Using Hydrogen Peroxide and Baking Soda
- Removing Skunk Odor
- Using Hydrogen Peroxide and Charcoal
- Removing Hard Water Stains
- Conclusion
- The Importance of Regular Sink Maintenance
- Tips for Maintaining a Clean and Odor-Free Sink
- The Benefits of Preventing Future Stains and Odors
Regular Maintenance Tips
- Keeping the sink clean is an essential part of maintaining a hygienic and functional kitchen.
- Regular maintenance helps prevent the buildup of hard water deposits, soap scum, and other residues that can lead to the development of unpleasant odors and stains.
- Here are some expert tips for regular maintenance of your sink:
- Use a drain strainer: A drain strainer helps prevent hair, soap, and other debris from clogging the drain. It is recommended to clean the strainer once a week by removing it from the drain and rinsing it with hot water.
- Clean the sink regularly: It is recommended to clean the sink at least once a week. This can be done by using a mixture of equal parts water and vinegar, scrubbing the sink with a non-abrasive sponge or cloth, and then rinsing it with water.
- Descaling the faucet: Hard water deposits can build up over time and cause the faucet to become clogged. To descale the faucet, mix equal parts water and vinegar, pour the mixture into the faucet aerator, and let it sit for a few hours before rinsing it off with water.
- Avoid using abrasive cleaners: Abrasive cleaners can scratch the sink surface and damage the finish. Instead, use gentle cleaners such as those made with baking soda or lemon juice.
- Dry the sink thoroughly: After cleaning the sink, it is important to dry it thoroughly to prevent water spots and mineral buildup. Use a clean towel or let it air dry.
By following these regular maintenance tips, you can help keep your sink clean and functional for years to come.
Troubleshooting Common Sink Cleaning Issues
Residual Stains
- Identifying Residual Stains
- A residual stain is a stubborn mark or discoloration that remains on the sink even after cleaning.
- Common causes of residual stains include hard water deposits, mineral buildup, and lime scale.
- These stains can be difficult to remove and may require specialized cleaning products or techniques.
- Causes of Residual Stains
- Hard water deposits: These are minerals that accumulate in the sink over time and can create a white, chalky residue.
- Mineral buildup: This occurs when minerals in the water react with the sink material, creating a scaly, grayish-white residue.
- Lime scale: This is a hard, crusty buildup that forms when water with high levels of calcium and magnesium evaporates, leaving behind a chalky residue.
- Removing Residual Stains
- Use a combination of white vinegar and baking soda: Mix equal parts white vinegar and baking soda, sprinkle the mixture onto the stain, and let it sit for several hours or overnight. Scrub the stain with a non-abrasive sponge or cloth and rinse with warm water.
- Use a pumice stone: Gently scrub the stain with a pumice stone dipped in warm, soapy water. Continue scrubbing until the stain is removed.
- Use a commercial cleaner: Apply a commercial sink cleaner directly to the stain and let it sit for several minutes before scrubbing with a non-abrasive sponge or cloth.
- Use a mixture of hydrogen peroxide and baking soda: Mix equal parts hydrogen peroxide and baking soda, sprinkle the mixture onto the stain, and let it sit for several hours or overnight. Scrub the stain with a non-abrasive sponge or cloth and rinse with warm water.
- Use a steam cleaner: Apply steam directly to the stain and let it sit for several minutes before wiping it away with a damp cloth.
- Preventing Residual Stains
- Use a sink protectant: Apply a protectant to the sink regularly to create a barrier between the sink material and water.
- Use a water softener: A water softener can help remove minerals from the water before they have a chance to accumulate on the sink.
- Clean the sink regularly: Make sure to clean the sink regularly to prevent the buildup of minerals and other debris that can lead to residual stains.
Unpleasant Odors
If you’ve noticed a foul odor emanating from your sink, it’s likely that there is a buildup of bacteria and residue that has accumulated over time. Fortunately, there are several effective methods for eliminating these odors and restoring your sink to its original state.
- Identifying the source of the odor: The first step in eliminating unpleasant odors from your sink is to identify the source of the problem. If the odor is particularly strong, it may be coming from a buildup of food particles or other debris that has accumulated in the drain or pipes. To identify the source of the odor, try pouring a small amount of baking soda down the drain and letting it sit for a few hours. If the odor is eliminated, it’s likely that the problem was caused by a buildup of debris in the drain.
- Cleaning the drain: If the odor is coming from a buildup of debris in the drain, you’ll need to clean the drain thoroughly to eliminate the odor. This can be done using a mixture of baking soda and vinegar, which will help to break down the debris and eliminate the odor. Simply pour a mixture of baking soda and vinegar down the drain, let it sit for a few hours, and then rinse with hot water.
- Cleaning the sink: If the odor is coming from the sink itself, you’ll need to clean the sink thoroughly to eliminate the odor. This can be done using a mixture of hot water and a mild detergent, which will help to break down any residue or bacteria that may be present. Simply pour a mixture of hot water and detergent into the sink, scrub with a non-abrasive sponge, and then rinse with hot water.
- Preventing future odors: To prevent future odors from occurring, it’s important to maintain a regular cleaning routine for your sink. This can be done by regularly washing the sink with hot water and a mild detergent, and by rinsing the drain with hot water once a week to prevent a buildup of debris. Additionally, it’s important to avoid pouring cooking oils or other substances down the sink, as these can contribute to the buildup of bacteria and odors.
Discoloration
Discoloration in the sink can be caused by hard water deposits, mineral buildup, or even the dish soap used. It can be unsightly and difficult to remove, but there are ways to address it. Here are some tips on how to remove discoloration from your sink:
- Use a Vinegar and Baking Soda Solution: Mix equal parts of vinegar and baking soda to form a paste. Apply the paste to the discolored area, let it sit for about 30 minutes, and then scrub it off with a non-abrasive sponge. The vinegar will help to break down the minerals causing the discoloration, while the baking soda will provide a gentle abrasive action to remove the stains.
- Use a pH-Neutral Detergent: Using a pH-neutral detergent can help prevent discoloration from occurring in the first place. Dish soaps can sometimes leave a residue that can lead to discoloration over time. Switching to a pH-neutral detergent can help reduce this issue.
- Avoid Using Abrasive Cleaners: Abrasive cleaners can scratch the surface of the sink and make the discoloration worse. It’s best to avoid using them altogether.
- Use a Sink Cleaning Solution: If the discoloration is particularly stubborn, you can try using a sink cleaning solution. These solutions are specifically designed to remove mineral buildup and discoloration from sinks. Follow the instructions on the package carefully to ensure safe and effective use.
Remember, regular cleaning and maintenance can help prevent discoloration from occurring in the first place. Make sure to clean your sink at least once a week to keep it looking its best.
FAQs
1. What is the best thing to clean a sink?
Answer:
There are several options for cleaning a sink, but one of the most effective methods is to use a combination of baking soda and vinegar. Baking soda is a natural abrasive that can help to remove stains and grime from the sink, while vinegar is an acidic substance that can help to break down grease and soap scum. To use this method, simply mix equal parts baking soda and vinegar, apply the mixture to the sink using a sponge or cloth, and let it sit for a few hours before rinsing off with water.
2. How often should I clean my sink?
It’s recommended to clean your sink at least once a week to prevent the buildup of grime and bacteria. If you have a lot of hard water stains or soap scum, you may need to clean your sink more frequently. In addition to regular cleaning, it’s also important to rinse your sink with water after each use to remove any loose debris or residue.
3. Can I use commercial cleaners to clean my sink?
Yes, you can use commercial cleaners to clean your sink. However, it’s important to read the labels carefully and follow the instructions carefully to avoid damaging the sink or causing skin irritation. Some commercial cleaners can be harsh and may damage the finish of your sink, so it’s important to use them sparingly and avoid using them too often.
4. How do I remove tough stains from my sink?
If you have tough stains in your sink, you can try using a mixture of baking soda and vinegar, followed by a gentle abrasive like a soft cloth or sponge. If the stains are particularly stubborn, you may need to use a non-abrasive cleaner or a mixture of water and vinegar to break down the stains before cleaning with baking soda and vinegar.
5. Is it safe to use bleach to clean my sink?
Bleach can be effective at cleaning soap scum and other grime from your sink, but it can also be harsh on your skin and the environment. If you choose to use bleach, it’s important to read the labels carefully and follow the instructions carefully to avoid damaging your sink or causing skin irritation. It’s also important to ventilate the area well to avoid inhaling the fumes.


