Are your kitchen cabinets looking a little dull and dingy? It’s time to give them a good cleaning! But what’s the best way to do it? In this ultimate guide, we’ll explore various methods for cleaning your kitchen cabinets, from the most basic to the more advanced techniques. Whether you’re looking for a quick and easy solution or a deep clean, we’ve got you covered. So let’s get started and bring back the shine to your kitchen cabinets!
Understanding the Importance of Cabinet Cleaning
Benefits of cleaning cabinets
Regular cleaning of your kitchen cabinets can provide numerous benefits. Firstly, it helps to remove dirt, dust, and other contaminants that accumulate over time, which can aggravate allergies and asthma. Additionally, cleaning your cabinets can improve the overall appearance of your kitchen, making it look cleaner and more inviting. Furthermore, a clean kitchen can also have a positive impact on your mood and overall well-being. Finally, cleaning your cabinets can also help to prevent the growth of mold and mildew, which can cause health problems and damage to your cabinets.
Consequences of not cleaning cabinets
When cabinets are not cleaned regularly, a range of issues can arise. Neglecting to clean them can lead to:
- Unpleasant odors: Bacteria, mold, and mildew thrive in damp environments, which can lead to unpleasant odors emanating from your cabinets. These odors can be difficult to eliminate and may require professional cleaning services.
- Damage to cabinetry: Accumulated dirt, dust, and debris can abrade the finish of your cabinets, causing scratches and dulling the surface. This can make your cabinets appear older and duller than they actually are.
- Health concerns: Bacteria, mold, and mildew can pose health risks, particularly for individuals with respiratory issues or compromised immune systems. Prolonged exposure to these microorganisms can cause allergic reactions or even respiratory infections.
- Increased pest infestations: Neglected cabinets can become breeding grounds for pests such as cockroaches and ants. These pests can multiply rapidly and cause damage to your cabinets and other parts of your kitchen.
- Difficulty maintaining a clean kitchen: When your cabinets are dirty, it can be challenging to maintain a clean kitchen overall. Dirt and bacteria can easily spread from your cabinets to other surfaces, making it harder to keep your kitchen hygienic.
To avoid these consequences, it is crucial to prioritize regular cabinet cleaning as part of your kitchen maintenance routine.
Preparing for Cabinet Cleaning
Gathering necessary supplies
When it comes to cleaning your kitchen cabinets, the first step is to gather all the necessary supplies. Here is a list of what you will need:
- Microfiber cloths: These are great for wiping down surfaces and are gentle on most surfaces.
- Soft-bristled brush: This is useful for getting into the corners and crevices of your cabinets.
- Scouring pad: This can be used to scrub tough stains and grime.
- All-purpose cleaner: This can be used to clean the surfaces of your cabinets.
- Vinegar: This is a natural cleaning agent that can be used to remove tough stains and odors.
- Baking soda: This is a great natural abrasive that can be used to scrub surfaces and remove odors.
- Water: This is necessary for diluting cleaning solutions and rinsing surfaces.
By having all of these supplies on hand, you will be well-prepared to tackle the task of cleaning your kitchen cabinets.
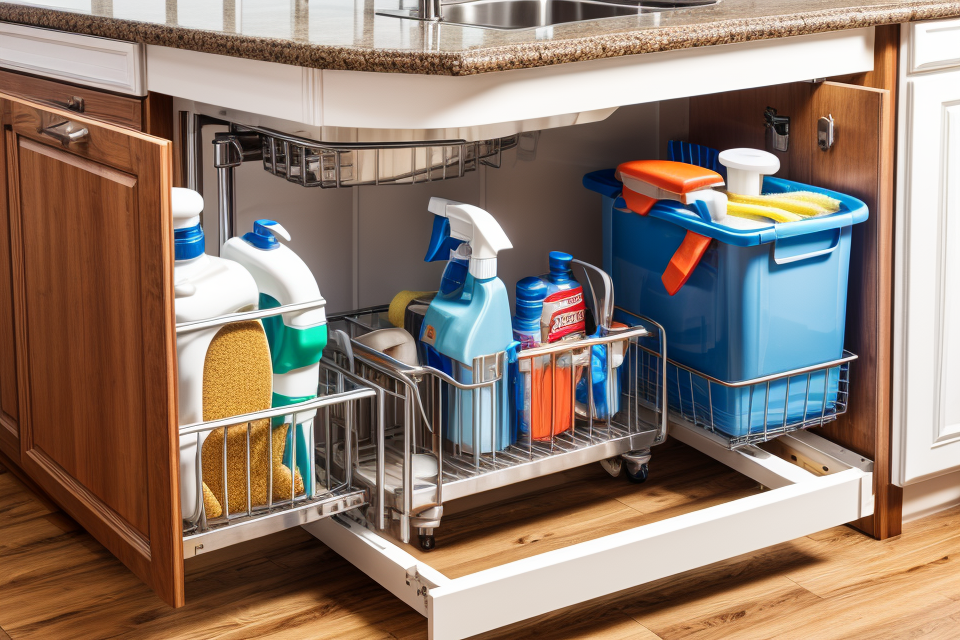
Removing items from cabinets
When it comes to cleaning your kitchen cabinets, one of the first steps is to remove all the items inside them. This can seem like a daunting task, but it’s necessary to ensure that your cabinets are thoroughly cleaned and sanitized. Here are some tips for removing items from your kitchen cabinets:
- Start by sorting through the items in your cabinets. Make a list of everything that needs to be cleaned, thrown away, or donated.
- Take everything out of your cabinets, one shelf at a time. This will help you keep track of what needs to go back where.
- Use bins or boxes to organize your items as you take them out. This will make it easier to put everything back in its proper place later on.
- Pay attention to expiration dates on food items and get rid of anything that has passed its prime.
- Take the opportunity to clean and declutter your cabinets while you have everything out. Get rid of any unnecessary items or items that are no longer being used.
- Once you have removed all the items from your cabinets, take a moment to vacuum or sweep the shelves to remove any dust or debris.
By taking the time to remove all the items from your kitchen cabinets, you’ll be able to give them a thorough cleaning and make sure that they’re free of dust, dirt, and other contaminants.
Cabinet Cleaning Techniques
DIY cleaning methods
Baking Soda and Vinegar Solution
One of the most popular and effective DIY cleaning methods for kitchen cabinets is a baking soda and vinegar solution. To make this solution, simply mix equal parts of baking soda and white vinegar. Apply the mixture to a cloth or sponge and gently scrub the surfaces of your cabinets. The baking soda acts as a natural abrasive, while the vinegar helps to remove any lingering odors. Once you’ve finished cleaning, wipe down the surfaces with a damp cloth and dry them thoroughly.
Oxygen Bleach
Oxygen bleach is another DIY cleaning method that can be used to clean kitchen cabinets. It’s a powerful cleaner that can help to remove tough stains and odors. To use oxygen bleach, mix it with water according to the instructions on the package. Apply the solution to a cloth or sponge and gently scrub the surfaces of your cabinets. Once you’ve finished cleaning, wipe down the surfaces with a damp cloth and dry them thoroughly.
Salt and Lemon
A simple combination of salt and lemon juice can also be used to clean kitchen cabinets. The salt acts as a natural abrasive, while the lemon juice helps to remove any lingering odors. To use this method, mix equal parts of salt and lemon juice. Apply the mixture to a cloth or sponge and gently scrub the surfaces of your cabinets. Once you’ve finished cleaning, wipe down the surfaces with a damp cloth and dry them thoroughly.
Ammonia and Water
Ammonia is another household cleaner that can be used to clean kitchen cabinets. It’s a powerful cleaner that can help to remove tough stains and odors. To use ammonia, mix it with water according to the instructions on the package. Apply the solution to a cloth or sponge and gently scrub the surfaces of your cabinets. Once you’ve finished cleaning, wipe down the surfaces with a damp cloth and dry them thoroughly.
These are just a few examples of DIY cleaning methods that can be used to clean kitchen cabinets. Whether you choose to use baking soda and vinegar, oxygen bleach, salt and lemon, or ammonia, be sure to follow the instructions carefully and test the cleaner on a small, inconspicuous area of your cabinets before applying it to the entire surface.
Professional cleaning services
When it comes to cleaning your kitchen cabinets, one option is to hire a professional cleaning service. Here are some reasons why you may want to consider this option:
- Expertise: Professional cleaners have the knowledge and experience to handle even the toughest cleaning jobs. They have access to specialized equipment and cleaning solutions that are not available to the general public.
- Time-saving: Hiring a professional cleaner can save you a lot of time and effort. You won’t have to spend hours scrubbing and cleaning your cabinets, which means you can focus on other tasks.
- Health and safety: Some cleaning products can be harsh and dangerous to use. By hiring a professional cleaner, you can ensure that the job is done safely and without any harmful chemicals.
- Guaranteed results: Professional cleaning services usually offer a guarantee of their work. This means that if you’re not satisfied with the results, they will come back and redo the job at no extra cost.
However, hiring a professional cleaning service can also be expensive. It’s important to weigh the costs and benefits before making a decision. You should also make sure to research the company and read reviews from other customers to ensure that you’re hiring a reputable and reliable service.
Cleaning your kitchen cabinets can be a daunting task, but with the right techniques, it can be done easily and efficiently. Here are some DIY cleaning methods that you can try at home:
Baking Soda and Vinegar
One of the most popular and effective DIY cleaning methods for kitchen cabinets is using baking soda and vinegar. Baking soda is a natural abrasive that can help remove stains and odors, while vinegar is an acid that can break down grease and grime.
- Mix equal parts of baking soda and vinegar to form a paste.
- Apply the paste to the cabinet surfaces using a soft cloth or sponge.
- Let the paste sit on the surfaces for about 30 minutes.
- Scrub the surfaces with a soft cloth or sponge dipped in warm water.
- Wipe the surfaces dry with a clean cloth.
White Vinegar
White vinegar is another effective cleaning agent that can be used to clean kitchen cabinets. It is a mild acid that can break down grease and grime, leaving your cabinets looking clean and refreshed.
- Mix equal parts of white vinegar and water to form a solution.
- Apply the solution to the cabinet surfaces using a soft cloth or sponge.
- Let the solution sit on the surfaces for about 30 minutes.
Oxygen bleach is a powerful cleaning agent that can be used to clean kitchen cabinets. It is effective at removing stains and odors, and is safe to use on most surfaces.
- Mix oxygen bleach with warm water to form a solution.
These are just a few examples of DIY cleaning methods that you can use to clean your kitchen cabinets. Try them out and see which one works best for you.
Microfiber cloths
Microfiber cloths are a popular choice for cleaning kitchen cabinets due to their effectiveness in removing dirt and grime without leaving streaks or residue behind. They are made from synthetic fibers that are smaller than a human hair, which allows them to capture and trap dirt and dust particles.
To use microfiber cloths for cleaning your kitchen cabinets, start by wiping down the surfaces with a damp cloth. You can use a mild soap or a solution of water and vinegar to help loosen dirt and grime. Be sure to wring out the cloth thoroughly before using it to avoid drips and splatters.
When cleaning your cabinets, it’s important to pay extra attention to the areas around the handles and hinges, as these tend to accumulate the most dirt and dust. You can also use a soft-bristled brush to gently scrub any tough stains or grime.
Once you’ve finished cleaning the cabinets, use a clean microfiber cloth to wipe down the surfaces and remove any excess moisture. This will help prevent water spots and leave your cabinets looking shiny and clean.
Overall, microfiber cloths are a convenient and effective cleaning tool for kitchen cabinets. They are gentle on surfaces, effective at removing dirt and grime, and easy to use. By incorporating them into your cleaning routine, you can keep your kitchen cabinets looking their best.
Baking soda and vinegar
When it comes to cleaning your kitchen cabinets, baking soda and vinegar are two of the most effective and inexpensive methods you can use. Here’s how they work:
How to use baking soda to clean your cabinets
- Mix equal parts of baking soda and water to form a paste.
- Apply the paste to your cabinets using a soft cloth or sponge.
- Let the paste sit on the cabinets for about 30 minutes.
- Scrub the paste off with a soft cloth or sponge.
- Wipe down the cabinets with a damp cloth to remove any remaining residue.
How to use vinegar to clean your cabinets
- Apply the solution to your cabinets using a soft cloth or sponge.
- Let the solution sit on the cabinets for about 30 minutes.
- Scrub the solution off with a soft cloth or sponge.
Why baking soda and vinegar work so well for cleaning cabinets
Baking soda is a great cleaner because it’s abrasive enough to remove dirt and grime, but gentle enough to avoid scratching the surface of your cabinets. It also has a mild alkaline pH that helps to break down grease and grime.
Vinegar is an acidic substance that can help to dissolve tough stains and odors. It’s also a natural disinfectant, which means it can help to kill germs and bacteria on your cabinets.
When used together, baking soda and vinegar create a powerful cleaning combination that can tackle even the toughest grime and stains on your kitchen cabinets.
Essential oils
Essential oils are a natural and effective way to clean your kitchen cabinets. These oils are extracted from plants and have various properties that make them useful for cleaning. Here are some of the most popular essential oils used for cleaning kitchen cabinets:
- Lemon oil: Lemon oil is a popular essential oil used for cleaning. It has a fresh and citrusy scent that leaves your cabinets smelling great. Lemon oil is also a natural disinfectant and can help kill bacteria and viruses on your cabinets.
- Tea tree oil: Tea tree oil is an excellent essential oil for cleaning kitchen cabinets because it has antimicrobial properties. It can help kill germs and bacteria on your cabinets, leaving them clean and sanitized.
- Orange oil: Orange oil is another popular essential oil used for cleaning. It has a fresh and sweet scent that is pleasant and invigorating. Orange oil is also a natural cleaner and can help remove dirt and grime from your cabinets.
- Eucalyptus oil: Eucalyptus oil is a powerful essential oil that can help clean and disinfect your kitchen cabinets. It has a refreshing and invigorating scent that can help freshen up your kitchen.
To use essential oils to clean your kitchen cabinets, mix a few drops of the oil with water in a spray bottle. Spray the mixture onto a cloth and wipe down your cabinets. You can also add a few drops of the oil to a bowl of hot water and use it to wipe down your cabinets. Be sure to test the oil on a small area of your cabinets first to ensure it won’t damage the finish.
Professional cleaning services can be a great option for those who want to ensure their kitchen cabinets are thoroughly cleaned and restored to like-new condition. Here are some benefits of hiring professional cleaning services:
- Expertise: Professional cleaners have the knowledge and experience to handle even the toughest cleaning jobs. They know the best methods and products to use for different types of cabinets and surfaces, and can quickly and effectively remove dirt, grime, and stains.
- Savings: While it may seem like hiring professionals would be more expensive than doing it yourself, in many cases it can actually save you money. Professionals can work more efficiently and effectively than an individual, and may have access to specialized equipment and cleaning solutions that can save you time and money in the long run.
- Time-saving: Professionals can clean your cabinets quickly and efficiently, saving you time and effort. You won’t have to worry about purchasing cleaning supplies or renting equipment, and you can relax while the professionals take care of the job.
- Quality: Professional cleaning services will leave your cabinets looking like new, and they will use high-quality products and equipment to ensure the job is done right. They will also be able to provide you with a detailed report on the condition of your cabinets and any necessary repairs or maintenance.
If you decide to hire professional cleaning services, it’s important to do your research and choose a reputable company with a good track record. Be sure to ask for references and check them before making a decision.
Advantages of hiring professionals
When it comes to cleaning your kitchen cabinets, hiring professionals can have several advantages. Here are some of the benefits of hiring professionals for cabinet cleaning:
- Expertise: Professionals have the expertise and experience to clean your cabinets efficiently and effectively. They have the knowledge of the right cleaning solutions and techniques to use on different types of cabinet materials.
- Time-saving: Hiring professionals saves you time and effort. You don’t have to worry about buying cleaning supplies or spending hours scrubbing and cleaning your cabinets. Professionals can do the job quickly and efficiently, leaving you with more time to focus on other tasks.
- Safety: Cleaning products can be hazardous and may cause respiratory problems or other health issues. Hiring professionals ensures that the cleaning is done safely and without putting you and your family at risk.
- Quality results: Professionals have the right tools and equipment to clean your cabinets thoroughly and leave them looking like new. They can remove stubborn stains and dirt that you may not be able to remove with DIY cleaning methods.
- Peace of mind: Knowing that your cabinets are clean and free of bacteria and germs can give you peace of mind. Professionals use disinfectants and sanitizers to ensure that your cabinets are not only clean but also hygienic.
Overall, hiring professionals for cabinet cleaning can save you time, effort, and stress. It ensures that your cabinets are cleaned thoroughly and safely, leaving you with peace of mind and a clean kitchen.
How to choose the right professional service
Choosing the right professional service to clean your kitchen cabinets is an important decision that requires careful consideration. Here are some tips to help you make the right choice:
- Reputation and Experience: Look for a company with a good reputation and years of experience in the industry. This will ensure that they have the necessary skills and knowledge to handle your cabinet cleaning needs.
- Licensing and Insurance: Make sure that the company you choose is licensed and insured. This will protect you in case of any damage or accidents that may occur during the cleaning process.
- Services Offered: Consider the services offered by the company. Some companies may only offer basic cleaning services, while others may offer more specialized services such as restoration or refinishing. Make sure that the company you choose offers the services you need.
- Pricing: Compare prices from different companies to ensure that you are getting a fair price for the services you need. Be wary of companies that offer significantly lower prices than their competitors, as this may indicate that they are cutting corners to save money.
- Customer Reviews: Read customer reviews and testimonials to get an idea of the quality of service provided by the company. This will give you an idea of what to expect and help you make an informed decision.
By considering these factors, you can choose a professional service that meets your needs and provides you with high-quality results.
Maintaining Clean Cabinets
Tips for keeping cabinets clean
Keeping your kitchen cabinets clean is an essential part of maintaining a hygienic and functional kitchen. Here are some tips to help you keep your cabinets clean and tidy:
- Dust regularly: Dust and wipe down your cabinets with a soft cloth or sponge at least once a week. This will help remove any loose dirt and dust that has accumulated on the surfaces.
- Use a microfiber cloth: Microfiber cloths are great for cleaning cabinets because they are gentle on surfaces and can trap dust and dirt. Use a damp microfiber cloth to wipe down your cabinets, and then use a dry one to remove any excess moisture.
- Avoid using harsh chemicals: Harsh chemicals can damage the finish of your cabinets and leave streaks or residue behind. Instead, opt for natural cleaning solutions like vinegar or lemon juice, which are gentle and effective at removing dirt and grime.
- Clean regularly: It’s important to clean your cabinets regularly to prevent the buildup of dirt and grime. Depending on your kitchen’s usage, you may need to clean your cabinets more frequently. For example, if you have a pet or small children, you may need to clean your cabinets more often to prevent stains and odors.
- Organize your cabinets: A clutter-free cabinet is easier to clean and maintain. Take the time to organize your cabinets regularly by removing unnecessary items and finding a place for everything. Use cabinet organizers like trays, baskets, and dividers to keep items in their place and make it easier to find what you need.
- Consider investing in cabinet protectors: Cabinet protectors are a great investment if you want to keep your cabinets looking new. They can help prevent scratches, dents, and other damage to your cabinets. You can find cabinet protectors in a variety of materials, including foam, plastic, and metal.
Scheduling regular cleanings
Scheduling regular cleanings is a crucial aspect of maintaining clean kitchen cabinets. It helps to prevent the buildup of dirt, dust, and grime, which can lead to the growth of bacteria and mold. Regular cleaning also ensures that your cabinets look their best and remain in good condition. Here are some tips for scheduling regular cleanings:
- Set a Reminder: Set a reminder on your phone or calendar to remind you when it’s time to clean your cabinets. This will help you stay on top of your cleaning schedule and ensure that your cabinets are cleaned regularly.
- Inspect Your Cabinets: Inspect your cabinets regularly to check for any signs of damage or wear and tear. If you notice any issues, it may be time to have your cabinets professionally cleaned.
- Consider the Traffic in Your Kitchen: If your kitchen gets a lot of traffic, you may need to schedule more frequent cleanings. This is especially true if you have pets or children who may be contributing to the buildup of dirt and grime.
- Seasonal Cleanings: Consider scheduling a deep cleaning of your cabinets twice a year, once in the spring and once in the fall. This will help to remove any buildup of dust and dirt that may have accumulated over the winter or summer months.
- Cleaning Supplies: Make sure you have all the necessary cleaning supplies on hand, such as a microfiber cloth, mild detergent, and a cleaning solution. This will make the cleaning process more efficient and ensure that your cabinets are thoroughly cleaned.
By following these tips, you can ensure that your kitchen cabinets are cleaned regularly and remain in good condition.
- Regular Dusting: Dusting your cabinets regularly can help keep them looking new and prevent the buildup of dust and debris. Use a soft, dry cloth to wipe down the surfaces of your cabinets, paying special attention to any areas with a lot of knick-knacks or decorations.
- Wipe Up Spills: If you spill something on your cabinets, it’s important to wipe it up as soon as possible. This will prevent stains from setting in and make it easier to keep your cabinets clean. Use a soft, damp cloth to wipe up spills, and be sure to dry the area thoroughly to prevent water damage.
- Organize Contents: Keeping your cabinets organized can help prevent dirt and dust from accumulating. Take the time to sort through the contents of your cabinets and remove any items that are no longer needed or used. Consider investing in cabinet organizers, such as stackable storage containers or dividers, to help keep your contents organized and your cabinets looking neat.
- Avoid Heavy Objects: Hanging heavy objects on your cabinet doors or drawer handles can cause damage to the cabinetry over time. Instead, consider using cabinet-mounted hooks or storage solutions that are designed to hold heavier items.
- Avoid Direct Sunlight: Direct sunlight can cause fading and discoloration over time, so it’s important to avoid placing your cabinets in direct sunlight. If possible, place your cabinets away from windows or use window treatments to filter out the sunlight.
- Use Cleaning Products: There are a variety of cleaning products available that are specifically designed for cleaning kitchen cabinets. Look for products that are safe for use on your specific type of cabinetry and follow the instructions carefully.
- Maintain a Regular Cleaning Schedule: Regular cleaning is key to maintaining clean cabinets. Set aside some time each week to give your cabinets a thorough cleaning, using a combination of dusting, wiping, and cleaning products as needed. This will help keep your cabinets looking their best and prevent the buildup of dirt and debris.
Decluttering regularly
Decluttering your kitchen cabinets on a regular basis is an essential part of maintaining clean and organized cabinets. Not only does it help to keep your cabinets looking neat and tidy, but it also makes it easier to find what you need when you need it. Here are some tips for decluttering your kitchen cabinets regularly:
- Remove all items from your cabinets: This includes dishes, pots, pans, and any other kitchen utensils or appliances.
- Sort through your items: Go through each item and decide whether it should be kept, thrown away, or donated.
- Organize your items: Once you have sorted through your items, put them back in your cabinets in an organized manner. Use labels or storage containers to help keep things organized.
- Rotate your items: To prevent your cabinets from becoming cluttered again, consider rotating your items on a regular basis. This means regularly using and replacing items that you don’t use frequently.
- Make a plan for maintenance: Schedule regular decluttering sessions to keep your cabinets organized and clutter-free. This could be as often as once a month or as infrequently as once a year, depending on your needs and preferences.
By following these tips, you can keep your kitchen cabinets looking clean and organized, and make it easier to find what you need when you need it.
Dusting and wiping down surfaces
Dusting and wiping down surfaces are crucial steps in maintaining clean kitchen cabinets. These steps should be performed regularly to prevent the accumulation of dust and dirt that can lead to the growth of bacteria and other microorganisms. Here are some details on how to effectively dust and wipe down your kitchen cabinet surfaces:
- Remove all items from the cabinets: Before you start dusting and wiping down surfaces, make sure to remove all items from the cabinets. This will allow you to access all areas of the cabinets and ensure that you clean them thoroughly.
- Use a soft, dry cloth: To dust the surfaces of your kitchen cabinets, use a soft, dry cloth. This will help to remove any loose dust and dirt without causing any damage to the surfaces.
- Wipe down surfaces with a damp cloth: To thoroughly clean the surfaces of your kitchen cabinets, use a damp cloth to wipe them down. Make sure to use a mild detergent or soap solution to clean the surfaces. This will help to remove any stubborn dirt and stains, as well as any bacteria or other microorganisms that may be present.
- Dry surfaces thoroughly: After wiping down the surfaces of your kitchen cabinets with a damp cloth, make sure to dry them thoroughly with a clean, dry cloth. This will help to prevent any water spots or other damage to the surfaces.
- Repeat as necessary: Depending on the level of dirt and dust in your kitchen cabinets, you may need to repeat these steps regularly to maintain clean surfaces. This will help to prevent the accumulation of dust and dirt, and will keep your kitchen cabinets looking their best.
Using cabinet protectors
Protecting your kitchen cabinets is an essential part of maintaining their cleanliness and ensuring their longevity. There are various types of cabinet protectors that you can use, each designed to provide specific benefits. Here are some of the most common types of cabinet protectors and their advantages:
- Adhesive cabinet protectors: These protectors are self-adhesive and can be easily installed on your cabinet surfaces. They provide a barrier between your cabinets and any spills or stains, making it easier to clean and maintain their appearance.
- Foam cabinet protectors: These protectors are made of soft, compressible foam that can be placed between your cabinet doors and the walls. They help to prevent scratches and dents, as well as providing a buffer against bumps and bruises.
- Magnetic cabinet protectors: These protectors use strong magnets to adhere to your cabinet surfaces. They are an excellent option for protecting delicate finishes, as they cause no damage and can be easily removed and repositioned as needed.
- Slip-on cabinet protectors: These protectors are designed to slip over the handles of your cabinet doors, providing a barrier against scratches and dents. They are an excellent option for protecting your cabinets from accidental impacts and bumps.
Using cabinet protectors is a simple and effective way to maintain the cleanliness and appearance of your kitchen cabinets. They provide a protective barrier against spills, stains, scratches, and dents, making it easier to keep your cabinets looking their best. When choosing cabinet protectors, consider the specific needs of your cabinets and select the type that will provide the best protection.
Scheduling regular cleanings is a crucial aspect of maintaining clean kitchen cabinets. Dirt, dust, and spills can accumulate quickly, making it essential to regularly clean your cabinets to keep them looking their best. Here are some tips for scheduling regular cleanings:
- Set a reminder: Use a digital calendar or set a reminder on your phone to help you remember when it’s time to clean your cabinets. This will ensure that you don’t forget and that your cabinets stay clean and hygienic.
- Determine a frequency: The frequency of cleanings will depend on how often you use your cabinets and how dirty they get. If you have a busy kitchen that sees a lot of use, you may need to clean your cabinets more frequently, such as once a week or every two weeks. If your kitchen is less used, you may be able to get away with cleaning your cabinets once a month or every six weeks.
- Incorporate into your routine: Schedule your cabinet cleanings during times when you are already cleaning other areas of your kitchen. This will help you stay organized and make the most of your cleaning time.
- Consider hiring a professional: If you’re short on time or don’t feel comfortable cleaning your cabinets yourself, consider hiring a professional cleaner. This can be a great option if you want to ensure that your cabinets are thoroughly cleaned and restored to their former glory.
By scheduling regular cleanings, you can help keep your kitchen cabinets looking their best and ensure that they remain hygienic and free from harmful bacteria and allergens.
Weekly cleaning routine
Keeping your kitchen cabinets clean and well-maintained is an essential part of ensuring a healthy and pleasant living environment. Here’s a detailed weekly cleaning routine that you can follow to keep your kitchen cabinets spick and span:
Step 1: Remove all items from the cabinets
The first step in cleaning your kitchen cabinets is to remove all the items from them. This includes dishes, cookware, utensils, and any other items that may be stored in the cabinets. It’s essential to clear the space to gain access to all areas that need cleaning.
Step 2: Dust and wipe down surfaces
Once you’ve removed all the items from the cabinets, it’s time to dust and wipe down the surfaces. Use a soft cloth or a vacuum cleaner to remove any dust or debris that has accumulated on the surfaces. This will help to remove any loose dirt and particles that may interfere with the cleaning process.
Step 3: Clean with a mild detergent
After dusting and wiping down the surfaces, it’s time to clean the cabinets with a mild detergent. Use a soft cloth or sponge to apply the detergent to the surfaces, making sure to cover all areas thoroughly. You can use a gentle soap or a mixture of water and vinegar for this step. Avoid using harsh chemicals or abrasive cleaners, as these can damage the finish of your cabinets.
Step 4: Rinse and dry
After cleaning the surfaces with a mild detergent, it’s essential to rinse and dry the surfaces thoroughly. Use a clean cloth or sponge to remove any excess detergent, and then dry the surfaces with a soft towel. This will help to prevent water spots and other damage to the finish of your cabinets.
Step 5: Condition wooden surfaces
If your kitchen cabinets are made of wood, it’s essential to condition the surfaces after cleaning. Use a wood conditioner or a mixture of oil and vinegar to restore the natural luster of the wood. This will help to protect the wood from damage and keep it looking beautiful for years to come.
By following this weekly cleaning routine, you can ensure that your kitchen cabinets remain clean and well-maintained. Regular cleaning will help to prevent the buildup of dirt and grime, keeping your cabinets looking their best and ensuring a healthy living environment.
Monthly deep cleaning
It is recommended to perform a monthly deep cleaning of your kitchen cabinets to keep them looking their best. Here are some steps you can follow to ensure a thorough cleaning:
- Remove all items from the cabinets: This includes dishes, cookware, and any other items that may be stored in the cabinets.
- Wipe down the surfaces: Use a damp cloth to wipe down the surfaces of the cabinets, paying particular attention to any areas with visible dust or dirt buildup.
- Scrub if necessary: If there is stubborn grime or stains on the surfaces, use a mild detergent and a soft-bristled brush to scrub the surfaces.
- Clean the hardware: Clean the hardware on your cabinets, such as handles and hinges, using a soft cloth and mild soap.
- Dry thoroughly: Make sure to dry all surfaces thoroughly with a clean cloth to prevent water spots.
- Inspect and address any damage: Take this opportunity to inspect your cabinets for any damage, such as scratches or dents, and address any issues as needed.
By following these steps, you can ensure that your kitchen cabinets are thoroughly cleaned and maintained on a regular basis.
Annual professional cleaning
An annual professional cleaning is an excellent way to ensure that your kitchen cabinets remain in top condition. Here are some reasons why you should consider this service:
- Expertise: Professional cleaners have the training and experience to safely and effectively clean your cabinets. They know how to remove stubborn stains and odors, and how to protect your cabinets’ finish.
- Time-saving: Cleaning your kitchen cabinets can be a time-consuming and labor-intensive task. By hiring a professional cleaner, you can save yourself the time and effort required to do the job yourself.
- Health benefits: Cleaning your kitchen cabinets can expose you to dust, mold, and other allergens. By hiring a professional cleaner, you can avoid exposure to these pollutants and protect your health.
- Deep cleaning: Professional cleaners have access to specialized equipment and cleaning solutions that can reach deep into the cracks and crevices of your cabinets, where dirt and grime can accumulate. This ensures a thorough cleaning that you may not be able to achieve with regular cleaning methods.
- Peace of mind: By having your kitchen cabinets professionally cleaned on a regular basis, you can rest assured that they are always in good condition. This can give you peace of mind and allow you to focus on other aspects of your home.
In summary, an annual professional cleaning is a wise investment for anyone who wants to maintain the beauty and functionality of their kitchen cabinets.
Common Issues with Cabinet Cleaning
How to handle tough stains
When it comes to cleaning your kitchen cabinets, one of the most common issues you may encounter is tough stains. These stains can be caused by a variety of factors, such as spills, smoke damage, or even just the natural aging process. Fortunately, there are several methods you can use to tackle tough stains and get your cabinets looking like new again.
Using Baking Soda and Vinegar
One of the simplest and most effective methods for removing tough stains from your kitchen cabinets is to use a mixture of baking soda and vinegar. This method works by creating a chemical reaction that breaks down the stain and lifts it from the surface of the cabinet.
To use this method, start by mixing equal parts baking soda and vinegar to form a paste. Apply the paste to the stained area using a soft cloth or sponge, and let it sit for several hours or overnight. Then, use a damp cloth to wipe away the paste and the stain.
Applying a Mixture of Oil and Baking Soda
Another effective method for removing tough stains from your kitchen cabinets is to apply a mixture of oil and baking soda. This method works by creating a natural abrasive that can help to break down the stain and lift it from the surface of the cabinet.
To use this method, start by mixing equal parts baking soda and oil (such as olive oil or coconut oil) to form a paste. Apply the paste to the stained area using a soft cloth or sponge, and let it sit for several hours or overnight. Then, use a damp cloth to wipe away the paste and the stain.
Using a Commercial Cabinet Cleaner
If you’re having trouble removing tough stains from your kitchen cabinets using traditional cleaning methods, you may want to consider using a commercial cabinet cleaner. These cleaners are specifically designed to tackle tough stains and can be much more effective than homemade remedies.
When using a commercial cleaner, be sure to follow the instructions carefully and wear any necessary protective gear. Some cleaners may require you to sand or scrub the affected area before applying the cleaner, while others may be applied directly to the stain.
Overall, with the right cleaning method and a little bit of elbow grease, you can tackle even the toughest stains on your kitchen cabinets and keep them looking like new.
Dealing with water damage
Water damage is a common issue that can arise when cleaning kitchen cabinets. It can be caused by a variety of factors, such as leaky faucets, humidity, or spills. If left untreated, water damage can lead to the growth of mold and mildew, which can cause health problems and damage to the cabinets.
Here are some steps you can take to deal with water damage in your kitchen cabinets:
- Identify the source of the water damage. This will help you determine the best course of action to take.
- Dry out the affected area as soon as possible. Open the cabinets and drawers to allow air to circulate and help dry out the wood.
- Use a dehumidifier to help reduce the humidity in the room. This can help prevent further damage and promote drying.
- Use a moisture meter to check the moisture levels in the wood. If the levels are too high, you may need to use a heat gun or other drying method to remove the moisture.
- Sand the affected area lightly with a fine-grit sandpaper to remove any water stains or discoloration.
- Apply a wood conditioner or moisturizer to the affected area to help prevent further damage and restore the wood’s natural luster.
- If the damage is severe, you may need to repaint or refinish the affected area to restore the cabinets to their original condition.
By following these steps, you can effectively deal with water damage in your kitchen cabinets and prevent further damage from occurring.
Replacing broken hardware
One of the most common issues when cleaning kitchen cabinets is dealing with broken hardware. This can include anything from loose handles and hinges to broken drawer glides. If you notice any broken hardware while cleaning your cabinets, it’s important to address it as soon as possible. Here’s a step-by-step guide on how to replace broken hardware in your kitchen cabinets:
- Gather the necessary tools: Before you start replacing any hardware, make sure you have all the necessary tools on hand. This includes a screwdriver, pliers, and any other tools that may be required for the specific hardware you need to replace.
- Remove the old hardware: To replace broken hardware, you first need to remove the old hardware. This may involve removing screws or other fasteners that are holding the hardware in place. Be careful when removing the old hardware to avoid damaging the cabinet surface.
- Install the new hardware: Once you’ve removed the old hardware, it’s time to install the new hardware. Follow the manufacturer’s instructions for installing the new hardware, and make sure it’s securely fastened in place.
- Test the hardware: After you’ve installed the new hardware, test it to make sure it’s working properly. Make sure the door or drawer opens and closes smoothly, and that the hardware is securely fastened in place.
By following these steps, you can easily replace broken hardware in your kitchen cabinets and restore them to their former glory.
When it comes to cleaning your kitchen cabinets, one of the most common issues you may encounter is tough stains. These stains can be caused by a variety of factors, such as spills, smoke damage, or even mold and mildew. However, with the right techniques and tools, you can effectively remove even the toughest of stains and leave your cabinets looking like new.
One of the first steps in handling tough stains is to identify the type of stain you are dealing with. For example, if the stain is caused by a spill, you may be able to remove it with a simple cleaning solution. However, if the stain is caused by mold or mildew, you may need to use a more specialized cleaning solution.
Once you have identified the type of stain, you can begin to take action. One effective method for removing tough stains is to use a mixture of baking soda and water. Simply mix equal parts baking soda and water to create a paste, and then apply it to the stain using a soft cloth. Let it sit for several hours or overnight, and then rinse it off with warm water.
If the stain is particularly stubborn, you may need to use a more aggressive cleaning solution. There are a variety of commercial cleaners available that are specifically designed to remove tough stains from cabinets. These cleaners typically contain harsh chemicals that can effectively break down the stain and remove it from the surface of the cabinet.
It’s important to note that when using commercial cleaners, you should always follow the instructions carefully and wear gloves and a mask to protect your skin and lungs from the harsh chemicals. Additionally, you should never mix different cleaning solutions, as this can create a dangerous and potentially hazardous chemical reaction.
Another effective method for removing tough stains is to use steam. You can purchase a steam cleaner or rent one from a local equipment rental store. These machines use hot water vapor to loosen and remove stubborn stains from the surface of the cabinet.
In conclusion, when it comes to handling tough stains on your kitchen cabinets, there are a variety of techniques and tools you can use to effectively remove them. Whether you choose to use a baking soda and water paste, commercial cleaner, or steam cleaner, it’s important to be patient and persistent in your efforts. With the right approach, you can leave your cabinets looking like new once again.
Baking soda and vinegar paste
One of the most popular methods for cleaning kitchen cabinets is the baking soda and vinegar paste method. This method is relatively inexpensive and can be used to clean both the inside and outside of your cabinets. Here’s how it works:
- Materials needed: Baking soda, white vinegar, a soft cloth, and water.
- Preparation: First, remove all the contents from your cabinets, including dishes, utensils, and food items. Next, mix equal parts of baking soda and white vinegar to form a paste.
- Cleaning process: Apply the paste to the cabinets using a soft cloth, making sure to cover all surfaces. Let the paste sit on the cabinets for about 30 minutes to an hour. During this time, the baking soda will react with the vinegar, creating a foam that will help loosen dirt and grime. After the foam has dissipated, use a damp cloth to wipe away the remaining paste.
- Finishing touches: Finally, use a dry cloth to wipe away any excess moisture, and then polish the cabinets with a soft cloth to remove any streaks.
While the baking soda and vinegar paste method is a popular and effective way to clean kitchen cabinets, it’s important to note that it may not work as well on cabinets with a lot of fingerprints or smudges. Additionally, if you have wood cabinets, you may want to avoid using this method, as the vinegar can damage the wood finish.
Using hydrogen peroxide
When it comes to cleaning kitchen cabinets, hydrogen peroxide is a popular choice among homeowners. However, while it can be effective in removing stains and odors, it also has some drawbacks.
Pros of Using Hydrogen Peroxide
- Hydrogen peroxide is a powerful oxidizer, which means it can break down organic matter and kill bacteria and viruses.
- It is a natural and non-toxic substance, making it a safe option for those who prefer to avoid harsh chemicals in their cleaning products.
- Hydrogen peroxide is inexpensive and easy to find at most drugstores or supermarkets.
Cons of Using Hydrogen Peroxide
- Hydrogen peroxide can be too harsh for some surfaces, particularly wood or painted cabinets, as it can cause discoloration or bleaching.
- It can also be time-consuming to apply and let sit for several hours before wiping away the residue.
- Hydrogen peroxide can create a lot of foam, which can be difficult to remove and may leave a residue behind.
Overall, while hydrogen peroxide can be an effective cleaning agent for some kitchen cabinets, it may not be the best choice for all surfaces or situations. It is important to test it on a small, inconspicuous area first to ensure it won’t damage the surface or leave behind any unwanted residue.
Applying white vinegar
White vinegar is a popular choice for cleaning kitchen cabinets due to its effectiveness in removing stains and odors. However, applying it incorrectly can lead to unsatisfactory results. Here are some common issues that may arise when using white vinegar to clean your kitchen cabinets:
- Not using enough vinegar: Using too little vinegar may not be sufficient to clean the cabinets thoroughly. It’s important to saturate a clean cloth with vinegar and apply it liberally to the surface of the cabinet.
- Not allowing enough time for the vinegar to work: Vinegar needs time to penetrate and dissolve the grime on the cabinet surface. It’s recommended to let the vinegar sit on the surface for at least 30 minutes before wiping it off.
- Using vinegar on painted or finished surfaces: Vinegar can be too harsh for painted or finished surfaces and may cause damage. It’s important to test the vinegar on a small, inconspicuous area first to ensure it won’t cause any damage.
- Rincing the cabinets too quickly: After applying the vinegar, it’s important to rinse the cabinets thoroughly with clean water to remove any residue. Rinsing too quickly can leave behind a film of vinegar that’s difficult to remove.
-
Not drying the cabinets properly: After cleaning the cabinets, it’s important to dry them thoroughly to prevent water spots and streaks. Using a clean, dry cloth to wipe down the surfaces is the best way to ensure they are completely dry.
-
Inspect the damage: Before you start cleaning, it’s important to assess the extent of the damage. Look for signs of mold or mildew, as well as any discoloration or warping of the wood.
- Dry out the cabinets: If the damage is caused by a leaky faucet or other source of water, it’s important to dry out the cabinets as soon as possible. Open up the cabinets and use a towel or cloth to absorb any excess moisture. You can also use a fan to help circulate air and speed up the drying process.
- Clean the cabinets: Once the cabinets are dry, you can begin cleaning them. Use a mixture of equal parts white vinegar and water to wipe down the surfaces. This will help to remove any lingering odors and stains caused by the water damage.
- Apply a sealant: If the damage is severe or if you’re concerned about the long-term health of your cabinets, you may want to apply a sealant to protect against future water damage. There are many different types of sealants available, so be sure to choose one that is safe for use on your cabinets and that will provide the level of protection you need.
By following these steps, you can effectively deal with water damage in your kitchen cabinets and keep them looking their best.
Drying out wet cabinets
Cleaning your kitchen cabinets is a crucial part of maintaining a hygienic and organized kitchen. However, it is not uncommon to face issues during the cleaning process. One such issue is drying out wet cabinets. This problem can arise due to various reasons, such as spilling liquids on the cabinets or using excessive moisture while cleaning. In this section, we will discuss some effective methods to dry out wet cabinets and prevent further damage.
- Method 1: Use a clean cloth
One of the simplest methods to dry out wet cabinets is to use a clean cloth. Take a soft cloth and blot the wet area gently. Continue blotting until the area is dry. Make sure to use a clean cloth to avoid any streaks or stains. - Method 2: Use a hairdryer
If the wet area is small, you can use a hairdryer to dry it out. Place the hairdryer a few inches away from the wet area and blow dry the moisture. Make sure to use a low heat setting to avoid damaging the paint or finish of the cabinets. - Method 3: Leave it to air dry
In some cases, it may be best to leave the wet area to air dry. If the area is not in a highly trafficked part of the kitchen, you can simply leave it alone and let it dry naturally. This method may take longer than the previous methods, but it is a safe option if you do not have access to a hairdryer or clean cloth.
It is important to dry out wet cabinets as soon as possible to prevent further damage. If the moisture is left unattended, it can lead to mold and mildew growth, which can be difficult to remove. Additionally, wet cabinets can warp or discolor the wood, making them appear dull and unappealing. By following these simple methods, you can easily dry out wet cabinets and keep your kitchen looking clean and organized.
Replacing damaged materials
Cabinet cleaning can be a challenging task, especially when dealing with damaged materials. Here are some details on replacing damaged materials when cleaning your kitchen cabinets:
- Identifying damaged materials: Before you start cleaning your kitchen cabinets, it’s essential to identify any damaged materials. Look for cracks, chips, or discoloration on the surface of the cabinet.
- Removing damaged materials: Once you’ve identified the damaged materials, you’ll need to remove them. Use a utility knife or X-Acto knife to carefully cut around the damaged area. Then, carefully remove the damaged material from the cabinet.
- Replacing damaged materials: After removing the damaged material, you’ll need to replace it. Depending on the extent of the damage, you may need to replace the entire panel or just a small section. If you need to replace the entire panel, you’ll need to remove the screws that hold the panel in place and then carefully pry it off. If you only need to replace a small section, you can use a filler to patch the damaged area.
- Sanding and painting: Once you’ve replaced the damaged material, you’ll need to sand the area to ensure a smooth finish. Then, you can paint the cabinet to match the rest of the cabinets.
By addressing damaged materials in your kitchen cabinets, you can ensure that they look their best and last for years to come.
Restoring the finish
One of the most common issues with cleaning kitchen cabinets is restoring the finish. Over time, cabinets can become dull and discolored due to wear and tear, and cleaning them can often make this problem worse. Here are some tips for restoring the finish of your kitchen cabinets:
- Use a soft cloth or sponge to apply a small amount of furniture polish or cleaning solution to the surface of the cabinet.
- Use a soft, dry cloth to wipe away any excess polish or solution.
- Use a soft, clean cloth to buff the surface of the cabinet, using circular motions to help restore the shine.
- Repeat the process as needed until the desired level of shine is achieved.
It’s important to note that some cleaning methods can damage the finish of your cabinets, so it’s always best to test a small, inconspicuous area first before cleaning the entire surface. Additionally, it’s important to avoid using abrasive cleaners or scrubbers, as these can scratch or damage the surface of the cabinets. By following these tips, you can help restore the finish of your kitchen cabinets and keep them looking their best.
Cabinet hardware is essential to the functionality and aesthetic of your kitchen. Over time, hardware can become worn, damaged, or even broken. This can make it difficult to open and close your cabinets, and can also affect the overall appearance of your kitchen. Replacing broken hardware is a crucial step in the cabinet cleaning process, and can help to restore your cabinets to their former glory.
There are several reasons why cabinet hardware may break. One common cause is overuse or repeated opening and closing of the cabinets. This can cause the hardware to wear down or break over time. Another cause may be due to poor quality hardware, which may not be able to withstand the normal use and wear of your cabinets. Additionally, accidents can happen, and your hardware may become damaged due to impact or other external factors.
Replacing broken hardware is a relatively simple process, but it is important to follow the correct steps to ensure a proper fit and functionality. First, you will need to remove the old hardware from the cabinets. This may require some disassembly of the cabinet doors or drawers, depending on the type of hardware you have. Once the old hardware is removed, you can then measure the space where the new hardware will go. This will ensure that the new hardware fits properly and functions smoothly.
When choosing new hardware, it is important to select high-quality materials that can withstand the wear and tear of daily use. Stainless steel is a popular choice for cabinet hardware, as it is durable and easy to clean. Brass and bronze are also good options, as they are long-lasting and have a classic look. It is also important to choose hardware that matches the style of your cabinets and kitchen overall.
Replacing broken hardware can help to restore the functionality and aesthetic of your kitchen. By following the correct steps and choosing high-quality materials, you can ensure that your new hardware will last for years to come.
Identifying broken hardware
Cleaning your kitchen cabinets can be a daunting task, especially if you’re dealing with broken hardware. Over time, hardware such as hinges, handles, and drawer pulls can become worn, rusted, or damaged, making it difficult to open and close your cabinets properly. In this section, we’ll discuss some common issues with broken hardware and how to identify them.
Types of Broken Hardware
Before we dive into identifying broken hardware, it’s important to understand the different types of hardware that can break in your kitchen cabinets. These include:
- Hinges: These are the metal or plastic devices that attach to the cabinet door and the cabinet frame, allowing the door to swing open and closed.
- Handles: These are the knobs or pulls that you use to open and close your cabinet doors.
- Drawer pulls: These are the metal or plastic devices that attach to the drawer and the cabinet frame, allowing you to pull open the drawer.
Signs of Broken Hardware
There are several signs that your kitchen cabinet hardware may be broken. These include:
- Difficulty opening and closing cabinets or drawers: If your cabinets or drawers are difficult to open or close, it may be a sign that the hardware is broken or worn.
- Squeaking or creaking noises: If you hear squeaking or creaking noises when you open or close your cabinets, it may be a sign that the hardware is loose or damaged.
- Gaps or misalignments: If you notice gaps or misalignments between the cabinet door and the frame, or between the drawer and the cabinet frame, it may be a sign that the hardware is broken or worn.
How to Identify Broken Hardware
To identify broken hardware in your kitchen cabinets, follow these steps:
- Open and close your cabinets and drawers to see if they move smoothly. If they don’t, check for any of the signs listed above.
- Inspect the hinges, handles, and drawer pulls for any signs of damage or wear. Look for loose screws, broken parts, or rust.
- If you notice any issues with the hardware, try to repair it using the tools and techniques outlined in the next section. If you’re not comfortable repairing the hardware yourself, you may need to call a professional handyman or cabinet repair service.
In the next section, we’ll discuss how to repair broken hardware in your kitchen cabinets.
Replacing hinges and handles
Replacing hinges and handles is a common issue that arises when cleaning kitchen cabinets. Over time, hinges and handles can become loose, damaged, or even missing, which can make it difficult to open and close the cabinets properly. Here are some steps you can take to replace the hinges and handles on your kitchen cabinets:
Removing the Old Hinges and Handles
The first step in replacing the hinges and handles on your kitchen cabinets is to remove the old ones. Depending on the type of hinge or handle you have, this may involve using a screwdriver or other tools to loosen or remove the screws that hold them in place. Be careful not to damage the cabinet surface or surrounding walls while removing the old hinges and handles.
Measuring for New Hinges and Handles
Once you have removed the old hinges and handles, it’s important to measure the cabinet opening to ensure that you get the right size replacement hinges and handles. Measure the width and height of the cabinet opening, as well as the thickness of the cabinet material, to ensure that the new hinges and handles will fit properly.
Choosing New Hinges and Handles
There are many different types of hinges and handles available, so it’s important to choose the right ones for your kitchen cabinets. Consider factors such as the style, color, and material of the hinges and handles, as well as their weight capacity and durability. You may want to consult with a professional or do some research online to determine the best options for your specific cabinets.
Installing the New Hinges and Handles
Installing the new hinges and handles on your kitchen cabinets is typically a relatively simple process. Follow the manufacturer’s instructions for attaching the hinges to the cabinet and the handles to the hinges. Make sure to use the appropriate screws or fasteners, and apply any necessary glue or adhesive to ensure a secure fit.
Overall, replacing the hinges and handles on your kitchen cabinets can be a straightforward process that can greatly improve the functionality and appearance of your cabinets. By following these steps, you can ensure that your cabinets open and close smoothly and look great for years to come.
Adjusting misaligned doors
Adjusting misaligned doors is a common issue that many homeowners face when cleaning their kitchen cabinets. Over time, the doors can become misaligned due to a variety of factors, such as uneven flooring, improper installation, or simple wear and tear.
One of the main reasons that misaligned doors need to be adjusted is to ensure that they close properly. If the doors do not close properly, they can become difficult to open and close, and they may not provide adequate protection against dust and other debris. Additionally, misaligned doors can create an unsightly appearance, which can detract from the overall aesthetic of your kitchen.
Fortunately, adjusting misaligned doors is a relatively simple process that can be accomplished with a few basic tools. To begin, you will need a screwdriver, a tape measure, and a level. You may also want to have some sandpaper on hand to smooth out any rough edges.
Once you have gathered your tools, you can begin by measuring the gap between the door and the cabinet frame. Use the tape measure to find the widest point of the gap, and then use the screwdriver to adjust the hinges as needed. Depending on the size of the gap, you may need to adjust the hinges several times to achieve the desired results.
If you find that the door is not aligned properly after adjusting the hinges, you may need to shim the door to help it stay in place. To do this, simply place a small piece of wood or metal between the door and the cabinet frame, making sure that it is level. This will help hold the door in place and prevent it from becoming misaligned again in the future.
In summary, adjusting misaligned doors is a crucial step in cleaning your kitchen cabinets. By taking the time to properly adjust the doors, you can ensure that they close properly, look good, and provide adequate protection against dust and other debris.
Frequently Asked Questions
What are the best cleaning products for cabinets?
When it comes to cleaning your kitchen cabinets, there are a variety of products that you can use to get the job done. Some of the most popular options include:
- White vinegar: This is a natural and affordable option that can be used to remove dirt and grime from your cabinets. Simply mix equal parts white vinegar and water, apply the mixture to a cloth, and wipe down your cabinets.
- Baking soda: This is a great option for removing odors and stains from your cabinets. Simply sprinkle baking soda onto a cloth, and use it to scrub down your cabinets. You can also leave it on overnight and then vacuum it up in the morning.
- Microfiber cloths: These are great for cleaning your cabinets because they are soft and gentle on the surface. You can use them wet or dry, and they are great for removing dirt and grime without leaving streaks.
- Glass cleaner: If you have glass cabinets, you’ll want to use a glass cleaner specifically designed for that purpose. These cleaners are gentle on the glass and will leave it streak-free.
- Cabinet cleaning sprays: There are a variety of cabinet cleaning sprays available on the market that are specifically designed to clean your cabinets. These sprays typically contain a combination of natural and chemical ingredients that are effective at removing dirt and grime.
When choosing a cleaning product for your cabinets, it’s important to consider the surface material of your cabinets. For example, if you have wood cabinets, you’ll want to avoid using harsh chemicals that could damage the wood. Similarly, if you have painted cabinets, you’ll want to avoid using abrasive cleaners that could scratch the paint.
It’s also important to read the labels of any cleaning products you use to ensure that they are safe for use on your cabinets. Some cleaning products can cause damage to the finish or the wood itself, so it’s important to use them carefully and according to the manufacturer’s instructions.
Overall, when it comes to cleaning your kitchen cabinets, there are a variety of products available that can help you get the job done. By choosing the right product for your cabinets and using it carefully, you can keep your kitchen looking clean and fresh.
How often should I clean my cabinets?
- Cleaning your kitchen cabinets is an essential part of maintaining a hygienic and visually appealing kitchen. However, determining how often to clean your cabinets can be challenging. Here are some guidelines to help you decide:
- Frequency of use: If your cabinets are used frequently, such as for cooking or storing frequently used items, it’s best to clean them more often, such as once a month.
- Location: Cabinets that are exposed to direct sunlight or high-traffic areas may require more frequent cleaning due to dust and dirt accumulation.
- Type of surface: The type of surface your cabinets have can also impact how often they need to be cleaned. For example, wooden cabinets may require more frequent cleaning than those with a smooth, non-porous surface.
- Personal preference: Ultimately, the frequency of cleaning your cabinets will depend on your personal preference and the level of cleanliness you desire in your kitchen. It’s essential to find a balance between keeping your cabinets clean and not over-cleaning them, which can cause damage to the finish or the wood.
Can I clean my cabinets while still in them?
While it is possible to clean your kitchen cabinets while they are still in place, it is not always the best option. Here are some factors to consider when deciding whether to clean your cabinets while they are still in place:
- Accessibility: If your cabinets are easily accessible and you can reach all the surfaces without having to move anything, then cleaning them while they are still in place may be a good option.
- Space constraints: If you have limited space in your kitchen and moving your cabinets would be difficult or impossible, then cleaning them while they are still in place may be your only option.
- Condition of the cabinets: If your cabinets are in poor condition or have a lot of damage, it may be best to move them to a safe location before cleaning them. This will help prevent further damage and ensure that the cleaning process is as effective as possible.
Overall, whether or not to clean your cabinets while they are still in place will depend on a variety of factors, including accessibility, space constraints, and the condition of the cabinets. If you are unsure whether to move your cabinets or clean them in place, it may be best to consult with a professional cleaning service.
What are the signs that my cabinets need to be cleaned?
When it comes to determining whether your kitchen cabinets need a deep cleaning, there are several signs to look out for. These signs can indicate that your cabinets are in need of a thorough cleaning to restore their original appearance and maintain their durability.
One of the most obvious signs that your cabinets need to be cleaned is when they start to look dull and discolored. Over time, cabinets can become dull due to exposure to dust, dirt, and other debris, which can also cause discoloration. This can be especially noticeable if you have wood or painted cabinets, as the finish may become dull and fade in certain areas.
Another sign that your cabinets need to be cleaned is when they start to show signs of wear and tear. This can include scratches, dents, and other damage that can make your cabinets look old and worn. While some of this damage may be beyond repair, a thorough cleaning can help to remove dirt and debris that can exacerbate the damage and make it more noticeable.
Additionally, if you notice that your cabinets are starting to smell musty or have a stale odor, it may be time to clean them. This can be caused by the buildup of dust, dirt, and other debris, which can create an environment for mold and mildew to grow. This can not only affect the appearance of your cabinets, but it can also pose health risks for you and your family.
Finally, if you notice that your cabinets are difficult to open or close, it may be a sign that they need to be cleaned. Over time, cabinets can become stuck or jammed due to the buildup of dirt and debris, which can make it difficult to open and close them smoothly. A thorough cleaning can help to remove this buildup and restore your cabinets to their proper function.
By being aware of these signs, you can determine when your cabinets need to be cleaned and take action to restore their appearance and maintain their durability.
- Mild soap and water: This is one of the simplest and most effective cleaning solutions you can use on your cabinets. Simply mix a few drops of mild soap with warm water, and use a soft cloth to wipe down the surfaces of your cabinets.
- White vinegar: White vinegar is a natural cleaning agent that can help to remove stains and dirt from your cabinets. Mix equal parts white vinegar and water, and use a soft cloth to wipe down the surfaces of your cabinets.
- Baking soda: Baking soda is a natural abrasive that can help to remove dirt and stains from your cabinets. Sprinkle baking soda onto a damp cloth, and use it to scrub the surfaces of your cabinets.
- Lemon juice: Lemon juice is a natural cleaning agent that can help to remove stains and dirt from your cabinets. Apply lemon juice to a soft cloth, and use it to wipe down the surfaces of your cabinets.
- Cleaning sprays: There are a variety of cleaning sprays available on the market that are specifically designed for cleaning cabinets. These sprays typically contain a combination of natural and synthetic cleaning agents that can help to remove dirt and stains from your cabinets.
It’s important to note that when choosing cleaning products for your cabinets, you should avoid using harsh chemicals or abrasive cleaners, as these can damage the finish of your cabinets and cause them to deteriorate over time. Instead, opt for gentle, natural cleaning solutions that are safe for your cabinets and your health.
Natural cleaning solutions
Cleaning your kitchen cabinets doesn’t have to involve harsh chemicals. Here are some natural cleaning solutions that you can use to get your cabinets looking like new.
Baking Soda
Baking soda is a great natural cleaner that can be used to remove stains and odors from your kitchen cabinets. It’s also a great abrasive, so it can help to remove dirt and grime. To use baking soda, simply mix a small amount with water to create a paste, apply it to your cabinets, and let it sit for a few hours before wiping it away.
Vinegar
Vinegar is another natural cleaning solution that can be used to clean your kitchen cabinets. It’s a great solution for removing grease and grime, and it can also help to remove odors. To use vinegar, mix equal parts vinegar and water, apply it to your cabinets with a cloth, and let it sit for a few minutes before wiping it away.
Lemon Juice
Lemon juice is a natural bleach that can be used to remove stains and odors from your kitchen cabinets. It’s also a great natural disinfectant, so it can help to keep your cabinets clean and germ-free. To use lemon juice, apply it directly to the stain or odor, let it sit for a few minutes, and then wipe it away with a cloth.
Orange Oil
Orange oil is a natural cleaning solution that can be used to remove grease and grime from your kitchen cabinets. It’s also a great natural deodorizer, so it can help to keep your cabinets smelling fresh. To use orange oil, mix a few drops with water to create a solution, apply it to your cabinets with a cloth, and let it sit for a few minutes before wiping it away.
Remember, when using natural cleaning solutions, it’s important to test them on a small area of your cabinets first to make sure they won’t damage the finish.
Commercial cleaning products
Commercial cleaning products can be a convenient solution for cleaning kitchen cabinets. These products are specifically designed to tackle tough stains and grime that regular cleaning may not be able to remove. Here are some common commercial cleaning products used for cleaning kitchen cabinets:
- Miracle Cabinet Cleaner: This product is a popular choice for cleaning kitchen cabinets. It is a powerful gel that is applied to a damp cloth and wiped onto the cabinets. The gel dissolves tough grime and stains, leaving the cabinets looking like new.
- Cabinet Magic: This product is a two-part cleaner and polish that is mixed together before use. It is applied to a soft cloth and wiped onto the cabinets, leaving them looking clean and polished.
- Krud Kutter: This product is a heavy-duty cleaner that is designed to remove tough stains and grime. It is applied to a damp cloth and wiped onto the cabinets, then rinsed off with water.
When using commercial cleaning products, it is important to follow the manufacturer’s instructions carefully. Some products may require you to wear gloves or work in a well-ventilated area. It is also important to test the product on a small, inconspicuous area of the cabinets before using it on the entire surface. This will help ensure that the product is safe for your cabinets and will not cause any damage.
Specialized cleaning products for specific cabinet materials
When it comes to cleaning kitchen cabinets, it’s important to use the right products for the job. Different materials require different cleaning methods to ensure they are properly cleaned without being damaged. Here are some specialized cleaning products for specific cabinet materials:
- Wood cabinets: For wood cabinets, use a cleaning product that is specifically designed for wood surfaces. These products are typically made with natural ingredients that are safe for wood and will not damage the finish.
- Laminate cabinets: Laminate cabinets require a different cleaning method than wood cabinets. Use a cleaning product that is specifically designed for laminate surfaces. These products typically contain a combination of mild detergents and water to clean the surface without damaging it.
- Stainless steel cabinets: Stainless steel cabinets are easy to clean and can be wiped down with a damp cloth. However, if there are stubborn stains or grime, use a specialized cleaning product that is designed for stainless steel surfaces. These products typically contain ingredients that are safe for stainless steel and will not cause any damage.
- Glass cabinets: Glass cabinets require a specialized cleaning product that is designed to clean glass surfaces without leaving streaks or smears. These products typically contain a combination of mild detergents and water that are safe for glass surfaces.
When choosing a cleaning product, be sure to read the label carefully and follow the instructions for use. Additionally, always test the product on a small, inconspicuous area of the cabinet before applying it to the entire surface to ensure it does not cause any damage.
- Factors to consider:
- Frequency of use
- Type of surface
- Presence of children or pets
- Allergies or sensitivities
- Recommended cleaning schedule:
- Every 6-12 months for standard cabinets
- More often for high-traffic areas or visible dirt buildup
- Adjust based on individual needs and preferences
- Benefits of regular cleaning:
- Maintaining a clean and hygienic kitchen environment
- Preventing the buildup of allergens and bacteria
- Extending the life of your cabinets
- Quick tips for maintaining clean cabinets:
- Wipe down surfaces with a damp cloth after each use
- Use a cabinet protector to shield against dirt and dust
- Keep cabinets well-ventilated to prevent moisture buildup
Remember, a clean kitchen starts with clean cabinets. Regularly cleaning your kitchen cabinets is essential to maintaining a hygienic and welcoming environment. By considering factors such as frequency of use, surface type, and individual needs, you can create a cleaning schedule that works best for you. Keeping your cabinets clean not only ensures a healthy living space but also helps extend the life of your cabinets.
Weekly cleaning
What are the steps to follow for weekly cleaning of kitchen cabinets?
- Remove all items from the cabinets.
- Dust the surfaces with a soft cloth or a vacuum cleaner.
- Use a mild detergent and warm water to wipe down the surfaces.
- Use a clean, dry cloth to wipe down the surfaces again.
- Return the items to the cabinets.
How often should kitchen cabinets be cleaned on a weekly basis?
It is recommended to clean kitchen cabinets on a weekly basis to maintain their appearance and hygiene. This can help prevent the buildup of dust, dirt, and other debris that can accumulate over time.
Are there any specific tools or products that are recommended for weekly cleaning of kitchen cabinets?
For weekly cleaning, you will need a soft cloth or a vacuum cleaner, mild detergent, warm water, and a clean, dry cloth. It is recommended to avoid using harsh chemicals or abrasive cleaners, as these can damage the surfaces of the cabinets.
Cleaning your kitchen cabinets on a monthly basis is essential to maintain their appearance and ensure their longevity. Here are some key details to keep in mind when it comes to monthly deep cleaning:
Why is monthly deep cleaning important?
Regular monthly deep cleaning is crucial for keeping your kitchen cabinets looking their best and functioning properly. It helps to remove built-up dirt, grime, and dust that can accumulate over time, which can cause damage to the wood or paint finish, and make it harder to open and close the doors.
What tools do I need for monthly deep cleaning?
To perform a monthly deep cleaning, you will need a few essential tools such as:
- A soft-bristled brush or cloth
- A sponge or microfiber cloth
- A solution of warm water and mild dish soap
- A cleaning solution designed for kitchen cabinets
- A dry cloth or paper towels
How do I clean my kitchen cabinets on a monthly basis?
To clean your kitchen cabinets on a monthly basis, follow these steps:
- Remove all items from the cabinets, including dishes, glasses, and utensils.
- Dampen a soft-bristled brush or cloth with warm water and mild dish soap, and gently scrub the surfaces of the cabinets to remove any visible dirt or grime.
- Use a cleaning solution designed for kitchen cabinets, and apply it to a soft cloth or sponge, and wipe down the surfaces of the cabinets to remove any stubborn stains or grime.
- Use a dry cloth or paper towels to wipe down the surfaces of the cabinets and remove any excess moisture.
- Use a clean, dry cloth to wipe down the surfaces of the cabinets to remove any remaining dust or debris.
- Repeat the process as needed until the cabinets are clean and free of dirt and grime.
By following these steps, you can ensure that your kitchen cabinets stay clean and well-maintained on a monthly basis.
Annual professional cleaning is an essential aspect of maintaining the cleanliness and hygiene of your kitchen cabinets. It involves the use of specialized equipment and cleaning solutions that are not readily available to the average homeowner. Here are some key points to consider when it comes to annual professional cleaning:
- Why is it necessary?
- Regular cleaning helps to remove dirt, dust, and grime that accumulate over time. However, it may not be enough to completely remove stubborn stains, odors, and germs that can build up in your kitchen cabinets.
- Professional cleaning uses stronger cleaning solutions and more advanced equipment to thoroughly clean your cabinets, leaving them looking like new.
- What is involved in the process?
- The first step is to remove all contents from the cabinets, including dishes, utensils, and food items.
- Next, the professional cleaning team will apply a cleaning solution to the surfaces of the cabinets, allowing it to sit for a period of time before scrubbing it off with a soft brush or cloth.
- If necessary, the team may use steam cleaning or other specialized methods to remove tough stains or odors.
- Finally, the cabinets will be wiped down with a clean, damp cloth to remove any remaining residue, and the contents can be returned to the cabinets.
- How often should it be done?
- It is recommended to have your kitchen cabinets professionally cleaned at least once a year, although this may vary depending on the level of usage and the condition of your cabinets.
- More frequent cleaning may be necessary if you have a busy kitchen with a lot of foot traffic or if you have pets or young children who may be prone to making a mess.
- How much does it cost?
- The cost of professional cleaning can vary depending on the size of your kitchen, the number of cabinets, and the level of cleaning required.
- Typically, the cost ranges from $100 to $500, but it may be more or less depending on your specific needs.
- How do I choose a professional cleaning service?
- Look for a reputable cleaning service with experience in cleaning kitchen cabinets.
- Check reviews and references to ensure that they have a good track record of providing quality service.
- Make sure to discuss your specific needs and budget with the service before hiring them to ensure that they are the right fit for you.
If you’re short on time or simply don’t want to deal with the hassle of removing your kitchen cabinets, you may be wondering if it’s possible to clean them while they’re still in place. The good news is that it is possible to clean your kitchen cabinets while they’re still in place, but there are a few things you should keep in mind before you get started.
First and foremost, it’s important to note that cleaning your cabinets while they’re still in place may not be as effective as removing them and cleaning them separately. This is because the walls, floors, and other surfaces in your kitchen can get dirty and may leave behind stains and residue that can be difficult to remove when your cabinets are still in place.
However, if you do decide to clean your cabinets while they’re still in place, there are a few things you can do to make the process easier and more effective. For example, you can use a mild detergent and warm water to wipe down the surfaces of your cabinets, and then use a soft cloth to wipe away any excess moisture. You can also use a cleaning solution specifically designed for cabinets, which can help to remove tough stains and grime.
Another option is to use a handheld vacuum cleaner to remove any dust or debris that may have accumulated in the corners and crevices of your cabinets. This can help to keep your cabinets looking clean and tidy, even if they’re still in place.
Overall, while cleaning your cabinets while they’re still in place may not be as effective as removing them and cleaning them separately, it can still be a viable option if you’re short on time or don’t want to deal with the hassle of removing them. With the right cleaning solution and a bit of elbow grease, you can keep your kitchen cabinets looking their best, even if they’re still in place.
Yes, but take caution not to damage them
While cleaning kitchen cabinets can be a daunting task, the good news is that it is possible to do so without causing any damage. However, it is important to take caution to avoid any potential damage to your cabinets. Here are some tips to keep in mind:
- Avoid using harsh chemicals or abrasive cleaners, as these can scratch or discolor the surface of your cabinets.
- Instead, opt for gentle cleaning solutions, such as a mixture of warm water and mild dish soap.
- Be sure to test any cleaning solution on a small, inconspicuous area of your cabinets before applying it to the entire surface.
- Use a soft cloth or sponge to apply the cleaning solution and gently wipe down the surfaces of your cabinets.
- For tough stains or grime, consider using a mixture of baking soda and water as a paste, which can be applied and scrubbed off with a soft cloth.
- When cleaning the hardware, such as handles and knobs, use a soft cloth or brush to remove any dirt or debris.
- After cleaning, be sure to wipe down the surfaces with a dry cloth to remove any excess moisture and prevent water spots.
By following these tips, you can keep your kitchen cabinets looking their best without causing any damage.
No, remove items first for proper cleaning
Cleaning your kitchen cabinets can be a daunting task, especially if you have a lot of items stored inside. However, it is important to remove all items from your cabinets before cleaning them for several reasons.
Firstly, removing items from your cabinets allows you to properly inspect and clean every nook and cranny of the cabinet. This is especially important if you have items that are difficult to move or hard to reach, as you may need to use specialized cleaning tools or techniques to ensure that all surfaces are thoroughly cleaned.
Secondly, removing items from your cabinets allows you to properly clean the cabinet itself. This is important because your cabinets are likely to have a buildup of dirt, dust, and grime that can be difficult to remove if you leave your items inside. By removing your items, you can use a vacuum cleaner or a damp cloth to thoroughly clean the surfaces of your cabinets, which can help to remove any dirt or grime that may have accumulated over time.
Lastly, removing items from your cabinets can help to prevent damage to your belongings. Certain cleaning solutions or tools can be harsh or abrasive, and may cause damage to your items if they are left inside your cabinets during the cleaning process. By removing your items, you can ensure that they are not exposed to any harmful chemicals or abrasive materials, which can help to protect them from damage.
Overall, it is important to remove all items from your kitchen cabinets before cleaning them. This will allow you to properly inspect and clean every surface, prevent damage to your belongings, and ensure that your cabinets are thoroughly clean and free of dirt and grime.
There are several signs that indicate your kitchen cabinets need to be cleaned. These include:
- Dull or discolored finish: Over time, dust, dirt, and other debris can build up on your cabinets, causing them to look dull and discolored.
- Musty odor: If your cabinets have a musty odor, it’s a sign that there is mold or mildew growth, which can only be removed with a thorough cleaning.
- Sticky or gummy residue: If you notice a sticky or gummy residue on your cabinets, it’s likely that there is a buildup of grease and grime that needs to be cleaned.
- Water spots: If you see water spots on your cabinets, it’s a sign that there is a buildup of hard water minerals that need to be removed.
- Cracked or peeling finish: If your cabinets have a cracked or peeling finish, it’s a sign that the wood or paint is deteriorating, which can be caused by a lack of maintenance and cleaning.
If you notice any of these signs, it’s time to give your kitchen cabinets a thorough cleaning to restore their appearance and prevent further damage.
Dirt buildup
Cleaning your kitchen cabinets can be a daunting task, especially when dealing with dirt buildup. Over time, dirt, dust, and other debris accumulate on surfaces, leaving them looking dull and dirty. Fortunately, there are several ways to tackle dirt buildup and restore your cabinets to their former glory.
How does dirt buildup affect the appearance of kitchen cabinets?
Dirt buildup can have a significant impact on the appearance of your kitchen cabinets. Over time, the buildup can turn into a thick layer of grime that can be difficult to remove. This can make your cabinets look dull, dirty, and unsanitary, which can be a turn-off for many homeowners.
What are the causes of dirt buildup in kitchen cabinets?
There are several factors that can contribute to dirt buildup in kitchen cabinets. One of the most common causes is poor ventilation. When cooking, steam and other particles can build up and settle on cabinet surfaces, leading to the formation of a sticky residue. Another cause is the accumulation of dust and other particles that can settle on surfaces over time. Finally, the use of harsh cleaning products or improper cleaning techniques can also contribute to dirt buildup.
How can I prevent dirt buildup in my kitchen cabinets?
Preventing dirt buildup in your kitchen cabinets requires a multi-faceted approach. First, make sure to regularly clean your cabinets using mild detergents and warm water. This will help to remove any dirt or dust that has accumulated on surfaces. Second, keep your cabinets well-ventilated by using a range hood or opening windows to allow steam to escape. Finally, avoid using harsh cleaning products or abrasive sponges, as these can scratch the surfaces of your cabinets and make it harder to remove dirt buildup in the future.
What are some effective methods for removing dirt buildup from kitchen cabinets?
There are several methods you can use to remove dirt buildup from your kitchen cabinets. One of the most effective methods is to use a solution of warm water and mild detergent. Apply the solution to a soft cloth or sponge and wipe down the surfaces of your cabinets. For tougher buildup, you can use a mixture of baking soda and water, which can help to break down the grime and make it easier to remove. You can also use a soft-bristled brush to scrub away the buildup, or a specialized cleaning product designed specifically for cabinets.
By following these tips, you can keep your kitchen cabinets looking clean and fresh, and ensure that they remain a beautiful and functional part of your home.
Stains and discoloration
One of the most common issues homeowners face when it comes to cleaning their kitchen cabinets is stains and discoloration. Over time, cabinets can become dull and discolored due to a variety of factors, including sunlight, smoke, and spills. Fortunately, there are several effective methods for removing stains and restoring the natural beauty of your cabinets.
Causes of Stains and Discoloration
There are several factors that can contribute to stains and discoloration on kitchen cabinets, including:
- Sunlight: Exposure to sunlight can cause cabinets to fade and become discolored over time. This is particularly true for cabinets made from light-colored woods, such as oak or maple.
- Smoke: Smoke from cooking can also cause cabinets to become discolored and stained. This is especially true for cabinets in the immediate vicinity of the stove.
- Spills: Spills and splatters from food and drinks can also contribute to stains and discoloration on kitchen cabinets.
Methods for Removing Stains and Discoloration
Fortunately, there are several effective methods for removing stains and discoloration from kitchen cabinets. Some of the most popular methods include:
- Using a Cabinet Cleaner: There are a variety of cabinet cleaners available on the market that are specifically designed to remove stains and discoloration from kitchen cabinets. These cleaners typically contain a combination of chemicals and abrasives that work together to break down the stain and restore the natural beauty of the cabinet.
- Mixing Baking Soda and Water: Another effective method for removing stains and discoloration from kitchen cabinets is to mix baking soda and water to create a paste. This paste can then be applied to the stain and allowed to sit for several hours before being wiped away with a damp cloth.
- Sanding and Refinishing: In some cases, stains and discoloration may be too severe to be removed with a cleaner or baking soda paste. In these cases, sanding and refinishing the cabinets may be necessary. This process involves sanding down the surface of the cabinet to remove the damaged layer of wood, and then applying a new layer of stain or paint to restore the natural beauty of the cabinet.
By using one or more of these methods, you can effectively remove stains and discoloration from your kitchen cabinets and restore their natural beauty.
Musty odors
Musty odors emanating from your kitchen cabinets can be unpleasant and uninviting. Here are some possible reasons for this problem and ways to address it:
- Dampness or moisture: If your cabinets are in a damp or humid environment, mold and mildew can grow, leading to musty odors. This is particularly common in areas near the sink or dishwasher.
- Food residue: Leftover food particles and spills can attract bacteria and cause unpleasant odors. Even seemingly small amounts can accumulate over time and cause problems.
- Dust and debris: Over time, dust, pet hair, and other debris can accumulate in your cabinets, contributing to a musty smell.
To address musty odors in your kitchen cabinets, consider the following steps:
- Ventilate the area: Open windows and doors to increase air circulation, allowing any musty odors to dissipate. This is especially important if your cabinets are located near a source of moisture.
- Clean thoroughly: Thoroughly clean your cabinets, paying particular attention to any areas with visible mold or mildew. Remove any dust, debris, or food residue that may be contributing to the odor.
- Use natural odor-absorbers: Consider using natural odor-absorbing agents like baking soda, vinegar, or essential oils to help neutralize any lingering odors.
- Dehumidify the area: If your cabinets are in a damp or humid environment, consider using a dehumidifier to help reduce moisture levels and prevent mold and mildew growth.
- Address underlying issues: If the musty odor persists, it may be necessary to address any underlying issues such as leaks, water damage, or inadequate ventilation.
By following these steps, you can help eliminate musty odors from your kitchen cabinets and create a fresh, inviting environment.
Recap of key points
- Cleaning your kitchen cabinets is an essential part of maintaining a hygienic and organized kitchen.
- The frequency of cleaning your cabinets depends on your lifestyle and usage of your kitchen.
- A thorough cleaning should be done every 6-12 months, but a quick wipe down can be done weekly.
- Use a mixture of warm water and mild dish soap to clean your cabinets.
- For tough stains or grime, consider using a baking soda and water paste.
- It’s important to dry your cabinets thoroughly after cleaning to prevent water damage.
- Regular cleaning not only keeps your kitchen looking clean and organized, but it also helps to prevent the buildup of harmful bacteria.
Importance of regular cabinet cleaning
Regular cleaning of kitchen cabinets is essential for maintaining a hygienic and pleasant environment in the kitchen. The following are some reasons why regular cabinet cleaning is important:
1. Removes Dirt and Bacteria
Kitchen cabinets are exposed to a variety of food particles, grease, and other organic matter that can accumulate over time. This build-up can create an ideal environment for bacteria to grow, which can lead to unpleasant odors and potentially harmful bacterial growth. Regular cleaning removes this dirt and bacteria, preventing them from multiplying and causing damage to your health.
2. Improves Air Quality
Dirty kitchen cabinets can contribute to poor indoor air quality by releasing harmful volatile organic compounds (VOCs) into the air. These compounds can cause respiratory problems, headaches, and other health issues. Regular cleaning helps to reduce the levels of VOCs in your kitchen, improving air quality and creating a healthier environment.
3. Extends Cabinet Lifespan
Regular cleaning helps to protect your kitchen cabinets from damage caused by dirt and grime buildup. Over time, this buildup can lead to discoloration, staining, and even warping of the wood or other materials used to construct the cabinets. By regularly cleaning your cabinets, you can help to prevent these issues and extend the lifespan of your cabinets.
4. Enhances Aesthetic Appeal
Finally, regular cleaning helps to maintain the aesthetic appeal of your kitchen cabinets. A clean and well-maintained kitchen is more pleasant to look at and can help to create a more inviting and welcoming atmosphere in your home.
In summary, regular cleaning of your kitchen cabinets is important for maintaining a healthy and pleasant environment in your kitchen, as well as protecting the longevity and aesthetic appeal of your cabinets.
Encouragement to implement cleaning techniques
Cleaning your kitchen cabinets may seem like a daunting task, but it is an essential part of maintaining a clean and healthy kitchen. Here are some tips to encourage you to implement proper cleaning techniques:
- Set aside time for cleaning: Make cleaning your kitchen cabinets a priority by setting aside time each week for this task. You can schedule it on the same day every week or choose a day that works best for you.
- Break it down into smaller tasks: Cleaning your kitchen cabinets can be overwhelming, so break it down into smaller tasks. Start by removing all the items from the cabinets, then dust the shelves, wipe down the doors and frames, and vacuum the floor around the base of the cabinets.
- Use the right cleaning supplies: Using the right cleaning supplies is crucial to effectively cleaning your kitchen cabinets. A mixture of warm water and mild dish soap is a good starting point. You can also use a microfiber cloth to wipe down the surfaces and a vacuum cleaner with a hose attachment to reach the corners and crevices.
- Clean regularly: Regular cleaning is essential to maintaining a clean and healthy kitchen. Make it a habit to clean your kitchen cabinets at least once a month to prevent the buildup of dirt and bacteria.
- Keep them organized: Keeping your kitchen cabinets organized can make cleaning them easier. Make sure to put things back in their proper place after each use, and consider investing in storage containers or organizers to keep items neat and tidy.
By following these tips, you can encourage yourself to implement proper cleaning techniques for your kitchen cabinets. Remember, a clean kitchen is a healthy kitchen, and taking the time to clean your cabinets regularly will pay off in the long run.
FAQs
1. What are the steps to clean kitchen cabinets?
The first step is to remove all items from the cabinets, including the shelves and drawers. Next, use a vacuum cleaner to remove any dust or debris on the floor of the cabinet. Then, wipe down the cabinet surfaces with a damp cloth and mild detergent. Rinse and dry the cloth thoroughly before wiping down the cabinets again to remove any soap residue. Finally, use a dry cloth to wipe down the surfaces and remove any excess moisture.
2. How often should I clean my kitchen cabinets?
It is recommended to clean your kitchen cabinets at least once a year, or more frequently if needed. If you have pets or children, or if you cook frequently, you may need to clean your cabinets more often to remove any dirt or grime buildup.
3. What are some tips for cleaning kitchen cabinets?
Here are some tips for cleaning kitchen cabinets:
- Use a mild detergent and warm water to clean the surfaces.
- Avoid using abrasive cleaners or scrubbers, as they can damage the finish of the cabinets.
- Use a soft cloth or sponge to wipe down the surfaces, rather than a brush or hard sponge, which can scratch the surfaces.
- Dry the surfaces thoroughly with a clean cloth to prevent water spots.
- Consider using a cabinet cleaning solution or a mixture of white vinegar and water to remove tough stains or odors.
- Make sure to clean the edges and corners of the cabinets, as well as the hinges and handles.
4. Can I clean my kitchen cabinets with baking soda?
Yes, baking soda is a great natural cleaning agent that can be used to clean kitchen cabinets. Mix baking soda with a little bit of water to create a paste, and then apply it to the surfaces of the cabinets using a soft cloth. Let it sit for a few minutes before wiping it off with a damp cloth and rinsing with clean water.
5. How can I remove tough stains from my kitchen cabinets?
To remove tough stains from kitchen cabinets, you can try using a mixture of equal parts white vinegar and water. Apply the mixture to the stain using a soft cloth, and then let it sit for a few minutes before wiping it off with a clean cloth and rinsing with water. You can also use a small amount of baking soda mixed with water to create a paste, which can be applied to the stain and then wiped off with a cloth.


