Are you tired of dealing with a dirty and greasy oven? It’s time to take action and learn the best way to clean the inside of your oven. In this ultimate guide, we’ll cover everything you need to know about oven cleaning, from the most effective methods to the tools you’ll need. Whether you’re a busy home cook or a professional chef, this guide will help you get your oven looking like new in no time. So, let’s get started and say goodbye to that messy oven once and for all!
Preparing for Oven Cleaning
Gathering Necessary Tools and Supplies
Before starting the oven cleaning process, it is essential to gather all the necessary tools and supplies to ensure the job is done efficiently and effectively. Here are some of the tools and supplies you will need:
- Oven cleaner: There are many different types of oven cleaners available on the market, so it is important to choose one that is safe for your specific type of oven. Look for an oven cleaner that is specifically designed for your oven’s brand and model.
- Scouring pad or steel wool: A scouring pad or steel wool can be used to scrub away any stubborn grime or stains. Be sure to use a non-abrasive scouring pad or steel wool to avoid scratching the oven’s surface.
- Bucket and sponge: A bucket and sponge are necessary for mixing the oven cleaner and scrubbing the oven. Make sure the bucket is large enough to hold the oven cleaner and the sponge is soft enough to avoid scratching the oven’s surface.
- Gloves: Wearing gloves is essential when cleaning the inside of your oven. The oven cleaner can be caustic and may cause skin irritation or burns. Choose gloves made of a material that is resistant to heat and chemicals.
- Kitchen towels or rags: Kitchen towels or rags are useful for wiping away any excess oven cleaner or grime.
- Microfiber cloth: A microfiber cloth is an excellent tool for cleaning the inside of your oven. It can be used to wipe away any excess oven cleaner or grime without leaving streaks or residue behind.
- Rinse aid: A rinse aid can be used to help remove any residual oven cleaner and leave the oven’s surface spotless.
By gathering all the necessary tools and supplies before starting the cleaning process, you can ensure that the job is done efficiently and effectively. Remember to choose an oven cleaner that is safe for your specific type of oven and to wear gloves to protect your skin from the caustic chemicals.
Turning Off the Oven and Allowing it to Cool
Before you begin the process of cleaning your oven, it is important to ensure that it is safe to do so. The first step in this process is to turn off the oven and allow it to cool completely. This may seem like a simple step, but it is crucial to the success of the cleaning process.
It is important to wait until the oven has cooled completely before cleaning it. If you attempt to clean the oven while it is still warm, the heat from the oven can cause the cleaning solution to evaporate quickly, making it difficult to effectively clean the oven. Additionally, attempting to clean the oven while it is still warm can cause the oven glass to crack, which can be expensive to repair.
It is recommended to wait at least 30 minutes to an hour for the oven to cool before attempting to clean it. If you are in a hurry, you can place a bowl of ice in the oven to help cool it down more quickly. Once the oven has cooled, you can proceed with the cleaning process.
In summary, turning off the oven and allowing it to cool completely is an essential step in the process of cleaning the inside of your oven. This will ensure that the cleaning solution is effective and that the oven glass does not crack during the cleaning process.
Removing All Food and Objects from the Oven
Before beginning the cleaning process, it is essential to remove all food and objects from the oven. This step is crucial because any remaining food or objects can become stuck in the crevices of the oven, making it difficult to clean. Additionally, removing all items from the oven ensures that they will not be damaged during the cleaning process.
To remove all food and objects from the oven, follow these steps:
- Turn off the oven and allow it to cool completely.
- Open the oven door and carefully remove any dishes or utensils that may be inside.
- Use a pair of tongs or a rubber spatula to scrape away any remaining food debris from the oven walls and floor.
- Check the back of the oven for any items that may have been stored there, such as cookbooks or spatulas.
- Use a soft-bristled brush to remove any crumbs or spills from the oven’s interior.
Once all food and objects have been removed from the oven, the cleaning process can begin. It is essential to be thorough when removing all items from the oven to ensure that the cleaning process is as effective as possible.
Cleaning the Oven’s Exterior
Removing Dirt and Grime with a Soft Brush
One of the most effective ways to clean the exterior of your oven is by using a soft brush. This method is particularly useful for removing dirt and grime that has accumulated on the oven’s surface over time. Here’s how you can do it:
- First, unplug your oven and let it cool down completely.
- Next, take a soft-bristled brush and gently insert it into the oven’s exterior. Use it to scrub away any dirt or grime that has accumulated on the surface.
- Make sure to cover all areas of the oven’s exterior, including the door, handles, and control panel.
- If there are any stubborn stains or grime buildup, you can mix some warm water and mild dish soap to create a cleaning solution. Apply the solution to the affected area using a sponge or cloth, and then use the soft brush to scrub away the grime.
- Rinse the brush thoroughly with warm water and dry it with a clean cloth before storing it away.
Using a soft brush to clean the exterior of your oven is a safe and effective method that won’t damage the surface or scratch the paint. It’s also a great way to remove any lingering odors or residue that may have accumulated over time. By following these simple steps, you can keep your oven looking like new and ensure that it continues to function properly for years to come.
Using a Mild Detergent to Scrub Tough Stains
If there are stubborn stains or residue on the exterior of your oven, it may be time to break out the scrubbing brush and some mild detergent. This method is best for removing grease, grime, and other tough stains that cannot be removed with a simple wipe down.
To start, preheat your oven to 200 degrees Fahrenheit. This will help loosen any grime or stains on the exterior of the oven, making it easier to remove.
Next, apply a small amount of mild detergent to a sponge or cloth, and use it to scrub the affected area. Be sure to focus on any areas with particularly stubborn stains.
Once you have finished scrubbing, use a clean sponge or cloth to wipe away any excess detergent.
Finally, use a clean, damp cloth to wipe down the entire exterior of the oven, including any areas that were scrubbed. This will help to remove any remaining detergent and ensure that the oven is completely clean.
Remember to always work carefully when cleaning the exterior of your oven, as some ovens may have delicate finishes that can be easily damaged.
Rinsing the Oven with a Damp Cloth
After disconnecting the power cord and removing any loose debris from the oven, the next step in cleaning the exterior is to rinse it with a damp cloth. This is a simple but effective method that can help to remove any remaining food particles, grease, or grime that may be present on the surface of the oven.
Here are the steps to follow when rinsing the oven with a damp cloth:
- Prepare a solution of warm water and mild dish soap. You can use a sponge or a soft cloth to gently scrub the surface of the oven, paying particular attention to any stubborn stains or grime.
- Rinse the oven thoroughly with a clean, damp cloth. Be sure to remove any excess moisture from the surface of the oven with a clean towel to prevent water spots from forming.
- Dry the oven with a clean towel or let it air dry. This will help to prevent any water spots from forming and ensure that the oven is completely clean and free of any debris or residue.
It is important to note that when rinsing the oven with a damp cloth, it is essential to use a mild dish soap and warm water only. Avoid using harsh chemicals or abrasive cleaners, as these can damage the surface of the oven and potentially create more problems. Additionally, be sure to clean the oven regularly to prevent the buildup of food particles and grime, which can lead to the development of unpleasant odors and potentially damage the oven’s interior.
Cleaning the Oven’s Interior
Removing Loose Debris with a Mop or Sponge
Cleaning the inside of your oven can be a daunting task, but it is necessary to ensure that your oven is functioning properly and to prevent the buildup of grease and food particles that can lead to unpleasant odors and health hazards. One of the first steps in cleaning your oven is to remove any loose debris that may have accumulated on the interior surfaces. This can be done using a mop or sponge.
Using a mop or sponge to remove loose debris is a simple and effective method that can be used on both electric and gas ovens. Start by turning off the oven and letting it cool down completely. Once the oven is cool, open the door and use a mop or sponge to gently scrub away any loose debris that has accumulated on the interior surfaces.
It is important to use a mild detergent or soap solution when cleaning the interior of your oven. This will help to loosen and remove any stubborn grime or stains that may have accumulated on the surfaces. Be sure to rinse the mop or sponge thoroughly with clean water after each use to avoid leaving any residue behind.
When cleaning the inside of your oven, it is important to pay particular attention to the following areas:
- The oven racks: These should be removed and cleaned separately, as they are likely to have the most buildup of food and grease. Use a mild detergent and warm water to clean the racks, and make sure to rinse them thoroughly before putting them back in the oven.
- The oven walls: These should also be cleaned thoroughly, using a mop or sponge to scrub away any loose debris and grime. Pay particular attention to the areas around the elements and heating coils, as these are likely to have the most buildup.
- The oven door: This should be cleaned both inside and out, using a soft cloth or sponge to remove any grime or smudges. Be sure to clean the seal around the door as well, as this can become clogged with food particles and prevent the oven from sealing properly.
Overall, removing loose debris with a mop or sponge is a simple and effective method for cleaning the inside of your oven. By thoroughly cleaning the oven racks, walls, and door, you can ensure that your oven is functioning properly and that your food will taste better and be cooked more evenly.
Cleaning the Oven’s Fan and Filter
The fan and filter of your oven play a crucial role in maintaining its overall functionality. They work together to remove excess heat and smoke from the interior of the oven, ensuring that your dishes are cooked evenly and efficiently. However, over time, the fan and filter can become clogged with grease and food debris, which can hinder their performance and cause damage to the oven. Therefore, it is essential to clean the fan and filter regularly to maintain the optimal functioning of your oven.
How to Clean the Oven’s Fan and Filter
- Turn off the oven and let it cool down completely. This is important as it will allow you to handle the components safely without risking burns or damage to the oven.
- Remove the racks from the oven and set them aside.
- Use a pair of pliers to remove the screws that hold the fan cover in place. Place the screws in a safe location where they will not be lost.
- Carefully remove the fan cover from the oven, taking note of any wires or connections that may need to be disconnected beforehand.
- Use a vacuum cleaner or a soft brush to remove any visible debris from the fan and filter. This will help to prevent any dust or particles from becoming airborne.
- Soak a soft cloth or sponge in warm, soapy water, and use it to clean the fan and filter thoroughly. Pay close attention to any areas that may be particularly dirty or difficult to reach.
- Once the fan and filter are clean, rinse them thoroughly with clean water to remove any soap residue.
- Allow the fan and filter to air dry completely before replacing the fan cover and screws.
Tips for Cleaning the Oven’s Fan and Filter
- Wear protective gloves when cleaning the fan and filter to prevent any burns or cuts from sharp edges.
- Avoid using abrasive cleaners or harsh chemicals as they can damage the fan and filter and reduce their lifespan.
- Do not attempt to clean the fan and filter while the oven is still warm, as this can cause damage to the components and increase the risk of burns.
- If you are unable to remove the fan cover or access the filter, consider consulting a professional oven cleaning service.
By following these steps and tips, you can ensure that your oven’s fan and filter are cleaned and maintained regularly, leading to better performance and a longer lifespan for your oven.
Scouring Pots and Pans with a Scouring Pad
Scouring pots and pans with a scouring pad is a simple yet effective method for cleaning the inside of your oven. Here’s how to do it:
- Gather your tools: You’ll need a scouring pad, a sponge, and some soap or detergent.
- Remove the oven racks: Use a spatula or tongs to remove the oven racks and set them aside.
- Clean the walls: Wet the scouring pad with warm water and add a small amount of soap or detergent. Then, use the pad to scrub the walls of the oven, starting from the top and working your way down. Be sure to pay extra attention to any burnt-on food or spills.
- Clean the racks: If your oven has racks, they will need to be cleaned as well. Use the scouring pad to scrub away any residue or debris, and then rinse them off with warm water.
- Clean the door: Use the sponge and soapy water to clean the glass door of your oven. Use a soft cloth to wipe away any streaks or smudges.
- Dry the oven: Use a clean towel to wipe away any excess moisture, and then turn on your oven’s fan to help dry the inside.
- Reassemble the oven: Place the oven racks back in their original positions, and then slide the oven rack guide back into place.
With these simple steps, you can keep your oven looking and functioning its best.
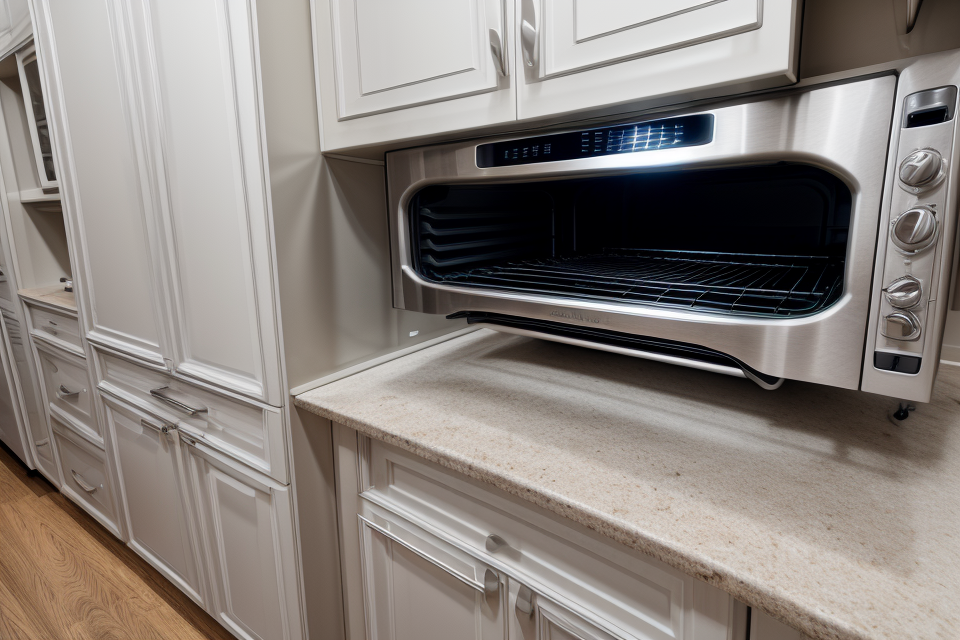
Cleaning the Glass Viewing Window
The glass viewing window of your oven may seem like a small and insignificant part, but it plays a crucial role in maintaining the overall health and longevity of your oven. It is essential to clean the glass viewing window regularly to ensure that your oven operates efficiently and that the food you cook is of the highest quality. Here are some steps you can follow to clean the glass viewing window of your oven:
Step 1: Unplug the Oven
Before you start cleaning the glass viewing window, make sure to unplug the oven from the power source. This is a crucial safety step to prevent any accidents or electrical shocks.
Step 2: Remove the Glass Viewing Window
The next step is to remove the glass viewing window from the oven. This will vary depending on the type of oven you have. Some ovens have a simple release mechanism, while others may require more effort. Use a screwdriver or your fingers to gently pry the glass viewing window out of the oven.
Step 3: Clean the Window
Once you have removed the glass viewing window, you can start cleaning it. Use a soft cloth and warm water to wipe away any debris or grime that has accumulated on the window. If there are stubborn stains or residue, you can use a mild detergent or baking soda to scrub it away. Make sure to avoid using abrasive materials, as this can scratch the glass and cause further damage.
Step 4: Dry the Window
After you have cleaned the glass viewing window, make sure to dry it thoroughly. Use a clean cloth to wipe away any excess moisture, as water droplets can refract light and make it difficult to see what’s inside the oven.
Step 5: Reinstall the Window
Finally, reinstall the glass viewing window into the oven. Make sure it is securely in place and doesn’t rattle or move around when the oven is in use.
By following these steps, you can ensure that your oven’s glass viewing window is clean and clear, allowing you to cook with precision and accuracy. Regular cleaning will also help prevent the buildup of grease and grime, which can contribute to the growth of bacteria and other harmful microorganisms.
Restoring the Oven to its Original Condition
Drying the Oven with a Clean Towel
After scrubbing the inside of your oven and removing any leftover grime, it’s important to dry the oven thoroughly before turning it back on. One of the most effective ways to do this is by using a clean towel to wipe down the interior surfaces of the oven.
Here are some steps to follow when drying your oven with a clean towel:
- Remove any excess water or cleaning solution from the surfaces of the oven using a clean sponge or cloth.
- Take a clean towel and wring it out thoroughly to remove any excess moisture.
- Place the towel inside the oven and close the door.
- Turn the oven on to its lowest setting and let it run for several minutes to help dry out the interior surfaces.
- Once the oven is heated up, open the door and use the towel to wipe down the surfaces of the oven, paying particular attention to any areas that may have been difficult to reach during the cleaning process.
- Continue wiping down the surfaces of the oven until they are completely dry and free of any moisture.
- Once the oven is completely dry, turn it off and remove the towel.
It’s important to use a clean towel when drying your oven to avoid leaving any lint or debris behind that could accumulate over time and create new cleaning challenges in the future. Additionally, it’s important to avoid using paper towels or other materials that could leave residue behind.
Overall, drying the oven with a clean towel is a simple yet effective way to ensure that your oven is completely clean and ready to use again. By following these steps, you can help extend the life of your oven and ensure that it continues to perform at its best for years to come.
Replacing the Oven Racks and Cleaning Them
Replacing the oven racks is an essential part of cleaning the inside of your oven. Over time, the racks can become discolored, warped, or even damaged, which can affect the performance of your oven. Therefore, it is recommended to replace them every few years to ensure that your oven is functioning properly.
When replacing the oven racks, it is important to remove them carefully to avoid any damage to the oven. Start by unplugging the oven and letting it cool down completely. Then, use a pair of pliers to remove the screws that hold the racks in place. Gently pull the racks out of the oven, being careful not to scratch the oven’s interior.
Once you have removed the old racks, it is time to clean them. Start by wiping them down with a damp cloth to remove any food particles or debris. If there is stubborn grease or stains, you can use a mixture of water and vinegar to clean them. Apply the mixture to the racks using a sponge or cloth, and let it sit for a few minutes before rinsing it off with water.
After cleaning the racks, you can apply a thin layer of oil to prevent rust and corrosion. Use a paper towel to apply the oil evenly over the racks, and let it sit for a few minutes before wiping it off with a clean cloth.
Once the racks are clean and dry, you can install them in the oven by reversing the process of removing them. Be sure to tighten the screws securely to hold the racks in place. With the new racks installed, your oven will be ready for cooking again.
Testing the Oven to Ensure it is Functioning Properly
Before proceeding with the cleaning process, it is crucial to test the oven to ensure that it is functioning properly. This step is important as it helps to avoid any damage to the oven or the cooking process. Here are some steps to follow when testing the oven:
- Preheat the oven: Preheating the oven is essential to ensure that it is functioning correctly. Set the oven to 200°F (93°C) and let it preheat for at least 30 minutes. This step will ensure that the oven reaches the correct temperature and is ready for cooking.
- Use an oven thermometer: An oven thermometer is a useful tool to check the temperature inside the oven. Place the thermometer in the center of the oven and leave it for a few minutes. Check the temperature to ensure that it is accurate.
- Check the temperature evenly: It is essential to ensure that the temperature is evenly distributed throughout the oven. Place a foil-wrapped candy thermometer in the center of the oven and preheat the oven. After 30 minutes, check the temperature of the thermometer to ensure that it is accurate.
- Clean the oven: Once you have tested the oven and confirmed that it is functioning correctly, you can proceed with cleaning the oven. Use the appropriate cleaning products and follow the manufacturer’s instructions for the best results.
By following these steps, you can ensure that your oven is functioning correctly, and you can proceed with cleaning it with confidence. Remember to always test the oven before and after cleaning to ensure that it is functioning properly.
Maintaining the Oven’s Cleanliness
Wiping Down the Oven’s Exterior Regularly
Keeping the exterior of your oven clean is just as important as cleaning the interior. Food spills, grease, and other debris can accumulate on the outside of the oven, which can lead to the spread of odors and the buildup of bacteria. Here are some steps to follow for wiping down the oven’s exterior regularly:
Removing Loose Debris
Before cleaning the exterior of your oven, it’s important to remove any loose debris, such as crumbs or spills, that may have accumulated on the surface. Use a soft brush or cloth to gently sweep away any loose debris.
Using a Mild Detergent
To clean the exterior of your oven, you can use a mild detergent, such as a mixture of warm water and a few drops of dish soap. Use a soft cloth or sponge to gently wipe down the surface of the oven, focusing on any areas with visible stains or buildup. Be sure to avoid using abrasive cleaners or scrubbers, as these can scratch the surface of the oven and damage the finish.
Drying the Oven
After cleaning the exterior of your oven, use a clean cloth or paper towels to wipe away any excess moisture. It’s important to make sure the oven is completely dry before turning it on, as any remaining moisture can lead to the growth of bacteria and mold.
Regular Maintenance
To maintain the cleanliness of the exterior of your oven, it’s important to wipe it down regularly. Depending on how often you use your oven, you may want to schedule a cleaning every few weeks or once a month. This will help prevent the buildup of grime and odors, and will keep your oven looking and functioning its best.
Running the Oven’s Self-Cleaning Cycle
Running the oven’s self-cleaning cycle is one of the most effective ways to maintain the cleanliness of your oven. This feature is designed to clean the oven by heating up to high temperatures, and then using a combination of heat and steam to break down grease and grime. Here’s how to run the self-cleaning cycle on your oven:
- Check the manual: Before starting the self-cleaning cycle, it’s important to check your oven’s manual for specific instructions. Different ovens may have slightly different procedures, and it’s important to follow the manufacturer’s guidelines to avoid any damage to your oven.
- Prepare the oven: Before starting the self-cleaning cycle, it’s important to remove any food debris or leftover food from the oven. This can be done by running a regular cleaning cycle or by using a degreaser and a sponge to wipe down the inside of the oven.
- Start the cycle: Once the oven is clean and the manual has been consulted, the self-cleaning cycle can be started. This is typically done by pressing a button on the oven’s control panel. The cycle will typically take several hours to complete, depending on the age and size of the oven.
- Monitor the cycle: It’s important to monitor the self-cleaning cycle as it progresses. The oven will typically heat up to high temperatures and then cool down again. During this time, the oven will emit a smoke-like steam, which is normal. It’s important to keep the oven door closed during the cycle to ensure that the steam is contained within the oven.
- Clean up: Once the self-cleaning cycle is complete, the oven should be clean and free of grime. It’s important to clean the oven’s exterior and any other surfaces that may have been affected by the cycle, such as the countertops or floor.
Overall, running the oven’s self-cleaning cycle is a simple and effective way to maintain the cleanliness of your oven. By following the manufacturer’s guidelines and taking the necessary precautions, you can keep your oven looking and functioning its best.
Avoiding Overloading the Oven
It is essential to avoid overloading the oven to maintain its cleanliness. Overloading the oven can lead to uneven cooking, which can cause food to burn or stick to the walls of the oven. This can be difficult to clean and can also cause damage to the oven’s heating elements.
Here are some tips for avoiding overloading the oven:
- Plan your meals: Plan your meals in advance and make sure you only put in the oven what you need to cook.
- Use smaller dishes: If you have multiple dishes to cook, use smaller dishes instead of one large one. This will help to ensure that the oven is not overloaded.
- Spread out the cooking: If you have multiple dishes to cook, try to spread them out over several oven trays. This will help to ensure that the oven is not overloaded and that the food cooks evenly.
- Check the oven racks: Make sure the oven racks are not too full before putting them in the oven. If they are too full, they may collapse and cause food to spill over and stick to the walls of the oven.
- Be mindful of the size of the food: Be mindful of the size of the food you are cooking. If you are cooking large items, such as a turkey or a roast, make sure the oven is big enough to accommodate them.
By following these tips, you can avoid overloading your oven and maintain its cleanliness.
Keeping the Oven Dust-Free
Keeping the oven dust-free is an essential aspect of maintaining its cleanliness. Over time, dust, crumbs, and other debris can accumulate inside the oven, reducing its efficiency and potentially causing damage to the appliance. To keep your oven dust-free, follow these steps:
- Regularly clean the oven’s interior: After each use, wipe down the oven’s interior with a damp cloth or sponge to remove any spills or spatters. For tougher stains, use a mild detergent or baking soda to scrub the surface.
- Use a professional oven cleaning service: If you notice that your oven is particularly dirty or difficult to clean, consider hiring a professional oven cleaning service. These services use specialized equipment and techniques to deep clean the oven, leaving it free of dust and debris.
- Check for loose crumbs: Before turning on the oven, check for any loose crumbs or debris that may have accumulated on the oven’s floor or inside the oven’s door. Removing these crumbs before cooking can help prevent them from catching fire or causing a mess.
- Clean the oven’s filters: If your oven has filters, clean them regularly to prevent dust and debris from accumulating. Follow the manufacturer’s instructions for cleaning the filters, as some may require specialized tools or cleaning solutions.
- Use a dustpan and brush: When cleaning the oven, use a dustpan and brush to sweep up any loose debris or dust that may have accumulated. This will help prevent dust from spreading throughout your kitchen and make cleaning the oven easier in the future.
By following these steps, you can help keep your oven dust-free and maintain its cleanliness over time. Regular cleaning will not only improve the oven’s performance but also extend its lifespan and ensure that it continues to function properly for years to come.
Tips and Tricks for Oven Cleaning
Using Baking Soda to Absorb Odors
One of the most effective and eco-friendly ways to clean the inside of your oven is by using baking soda. Baking soda is a great odor absorber and can help eliminate any lingering smells from previous cooking sessions.
Here are some tips for using baking soda to clean your oven:
- Prepare the baking soda mixture: Mix 2-3 tablespoons of baking soda with a little water to form a paste. The paste should be thick enough to coat the inside of your oven, but not so thick that it’s difficult to apply.
- Apply the paste to the oven walls: Use a sponge or spray bottle to apply the baking soda paste to the walls of your oven. Be sure to cover all surfaces, including the oven racks and any other nooks and crannies.
- Let it sit: Allow the baking soda paste to sit on the oven walls for at least 30 minutes. This will give it enough time to absorb any odors and stains.
- Scrub if necessary: If there are stubborn stains or odors, use a non-abrasive sponge or brush to gently scrub the surface.
- Rinse with water: Once you’ve applied the baking soda paste and allowed it to sit, use a damp sponge or cloth to wipe away any remaining residue.
- Dry the oven: Use a clean towel to wipe away any excess moisture and allow the oven to air dry completely before using it again.
Using baking soda to clean your oven is a simple and effective way to eliminate odors and leave your oven looking and smelling fresh.
Removing Tough Stains with White Vinegar
Cleaning the inside of your oven can be a daunting task, especially when it comes to removing tough stains. But fear not, as there are several methods you can use to get your oven looking like new again. One of the most effective methods is using white vinegar.
White vinegar is a versatile household product that can be used for a variety of cleaning tasks. When it comes to removing tough stains from your oven, white vinegar is a great option because it is gentle on the surface of your oven and can effectively remove grease and grime.
Here are the steps you can follow to remove tough stains with white vinegar:
- Mix equal parts of white vinegar and water in a spray bottle.
- Spray the mixture onto the stain and let it sit for about 15 minutes.
- Use a soft cloth or sponge to scrub the stain.
- Rinse the area with water and dry it with a clean cloth.
It’s important to note that while white vinegar is an effective cleaning agent, it may not work on all types of stains. If the stain is particularly stubborn, you may need to try a different method or use a commercial oven cleaner.
Additionally, it’s important to use caution when using white vinegar on your oven, as it can potentially damage the surface if left on for too long. Always test the vinegar mixture on a small, inconspicuous area of your oven before using it on the entire surface.
By following these simple steps, you can effectively remove tough stains from your oven using white vinegar. Not only will your oven look cleaner, but it will also function better and last longer.
Using Aluminum Foil to Protect the Oven’s Surface
Aluminum foil is a useful tool when cleaning the inside of your oven. It can be used to protect the oven’s surface from scratches and dents caused by abrasive cleaning products. Here are some tips on how to use aluminum foil when cleaning your oven:
- Place a piece of aluminum foil on the oven racks before cleaning. This will prevent the cleaning solution from coming into contact with the oven’s surface and causing any damage.
- After cleaning, remove the aluminum foil from the oven racks and dispose of it properly. Do not let it come into contact with food or be left in the oven as it can cause a fire.
- When using aluminum foil to protect the oven’s surface, make sure it is clean and free from any debris or food particles. This will prevent any contamination of the cleaning solution and ensure that the oven is thoroughly cleaned.
Overall, using aluminum foil to protect the oven’s surface is a simple and effective way to keep your oven looking like new. It is an affordable and easily accessible tool that can be used in conjunction with other cleaning products to ensure that your oven is thoroughly cleaned without any damage to the surface.
Keeping the Oven’s Door Open During Cleaning
One of the most effective ways to clean the inside of your oven is by keeping the door open during the cleaning process. This method is especially useful for removing stubborn grime and residue that has built up over time. Here are some steps to follow when keeping the oven door open during cleaning:
- Turn off the oven and remove any cookware or food particles.
- Place a folded piece of aluminum foil at the bottom of the oven to catch any falling debris.
- Open the oven door fully and place a baking sheet or large spatula underneath to catch any loose particles that may fall out.
- Sprinkle a small amount of baking soda or white vinegar onto a clean sponge or cloth.
- Gently insert the sponge or cloth into the oven, using it to scrub away any grime and residue.
- As you scrub, use a non-abrasive sponge or cloth to wipe down the inside of the oven, paying extra attention to the hard-to-reach areas.
- Let the baking soda or vinegar sit on the oven’s surface for a few minutes to allow it to work its magic.
- Remove the sponge or cloth and dispose of it in the trash.
- Rinse and dry the oven with a clean, damp cloth.
- Once the oven is clean, remove the aluminum foil and baking sheet or spatula, and wipe down the door with a dry cloth.
By keeping the oven door open during cleaning, you’ll be able to get into all the nooks and crannies of your oven, making it easier to remove stubborn grime and residue. Additionally, this method allows the cleaning solution to penetrate deeper into the oven’s surface, making for a more thorough cleaning.
Keeping Children and Pets Away from the Oven During Cleaning
While cleaning the inside of your oven, it is important to keep children and pets away from the appliance to ensure their safety. Here are some guidelines to follow:
- Lock the Oven Door: Before starting the cleaning process, lock the oven door to prevent children or pets from accidentally opening it and potentially getting hurt.
- Use Caution with Chemicals: If you are using harsh chemicals or abrasive cleaners, make sure they are out of reach of children and pets. Keep them in a safe place, such as a locked cabinet, until the cleaning is complete.
- Supervise Pets: If you have pets that like to explore, supervise them while you are cleaning the oven. Keep them in a separate room or on a leash to prevent them from getting too close to the oven.
- Keep the Area Clear: Clear the area around the oven of any items that could be dangerous to children or pets, such as kitchen utensils or knives.
- Use Non-Toxic Cleaners: If you are using non-toxic cleaners, make sure they are pet-friendly and safe for children to be around.
- Finish Cleaning in a Well-Ventilated Area: After cleaning the oven, make sure to finish cleaning in a well-ventilated area to avoid any chemical fumes that may be harmful to children or pets.
By following these guidelines, you can ensure the safety of your children and pets while cleaning the inside of your oven.
Frequently Asked Questions
What is the best way to clean the inside of an oven?
There are several methods to clean the inside of an oven, each with its own advantages and disadvantages. The best method for you will depend on the type of oven you have, its size, and the extent of the soiling. Here are some popular methods to consider:
- Using a DIY Oven Cleaning Kit
A DIY oven cleaning kit is a convenient and cost-effective way to clean your oven. These kits typically contain a gel or paste that you apply to the oven interior, let it sit for a specified amount of time, and then wipe away. They are generally safe to use on a variety of oven surfaces, including glass, metal, and enamel. However, they may not be as effective on heavily soiled ovens or those with burnt-on food. - Hiring a Professional Oven Cleaning Service
Hiring a professional oven cleaning service can be a great option if you want a deep clean or don’t feel comfortable cleaning your oven yourself. Professional cleaners use specialized equipment and techniques to remove stubborn grime and stains, leaving your oven looking like new. They also typically offer a range of additional services, such as oven repair and maintenance. However, hiring a professional can be expensive, especially if you have a large or commercial-grade oven. - Using Baking Soda and Vinegar
Baking soda and vinegar are two natural cleaning agents that can be used to clean the inside of an oven. Baking soda can be sprinkled on the oven floor and left overnight, then vacuumed up in the morning. Vinegar can be mixed with water and sprayed onto the oven interior, then wiped away with a cloth. These methods are gentle and non-abrasive, making them safe for use on most oven surfaces. However, they may not be as effective on heavily soiled ovens or those with burnt-on food. - Using Steel Wool or Sponge Scourers
Steel wool or sponge scourers can be used to scrub the inside of an oven. These methods are more abrasive than the previous methods, but can be effective on heavily soiled ovens or those with burnt-on food. However, they may scratch or damage some oven surfaces, especially enamel or porcelain.
Overall, the best way to clean the inside of an oven will depend on the specific needs of your oven and your personal preferences. Consider the size of your oven, the extent of the soiling, and your budget when deciding which method to use.
How often should I clean my oven?
Cleaning the inside of your oven is an essential task that should not be ignored. Over time, food residue, grease, and other debris can build up inside the oven, causing unpleasant odors and affecting the performance of the appliance. Therefore, it is crucial to clean your oven regularly to ensure it operates efficiently and lasts longer. But how often should you clean your oven?
The frequency of cleaning your oven depends on several factors, including the type of oven, the amount of use, and the type of cooking you do. As a general rule, it is recommended to clean your oven at least once every three months. However, if you use your oven frequently or cook with oils and greasy foods, you may need to clean it more often.
If you notice any unusual odors, smoke, or issues with cooking, it may be a sign that your oven needs to be cleaned. Ignoring these signs can lead to further buildup and damage to the oven, which may require more extensive repairs or replacement.
Cleaning your oven regularly is not only essential for its proper functioning but also for safety reasons. Grease and food residue can catch fire if they come into contact with a heat source, which can be dangerous.
In summary, cleaning the inside of your oven is a necessary task that should be done at least once every three months. However, the frequency of cleaning may vary depending on the type of oven, the amount of use, and the type of cooking you do. It is essential to listen to your oven and clean it when necessary to ensure its proper functioning and safety.
Can I use bleach to clean my oven?
Many homeowners wonder if they can use bleach to clean their oven. While bleach is a powerful cleaning agent, it is not always the best choice for cleaning your oven. Here are some factors to consider when deciding whether to use bleach:
- Safety: Bleach can be hazardous if used improperly. It can cause irritation to eyes and skin, and it can be harmful if ingested or inhaled. If you have any concerns about using bleach, you should consult with a professional cleaner or consider other cleaning options.
- Effectiveness: Bleach can be effective at cleaning certain types of stains and odors, but it may not be the best choice for all types of messes. For example, if your oven has burnt-on grease or food residue, you may need to use a different type of cleaner.
- Damage: Bleach can damage some types of surfaces, including painted or enameled surfaces. If you are unsure whether bleach is safe to use on your oven, you should test it on a small, inconspicuous area first.
Overall, while bleach can be a useful cleaning agent, it is not always the best choice for cleaning your oven. If you are unsure whether to use bleach, you should consider other cleaning options or consult with a professional cleaner.
Is it safe to use a self-cleaning oven?
When it comes to cleaning your oven, the self-cleaning feature can be a tempting option. However, there are concerns about the safety of using this feature. Here are some key points to consider:
- Is it safe to use a self-cleaning oven? The short answer is yes, it is generally safe to use a self-cleaning oven. Most modern ovens have a self-cleaning feature that uses high heat to break down grease and food residue, and then the oven’s fan circulates the heat to speed up the process. This method is effective at removing burnt-on food and grime, but it’s important to follow the manufacturer’s instructions carefully.
- Can the fumes from a self-cleaning oven be harmful? When the self-cleaning cycle is in progress, it’s important to keep the oven well-ventilated. The fumes produced by the high heat can be irritating to the eyes and respiratory system, so it’s recommended to avoid using the oven during this time if possible. However, the fumes should not be harmful if the oven is properly ventilated.
- Is it safe to use a self-cleaning oven if you have a gas oven? Yes, it is safe to use a self-cleaning oven if you have a gas oven. However, it’s important to follow the manufacturer’s instructions carefully and to be aware that the process may take longer than usual due to the need to preheat the oven before starting the cleaning cycle.
- Is it safe to use a self-cleaning oven if you have a glass-top stove? If you have a glass-top stove, it’s recommended to avoid using the self-cleaning feature on the oven. The high heat can cause damage to the glass surface, and the use of abrasive cleaners or scouring pads can scratch the surface. Instead, use a gentle, non-abrasive cleaner and a soft cloth to clean the glass top.
In conclusion, while there are some safety concerns to consider when using a self-cleaning oven, it is generally safe to do so if you follow the manufacturer’s instructions carefully. However, if you have a glass-top stove, it’s best to avoid using the self-cleaning feature on the oven to prevent damage to the surface.
How do I clean the fan and filter in my oven?
The fan and filter in your oven play a crucial role in maintaining its overall performance. Over time, these components can become clogged with food debris, which can impede airflow and affect the temperature inside the oven. To ensure that your oven is working at its best, it’s important to know how to clean the fan and filter.
Steps to Clean the Fan and Filter in Your Oven
- Unplug the Oven: Before you start cleaning the fan and filter, make sure to unplug the oven from the power source to avoid any accidents.
- Remove the Front Panel: Most ovens have a front panel that can be removed by gently pulling it away from the oven’s body. This will give you access to the fan and filter.
- Remove the Filter: Once you have access to the fan and filter, you can remove the filter by gently pulling it out. Be careful not to damage the filter, as it may be attached to the oven’s body.
- Clean the Filter: Use a soft brush or a vacuum cleaner to remove any debris from the filter. Avoid using water or harsh chemicals, as they can damage the filter.
- Clean the Fan: Use a soft brush or a vacuum cleaner to remove any debris from the fan blades. You can also use a mild detergent and water mixture to clean the fan, but make sure to dry it thoroughly before reassembling the oven.
- Reassemble the Oven: Once you have cleaned the fan and filter, reassemble the oven by replacing the front panel and plugging it back in.
Tips for Maintaining the Fan and Filter
- Regular Cleaning: It’s recommended to clean the fan and filter of your oven at least once a month to ensure optimal performance.
- Use a Dust Mask: When cleaning the fan and filter, wear a dust mask to avoid inhaling any dust or debris.
- Check for Damage: Before cleaning the fan and filter, check for any signs of damage, such as broken blades or disconnected parts. If you notice any damage, consult a professional for repairs.
By following these steps and tips, you can keep your oven’s fan and filter clean and ensure that your oven is working at its best.
What should I do if I am unable to remove stains from my oven?
If you’ve tried every method available and still can’t remove stains from your oven, don’t worry, you’re not alone. There are several reasons why you might be having trouble removing stains from your oven, including:
- Residual heat: The oven may still be warm from a previous use, making it difficult to remove stains. In this case, wait for the oven to cool down before attempting to clean it.
- Hard-to-remove stains: Some stains, such as burnt-on grease or food, can be particularly stubborn and require additional effort to remove.
- Improper cleaning methods: If you’re using the wrong cleaning methods or tools, you may be making the stains worse instead of removing them.
If you’re having trouble removing stains from your oven, here are some additional tips that may help:
- Use a stronger cleaning solution: If the stains are particularly stubborn, you may need to use a stronger cleaning solution. You can try mixing baking soda and water to create a paste, and then applying it to the stains. Let it sit for a few minutes before scrubbing it off with a non-abrasive sponge.
- Apply heat: If the stains are caused by burnt-on grease or food, applying heat may help to loosen them. You can try using a hairdryer to heat up the area around the stains, and then wiping it off with a non-abrasive sponge.
- Call a professional: If you’ve tried everything and still can’t remove the stains, it may be time to call a professional oven cleaning service. They have the tools and expertise to remove even the toughest stains, and can restore your oven to like-new condition.
FAQs
1. What are the best methods for cleaning the inside of an oven?
There are several methods for cleaning the inside of an oven, including using baking soda and vinegar, commercial oven cleaners, or even using a steam cleaner. It’s important to choose a method that is safe for your specific type of oven and that will effectively remove grime and odors.
2. How often should I clean the inside of my oven?
It’s recommended to clean the inside of your oven at least once a year, but more frequently if you use your oven frequently or if you notice a buildup of grease or food residue. Neglecting to clean your oven can lead to the buildup of dangerous bacteria and can also cause your oven to work less efficiently.
3. Can I use any cleaner on the inside of my oven?
No, not all cleaners are safe to use on the inside of an oven. Some commercial cleaners can be too harsh and can damage the paint or finish on your oven, while others may not be effective at removing tough grime and odors. It’s important to choose a cleaner that is specifically designed for use on ovens and that is safe for your specific type of oven.
4. Is it safe to use baking soda to clean the inside of my oven?
Yes, using baking soda is a safe and effective way to clean the inside of your oven. Baking soda is a natural abrasive that can help to break down grease and food residue, and it’s also a mild alkali that can help to neutralize odors. To use baking soda to clean your oven, simply sprinkle a small amount of baking soda onto a cleaning pad or cloth and wipe down the inside of your oven.
5. Can I use a steam cleaner to clean the inside of my oven?
Yes, using a steam cleaner is a safe and effective way to clean the inside of your oven. A steam cleaner uses hot water vapor to loosen and remove grime and odors, which can be especially useful for removing tough baked-on grime. To use a steam cleaner to clean your oven, simply attach the cleaner to the hose of your steam cleaner and use it to clean the inside of your oven, paying particular attention to any difficult-to-reach areas. Be sure to follow the manufacturer’s instructions for use and safety precautions.


