Is your oven looking more charcoal than chrome? Is cooking a feast turning into a fire hazard? Don’t let burnt residue get you down! It’s time to restore your oven’s glow with our step-by-step guide to cleaning burnt residue. From prepping to polishing, we’ll walk you through the process so you can cook up a storm in no time. Let’s get started!
Understanding Burnt Residue in Ovens
What is burnt residue?
Burnt residue refers to the black or brown buildup that often forms on the interior walls and elements of an oven, such as the racks, broiler pan, and bakeware. This residue is composed of a variety of materials, including food particles, grease, and other organic matter that have been subjected to high temperatures and have undergone thermal degradation. Over time, burnt residue can accumulate and create a thick layer that can interfere with the proper functioning of the oven, affecting its ability to distribute heat evenly and cook food evenly. Additionally, burnt residue can create an unpleasant odor and leave a stain on dishes and utensils. Therefore, it is important to remove burnt residue from an oven regularly to ensure optimal performance and prevent damage to the oven and its components.
Why is it problematic?
Burnt residue in an oven can pose a significant problem for several reasons. Firstly, it can affect the aesthetic appeal of the oven, leaving it looking dull and dirty. This can also make it difficult to maintain a clean and organized kitchen. Secondly, burnt residue can lead to unpleasant odors that can linger in the air, making it difficult to enjoy cooking and eating in the same space. Additionally, the buildup of burnt residue can affect the overall performance of the oven, leading to inefficient heating and cooking times.
Furthermore, the buildup of burnt residue can be a breeding ground for bacteria, which can lead to foodborne illnesses if not properly cleaned. It is essential to remove burnt residue from the oven regularly to ensure the safety of your food and the cleanliness of your kitchen.
Common areas where burnt residue accumulates
Burnt residue is a common problem that arises in ovens due to overcooking or burning of food. This residue can accumulate in various areas of the oven, including:
- The oven floor: The floor of the oven is the most common area where burnt residue accumulates. This is because it is the area where food is placed and cooked, and it is also the area that is closest to the heat source.
- The oven walls: Burnt residue can also accumulate on the walls of the oven, particularly in areas where food is placed on racks.
- The oven door: The door of the oven can also accumulate burnt residue, particularly if it is not properly sealed.
- The oven racks: Burnt residue can also accumulate on the racks of the oven, particularly if they are not cleaned regularly.
It is important to note that burnt residue can affect the performance of the oven and can cause it to heat unevenly. Therefore, it is essential to clean the oven regularly to remove any burnt residue that has accumulated.
The Importance of Oven Cleaning
Reasons to clean your oven regularly
Regular oven cleaning is crucial for maintaining a safe and efficient kitchen environment. Neglecting this essential task can lead to a buildup of grease, food residue, and other debris, which can cause several problems. Here are some reasons why you should clean your oven regularly:
- Preventing fires: Grease and food particles can ignite and cause a fire if they come into contact with a heat source. Regular cleaning helps prevent these incidents by removing flammable materials from the oven.
- Maintaining safety: A dirty oven can harbor bacteria, which can contaminate your food and make you sick. Cleaning your oven regularly helps to eliminate harmful bacteria and maintain a safe cooking environment.
- Prolonging the lifespan of your oven: Dirt and debris can accumulate and wear down the oven’s components, such as the heating elements and fans. By cleaning your oven regularly, you can help prevent damage to these parts and extend the lifespan of your oven.
- Maintaining a pleasant odor: A dirty oven can leave a lingering unpleasant odor that can permeate your kitchen. Regular cleaning helps remove food residue and other odor-causing particles, leaving your kitchen smelling fresh and clean.
- Restoring your oven’s glow: A clean oven not only looks better but also performs better. Regular cleaning can help restore your oven’s original shine and ensure that it cooks evenly and efficiently.
By following a regular cleaning schedule, you can ensure that your oven remains safe, efficient, and attractive. In the next section, we will discuss the steps involved in cleaning burnt residue from your oven.
Health and safety considerations
Cleaning your oven is not just about restoring its appearance and improving its performance, it is also essential for your health and safety. Here are some key health and safety considerations to keep in mind when cleaning your oven:
- Toxic chemicals: Many oven cleaners contain harsh chemicals that can be harmful if inhaled or ingested. Always read the label carefully and follow the manufacturer’s instructions for safe use. If you are concerned about the safety of commercial cleaners, consider making your own oven cleaner using natural ingredients like baking soda and vinegar.
- Heat exposure: Ovens can reach extremely high temperatures during cooking, and these temperatures can remain for some time after cooking is finished. This means that even after you have finished cooking, the oven can still be hot enough to cause burns or other injuries. Always wear protective gloves and take care when handling hot pans and utensils.
- Food safety: Ovens can harbor harmful bacteria, particularly if food residues are allowed to build up over time. Cleaning your oven regularly can help prevent the spread of illness and reduce the risk of foodborne illness.
- Fire hazards: If your oven is not cleaned regularly, there is an increased risk of fire. Grease and food residues can ignite if they come into contact with a spark or flame, which can lead to a fire in your home.
Overall, cleaning your oven is an important part of maintaining a safe and healthy kitchen environment. By following the steps outlined in this guide, you can effectively remove burnt residue and restore your oven’s glow, while also protecting your health and safety.
Preventing damage to your oven
Proper oven cleaning is essential to prevent damage to your oven. Here are some reasons why:
- Extending the lifespan of your oven: Burnt residue and grease can accumulate over time and cause damage to the oven’s internal components. This can lead to decreased efficiency, uneven cooking, and even damage to the heating elements. Regular cleaning can help extend the lifespan of your oven by preventing these issues.
- Preventing safety hazards: Grease and burnt residue can ignite and cause a fire hazard. Additionally, if left uncleaned, the buildup can release harmful toxins into the air when exposed to high heat. Cleaning your oven regularly can help prevent these safety hazards.
- Maintaining the aesthetic appeal: A clean oven not only functions better but also looks better. A dirty oven can be an eyesore and detract from the overall appearance of your kitchen. Regular cleaning can help maintain the aesthetic appeal of your oven and your kitchen.
Overall, proper oven cleaning is essential to prevent damage to your oven, maintain its functionality, and ensure your safety.
Choosing the Right Cleaning Method
Factors to consider when selecting a cleaning method
When it comes to choosing the right cleaning method for your oven, there are several factors to consider. Here are some key factors to keep in mind:
- The type of oven you have: Different ovens require different cleaning methods. For example, self-cleaning ovens have a special coating that requires a specific type of cleaner, while conventional ovens may require a different approach.
- The severity of the burnt residue: If the burnt residue is particularly stubborn, you may need to use a stronger cleaning method. However, if the residue is relatively light, a milder method may be sufficient.
- Your available tools and resources: Depending on the cleaning method you choose, you may need certain tools or resources. For example, if you choose to use baking soda and vinegar, you will need both of those ingredients on hand.
- Your personal preferences: Finally, consider your own personal preferences when choosing a cleaning method. If you prefer natural, eco-friendly cleaning methods, you may want to avoid harsh chemicals. On the other hand, if you are short on time and want a quick solution, you may opt for a faster cleaning method.
Comparison of popular cleaning methods
When it comes to cleaning burnt residue from your oven, there are several popular methods that you can try. Each method has its own set of advantages and disadvantages, so it’s important to choose the right one for your specific needs. In this section, we’ll compare some of the most popular cleaning methods to help you make an informed decision.
Baking Soda and Vinegar
One of the most common methods for cleaning burnt residue from an oven is using a mixture of baking soda and vinegar. This method is easy to use and can be effective at removing stubborn burnt residue. Here’s how it works:
- Mix equal parts baking soda and vinegar to form a paste.
- Apply the paste to the burnt residue and let it sit for a few hours.
- Scrub the residue off with a sponge or brush.
- Rinse the oven with water and dry it with a clean cloth.
Advantages:
- Inexpensive and easy to find ingredients.
- Effective at removing burnt residue.
- Non-abrasive, so it won’t scratch the oven’s surface.
Disadvantages:
- May not work as well on heavily burnt residue.
- Can take several hours to work.
Steam Cleaning
Another popular method for cleaning burnt residue from an oven is steam cleaning. This method uses hot water vapor to loosen and remove the burnt residue. Here’s how it works:
- Fill a pot with water and bring it to a boil.
- Attach a steam cleaner head to a vacuum cleaner or use a steam cleaner machine.
- Direct the steam at the burnt residue and let it sit for a few minutes.
- Scrub the residue off with a sponge or brush.
-
Rinse the oven with water and dry it with a clean cloth.
-
Can be effective at removing burnt residue.
- Uses only water, so it’s eco-friendly.
-
Can be used on a variety of surfaces.
-
May require specialized equipment.
- Can be time-consuming.
Commercial Cleaners
If you’re looking for a more powerful cleaning solution, you can try using a commercial oven cleaner. These cleaners are specifically designed to remove burnt residue and other tough stains. Here’s how it works:
- Apply the cleaner to the burnt residue and let it sit for the recommended amount of time.
- Scrub the residue off with a sponge or brush.
-
Rinse the oven with water and dry it with a clean cloth.
-
Can be very effective at removing burnt residue.
-
Comes in a ready-to-use formula.
-
Can be expensive.
- May contain harsh chemicals that can be harmful if used improperly.
Overall, choosing the right cleaning method for your oven’s burnt residue will depend on your personal preferences and the severity of the residue. Each method has its own set of advantages and disadvantages, so it’s important to choose the one that works best for you.
Safety precautions to take
Before attempting to clean your oven, it is important to take certain safety precautions to ensure that you and your oven are protected from any potential hazards. Here are some key safety measures to keep in mind:
- Always wear protective gear such as gloves, a dust mask, and safety goggles when cleaning your oven.
- Never mix cleaning chemicals or use bleach and ammonia-based cleaners together, as this can create toxic fumes.
- Always work in a well-ventilated area, preferably with the windows open or a fan running to dissipate any fumes.
- Never use harsh cleaning agents or abrasive materials on the oven’s glass window, as this can scratch the surface.
- Always unplug the oven or turn off the gas before cleaning to avoid any accidents.
- Be cautious when using sharp objects such as knives or scouring pads, as they can cause injury.
By following these safety precautions, you can avoid any potential hazards and ensure that your oven is cleaned thoroughly and safely.
Cleaning the Oven Interior
Removing burnt residue with a cleaning solution
Removing burnt residue from the oven interior is a crucial step in restoring its glow. This can be achieved by using a cleaning solution that is specifically designed to tackle the toughest burnt-on food and grease. Here are the steps to follow:
- Prepare the cleaning solution: To prepare the cleaning solution, mix equal parts of water and white vinegar in a spray bottle. You can also add a few drops of mild dish soap for extra cleaning power. Shake the bottle well and spray the mixture onto the burnt residue, ensuring that the entire surface is covered.
- Scrub the residue: Using a non-abrasive sponge or cloth, scrub the burnt residue until it loosens. You may need to use a bit of elbow grease to remove the toughest residue.
- Let it sit: Allow the cleaning solution to sit on the burnt residue for about 15-30 minutes. This will give the vinegar and dish soap time to penetrate the residue and break it down.
- Scrub again: After the designated time, scrub the residue again with the non-abrasive sponge or cloth. This should help to remove most of the burnt residue, leaving your oven looking brighter and cleaner.
- Rinse and dry: Use a clean, damp cloth to wipe away any remaining residue, and then dry the oven with a clean towel.
- Inspect the results: Once the oven is completely dry, inspect the results. If there is still some residue remaining, repeat the process as necessary until the oven is completely clean.
Remember to always work in a well-ventilated area when using cleaning solutions, and never use abrasive or harsh chemicals on your oven as this can damage the surface. By following these steps, you can effectively remove burnt residue from your oven, restoring its glow and leaving it looking like new.
Scouring pads, steel wool, and other tools for the job
When it comes to cleaning the interior of your oven, there are a variety of tools that you can use to get the job done. Here are some of the most common options:
- Scouring pads: These are thick, abrasive pads that are designed to scrub away tough grime and stains. They are ideal for removing burnt residue and other stubborn messes.
- Steel wool: This is a type of metal-based scrubbing material that is designed to be gentle on non-stick surfaces. It is a good option for cleaning the inside of your oven because it is effective at removing grime and residue without scratching the surface.
- Oven cleaning solutions: These are specially formulated cleaners that are designed to dissolve and remove burnt residue, grease, and other grime from your oven’s interior. They can be an effective option if you want to avoid using abrasive materials on your oven.
- Baking soda: This is a natural cleaning agent that is effective at absorbing odors and neutralizing acidic residues. It can be a useful addition to your cleaning arsenal when dealing with burnt residue and other tough stains.
- Vinegar: This is a natural cleaning agent that is effective at breaking down grease and grime. It can be used on its own or in combination with baking soda to create a powerful cleaning solution.
When choosing the tools you will use to clean your oven, it is important to consider the type of surface you are working with. For example, if you have a non-stick oven surface, you will want to avoid using abrasive materials like scouring pads that could scratch the surface. In general, it is best to start with the least abrasive tools possible and work your way up to more aggressive options if needed.
Tips for cleaning difficult-to-reach areas
When it comes to cleaning the interior of your oven, there may be some areas that are difficult to reach. Here are some tips to help you get the job done effectively:
- Use a long-handled brush or sponge to reach the difficult-to-reach areas. These tools are designed to extend your reach, making it easier to clean the oven walls and floor.
- Take the oven racks out and clean them separately. If your oven has racks, they can be removed for easier cleaning. Use a sponge or brush to clean the racks, and then rinse them with warm water.
- Use a degreaser to help loosen the burnt residue. Spray a degreaser directly onto the difficult-to-reach areas and let it sit for a few minutes before wiping it away with a sponge or cloth.
- Scour the oven interior with a steel wool pad. Steel wool is a great tool for scrubbing away tough burnt residue. Be sure to use a pad that is specifically designed for use on oven interiors.
- Use a ladder to reach the top of the oven. If the top of the oven is difficult to reach, consider using a ladder to help you clean it. Be sure to use caution when using a ladder.
- Remove any debris or grease from the control panel. Use a soft, damp cloth to wipe away any debris or grease that has accumulated on the control panel.
By following these tips, you can effectively clean the difficult-to-reach areas of your oven.
Cleaning the Oven Exterior
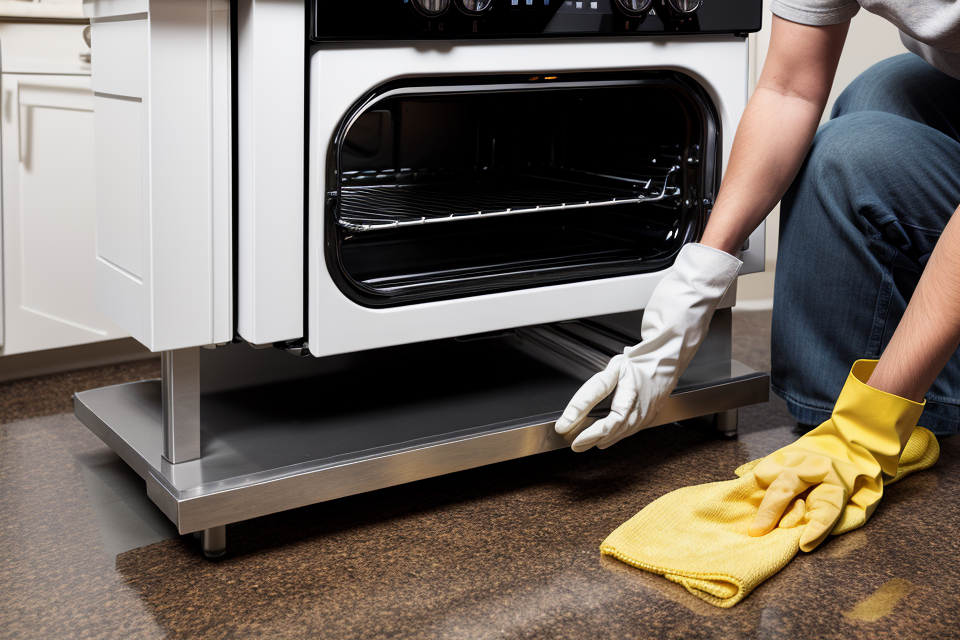
Removing burnt residue from the exterior of the oven
Before moving on to the interior of the oven, it is essential to clean the exterior thoroughly. This step is crucial as any remaining residue on the exterior can lead to the buildup of grease and dirt on the inside, making it harder to clean.
The first step in removing burnt residue from the exterior of the oven is to preheat the oven to its highest setting for about 30 minutes. This step will help loosen the burnt residue, making it easier to remove.
Once the oven is preheated, take a clean sponge or cloth and wet it with warm water. Apply a small amount of mild dish soap to the sponge or cloth, and use it to scrub the exterior of the oven. Start from the top and work your way down to the bottom, ensuring that you scrub all the way around the oven.
After scrubbing, take a clean, dry cloth and wipe down the exterior of the oven to remove any remaining moisture. If there is still stubborn residue, you can use a non-abrasive scouring pad or steel wool to scrub the area gently.
Once the exterior is clean, it is essential to inspect the oven for any damage or discoloration. If there is any damage, it is recommended to contact a professional repair service.
Overall, cleaning the exterior of the oven is a crucial step in restoring its glow. By preheating the oven and using a mild dish soap, you can effectively remove burnt residue and prepare the oven for the next cleaning step.
Cleaning the control panel and knobs
When it comes to cleaning the control panel and knobs of your oven, there are a few steps you can take to ensure they look like new again.
- Unplug the oven: Before you start cleaning, it’s important to unplug the oven to avoid any electrical shocks.
- Gather the necessary tools: You’ll need a soft cloth, a mild detergent, and some warm water.
- Clean the control panel: Use the soft cloth and warm water to wipe down the control panel. If there are any stubborn stains, use a small amount of mild detergent and gently scrub the area.
- Clean the knobs: Use the same method to clean the knobs. If they are removable, you can soak them in warm water and mild detergent for a few minutes before scrubbing them clean.
- Dry the control panel and knobs: Use a clean towel to dry the control panel and knobs thoroughly.
- Check for any remaining residue: Use a soft cloth to wipe down the control panel and knobs once more to ensure they are completely clean.
By following these steps, you can easily clean the control panel and knobs of your oven and restore its original glow.
Restoring the oven’s finish
- Reason for cleaning the oven’s finish: Over time, the oven’s exterior can become dull and discolored due to spills, grease buildup, and general wear and tear. This not only affects the oven’s appearance but also its performance, as heat can be trapped in the layers of grime.
- Methods for cleaning the oven’s finish: There are several methods to restore the oven’s finish, ranging from basic cleaning with a mild detergent to more extensive techniques such as using a power washer or sanding. The choice of method depends on the severity of the grime and the material the oven is made of.
- Cleaning with a mild detergent: For minor grime and stains, a simple solution of warm water and mild detergent can be used to clean the oven’s exterior. Apply the solution to a soft cloth or sponge and wipe down the surface, rinsing with clean water as needed. Be sure to test the solution on a small, inconspicuous area first to ensure it won’t damage the finish.
- Using a power washer: For more stubborn grime and stains, a power washer can be used with caution. Aim the water stream away from the oven’s surface to avoid causing damage. Start at a low pressure setting and gradually increase if needed. Be sure to test the water stream on a small, inconspicuous area first to ensure it won’t damage the finish.
- Sanding: For severe damage or deep stains, sanding may be necessary. Use a fine-grit sandpaper to avoid scratching the surface, and work in small sections to avoid damaging the surrounding area. After sanding, wipe down the surface with a damp cloth to remove any dust or debris.
- Re-applying a finish: Once the oven’s exterior is clean and free of grime, a finish can be re-applied to restore its original luster. This can be done using a specialized oven finish restorer or a high-quality furniture polish. Be sure to follow the manufacturer’s instructions for application and allow sufficient time for the finish to dry before using the oven.
Maintaining Your Oven After Cleaning
Recommended maintenance tasks
After you have successfully cleaned your oven, it is important to maintain it to ensure that it continues to function properly and lasts for a long time. Here are some recommended maintenance tasks that you can do:
- Clean the oven regularly: It is recommended to clean your oven at least once a month to remove any food particles or spills that may have accumulated. This will prevent the buildup of grease and residue, which can damage the oven’s components and affect its performance.
- Check the seals: Check the seals around the oven door to ensure that they are in good condition. If the seals are worn or damaged, they may not properly seal the oven, leading to heat loss and energy inefficiency. Replace the seals if necessary.
- Inspect the heating elements: Inspect the heating elements in your oven to ensure that they are in good condition. If the heating elements are damaged or worn, they may not heat the oven properly, leading to uneven cooking and poor performance. Replace the heating elements if necessary.
- Lubricate the oven door: Lubricate the hinges and tracks of the oven door to ensure that it opens and closes smoothly. This will prevent the door from getting stuck or becoming difficult to open, which can cause damage to the door or the oven.
- Check the temperature control: Check the temperature control in your oven to ensure that it is working properly. If the temperature control is not functioning correctly, it may not be able to maintain the correct temperature, leading to poor cooking results.
By following these recommended maintenance tasks, you can ensure that your oven is in good condition and functioning properly. Regular maintenance will not only improve the performance of your oven but also help to extend its lifespan.
How often to clean your oven
Regular maintenance is key to keeping your oven in good condition and preventing the buildup of burnt residue. Here are some guidelines on how often to clean your oven:
- Monthly cleaning: It is recommended to clean your oven once a month to remove any food particles or spills that may have accumulated. This will also help prevent the buildup of burnt residue.
- Quarterly cleaning: In addition to monthly cleaning, it is recommended to do a deeper cleaning of your oven every three months. This involves removing the oven racks and cleaning them thoroughly, as well as cleaning the oven interior and exterior.
- Annual cleaning: Once a year, it is recommended to give your oven a thorough deep cleaning. This includes disassembling the oven and cleaning all the parts, including the fan and any other removable components.
By following these guidelines, you can help ensure that your oven stays in good condition and continues to cook your food evenly and efficiently. Remember, regular maintenance is key to preventing the buildup of burnt residue and ensuring that your oven stays in good working order.
Preventing future burnt residue buildup
- Keep the oven clean: Regularly wipe down the inside of the oven with a damp cloth and mild detergent to remove any spills or drips.
- Avoid overcrowding the oven: Don’t put too many dishes in the oven at once, as this can lead to uneven cooking and potentially cause burnt residue to build up.
- Use the right temperature: Make sure to use the correct temperature for the food you are cooking. Setting the oven too high can cause food to burn and create residue.
- Clean the oven racks: If you use oven racks, make sure to clean them regularly as well. They can accumulate food particles and grease, which can contribute to burnt residue buildup.
- Use the self-cleaning feature: Many ovens have a self-cleaning feature that uses high heat to break down burnt residue. Use this feature regularly to keep your oven clean and functioning properly.
Troubleshooting Common Oven Cleaning Issues
What to do if the cleaning solution doesn’t work
- Step 1: Identify the cause of the issue
- Incorrect cleaning solution
- Insufficient contact time
- Improper application
- Previous residue not fully removed
- Step 2: Assess the situation
- Inspect the oven for any remaining residue
- Check the cleaning solution for expiration or contamination
- Evaluate the cleaning process for any mistakes
- Step 3: Adjust the cleaning method
- Try a different cleaning solution or technique
- Increase the contact time with the solution
- Apply additional heat or scrubbing to the affected area
- Step 4: Consult the manufacturer or professional cleaning services
- For further assistance and guidance
- To ensure proper and safe cleaning methods are used
By following these steps, you can address the issue and restore your oven’s glow.
Dealing with stubborn burnt residue
Cleaning stubborn burnt residue from your oven can be a daunting task, but with the right tools and techniques, it can be done effectively. Here are some tips to help you deal with stubborn burnt residue:
Use a combination of different cleaning methods
One effective way to deal with stubborn burnt residue is to use a combination of different cleaning methods. For example, you can start by using a soft cloth or sponge to apply a mixture of baking soda and water to the affected area. Allow it to sit for a few minutes before scrubbing gently with a non-abrasive sponge or brush. You can also try using a paste made from vinegar and baking soda, which can help to break down the burnt residue.
Use a degreaser
If the burnt residue is particularly stubborn, you may need to use a degreaser. A degreaser is a powerful cleaning solution that can help to break down and remove tough grime and stains. You can find degreasers specifically designed for ovens at most hardware stores or online. Be sure to follow the instructions carefully and wear gloves and a mask to avoid inhaling any fumes.
Scour the residue with a steel wool pad
Another option for dealing with stubborn burnt residue is to use a steel wool pad. Start by wetting the pad with warm water and using it to scrub the affected area. You can also use a small amount of degreaser or vinegar to help loosen the residue. Be sure to work in small sections at a time to avoid scratching the oven’s surface.
Use a commercial oven cleaner
If all else fails, you may need to use a commercial oven cleaner. These cleaners are specifically designed to tackle stubborn grime and stains, and they can be very effective at removing burnt residue. However, they can be expensive and may damage the oven’s surface if used incorrectly. Be sure to follow the instructions carefully and wear gloves and a mask to avoid inhaling any fumes.
Overall, dealing with stubborn burnt residue requires patience and persistence. By using a combination of different cleaning methods and techniques, you can restore your oven’s glow and keep it looking like new.
Common mistakes to avoid during oven cleaning
Cleaning your oven can be a daunting task, especially if you’re not familiar with the process. However, by avoiding some common mistakes, you can make the process much easier and more effective. Here are some mistakes to avoid during oven cleaning:
- Using abrasive cleaners: Abrasive cleaners can scratch the surface of your oven and make it harder to remove future residue buildup. Stick to gentle, non-abrasive cleaners to avoid damaging your oven.
- Not wearing protective gear: Oven cleaning can produce fumes and splashes that can be harmful to your health. Wear protective gear such as gloves, safety goggles, and a dust mask to protect yourself from these hazards.
- Skipping the pre-cleaning step: Before you start cleaning your oven, it’s important to remove any loose debris or residue. Use a brush or scraper to remove any loose particles before applying any cleaners.
- Not rinsing thoroughly: After cleaning your oven, it’s important to rinse thoroughly to remove any remaining cleaner. Failure to do so can leave a residue that can harden and be difficult to remove in the future.
- Using too much cleaner: Using too much cleaner can lead to excessive foaming, which can be difficult to remove. Use just enough cleaner to cover the affected area and avoid using too much.
- Not allowing enough time for cleaners to work: Depending on the type of cleaner you’re using, it may take some time to work its magic. Give the cleaner enough time to penetrate and break down the burnt residue before attempting to scrub it off.
By avoiding these common mistakes, you can ensure that your oven cleaning process is effective and safe.
FAQs
1. What are the necessary tools and materials to clean a burnt oven?
To clean a burnt oven, you will need a few essential tools and materials. These include a putty knife, steel wool, aluminum foil, baking soda, white vinegar, and a sponge or cloth. The putty knife and steel wool will be used to scrub the burnt residue off the oven’s surface, while the aluminum foil will help protect the oven’s finish from scratches. Baking soda and white vinegar are effective cleaning agents that will help loosen and remove the burnt residue. Finally, a sponge or cloth will be used to wipe down the oven once it has been cleaned.
2. How do I prepare the oven for cleaning?
Before cleaning your burnt oven, it is essential to prepare the area around it. Start by removing any loose food particles and wiping down the exterior of the oven with a damp cloth. Next, place aluminum foil on the floor and any other surfaces around the oven to protect them from scratches. Finally, turn off the oven and let it cool completely before beginning the cleaning process.
3. What is the best way to remove burnt residue from the oven’s interior?
To remove burnt residue from the oven‘s interior, start by applying a mixture of baking soda and white vinegar to the affected area using a sponge or cloth. Let the mixture sit for about 30 minutes, then use a putty knife or steel wool to scrub the residue off the oven’s surface. Continue scrubbing until the residue is gone, then wipe down the oven with a damp cloth to remove any remaining residue.
4. How do I clean the oven’s door and handle?
To clean the oven’s door and handle, start by removing any loose food particles using a damp cloth. Next, apply a mixture of baking soda and white vinegar to a sponge or cloth, then wipe down the door and handle. Use a putty knife or steel wool to scrub any stubborn residue off, then wipe down the area with a damp cloth to remove any remaining residue. Finally, use a clean cloth to wipe down the door and handle and let it dry completely.
5. Can I use commercial oven cleaners to clean a burnt oven?
Yes, you can use commercial oven cleaners to clean a burnt oven. These cleaners are specifically designed to remove tough burnt residue and stains from oven interiors. However, it is essential to follow the manufacturer’s instructions carefully, as these cleaners can be harsh and potentially damaging to the oven’s finish if used incorrectly. Additionally, always work in a well-ventilated area when using commercial cleaners to avoid inhaling any fumes.


