Do you have an old baking pan that you just can’t seem to let go of? Is it looking a little worse for wear and could use a pick-me-up? Fear not! With a few simple tips and tricks, you can breathe new life into your old baking pan and make it look as good as new. In this article, we’ll explore some easy and effective ways to revive your baking pan and give it a fresh new look. So, let’s get started and bring that old pan back to its former glory!
Restore the Non-Stick Coating
Remove Burned-On Grease
If your baking pan’s non-stick coating has become dull and ineffective, it’s possible that there is burned-on grease that needs to be removed. Here are some tips for removing burned-on grease from your baking pan:
- Use a scraper: A metal scraper can be a helpful tool for removing burned-on grease from baking pans. Gently scrape the pan with the scraper, moving in small circles until the grease is removed.
- Apply heat: Heat can help loosen the burned-on grease, making it easier to remove. Use a blowtorch or a heat gun to heat the pan for several minutes, being careful not to melt the pan itself. Allow the pan to cool slightly before attempting to remove the grease.
- Use a non-abrasive sponge: A non-abrasive sponge, such as a dish sponge or a soft cloth, can be used to scrub away the burned-on grease. Gently scrub the pan in a circular motion, using a small amount of warm, soapy water.
- Soak the pan: If the grease is particularly stubborn, try soaking the pan in warm, soapy water for several hours or overnight. This will allow the grease to soften, making it easier to remove.
By following these tips, you can effectively remove the burned-on grease from your baking pan and restore its non-stick coating.
Use Baking Soda and Vinegar
Are you tired of your old baking pan that’s lost its non-stick coating? Fear not, because there’s a simple and natural solution to restore it – baking soda and vinegar. This combination is an effective and eco-friendly way to revive your pan’s non-stick coating and make it as good as new. Here’s how to do it:
- Prepare the baking pan: Before starting the process, make sure your baking pan is clean and free of any food residue. If there’s any stubborn stain, use a soft sponge or cloth to wipe it off.
- Mix baking soda and vinegar: In a small bowl, mix equal parts of baking soda and white vinegar. You can adjust the amount of baking soda and vinegar depending on the size of your baking pan.
- Apply the mixture: Dip a soft cloth or sponge into the mixture and apply it generously onto the surface of the baking pan. Make sure to cover all areas, including the edges and corners.
- Scrub the pan: Use a non-abrasive sponge or cloth to scrub the pan gently. This will help the baking soda and vinegar mixture to penetrate the surface and remove any buildup.
- Rinse with water: After scrubbing, rinse the pan with clean water to remove any remaining residue.
- Dry the pan: Use a clean towel to pat the pan dry. Make sure there’s no water left on the surface of the pan.
- Bake the pan: To set the non-stick coating, place the pan in the oven at 350°F (175°C) for about 30 minutes. This will help the baking soda and vinegar mixture to bond with the surface of the pan and restore its non-stick coating.
By following these simple steps, you can revive your old baking pan and make it as good as new. The baking soda and vinegar mixture is a cost-effective and eco-friendly way to restore the non-stick coating, and it’s a great alternative to harsh chemicals that can damage the environment. So why not give it a try and breathe new life into your old baking pan?
Apply Oil or Shortening
Reviving your old baking pan’s non-stick coating is possible with a simple solution: applying oil or shortening. Here’s how:
- Clean the Pan: Before applying any oil or shortening, make sure the pan is thoroughly cleaned. Any leftover food or residue can prevent the oil from adhering properly.
- Heat the Pan: Preheat the oven to 350°F (175°C) and place the pan inside for 10-15 minutes. This will help the oil or shortening penetrate the coating more effectively.
- Apply the Oil or Shortening: Use a paper towel or a brush to apply a thin layer of oil or shortening evenly over the entire surface of the pan. Be sure to cover all the corners and edges.
- Bake the Pan: Place the pan in the oven and bake for 30-45 minutes, or until the coating is fully restored. Check the coating’s effectiveness by trying to release a small piece of food from it. If it sticks, continue baking for a few more minutes.
- Allow the Pan to Cool: Once the baking is complete, remove the pan from the oven and allow it to cool completely before wiping off any excess oil or shortening with a paper towel.
By following these steps, you can easily restore your old baking pan’s non-stick coating, making it ready for your next batch of delicious treats.
Fix Rust and Corrosion
Scour the Pan with a Brillo Pad
One of the most effective ways to revive an old baking pan is to scour it with a Brillo pad. Here’s how to do it:
- Remove any loose rust or corrosion from the pan using a wire brush or a sponge.
- Apply a generous amount of cooking oil to the pan and let it sit for a few minutes.
- Use a Brillo pad to scrub the pan in a circular motion, focusing on any stubborn rust or corrosion.
- Rinse the pan with warm water and repeat the process if necessary.
- Dry the pan thoroughly with a clean towel and apply a new layer of cooking oil to protect the pan.
Scouring the pan with a Brillo pad is an effective way to remove rust and corrosion, leaving your baking pan looking like new.
Apply Rust Dissolver
When your baking pan has started to show signs of rust and corrosion, it’s time to take action to restore it to its former glory. One effective method for fixing rust and corrosion is to apply rust dissolver. Here’s how to do it:
- Clean the pan thoroughly: Before applying rust dissolver, make sure that the pan is clean and free of any grease or food residue. This will help the rust dissolver to penetrate the metal and dissolve the rust more effectively.
- Apply the rust dissolver: Use a sponge or cloth to apply the rust dissolver to the affected areas of the pan. Make sure to cover the entire surface of the rust, paying particular attention to any deep pits or crevices.
- Let it sit: Allow the rust dissolver to sit on the pan for the recommended amount of time, usually at least 30 minutes or longer if the rust is particularly stubborn. This will give the rust dissolver time to penetrate the metal and break down the rust.
- Scour the pan: Once the rust dissolver has sat for the recommended amount of time, use a scouring pad or steel wool to scrub away the rust and any remaining rust dissolver. Make sure to work in a well-ventilated area, as the fumes from the rust dissolver can be strong.
- Rinse and dry the pan: After scouring the pan, rinse it thoroughly with warm water to remove any remaining rust dissolver and residue. Then, dry the pan thoroughly with a clean towel or let it air dry.
By following these steps, you can effectively dissolve rust and corrosion on your old baking pan and restore it to its former beauty.
Sand and Paint the Pan
When your baking pan has rust and corrosion, it can be challenging to revive it. However, one of the most effective ways to do so is by sanding and painting the pan. Here’s how you can do it:
Step 1: Remove the rust and corrosion
Before you start sanding and painting the pan, you need to remove the rust and corrosion. You can use a wire brush or sandpaper to do this. Make sure to remove all the rust and corrosion from the pan to ensure that the paint sticks well.
Step 2: Sand the pan
Once you have removed the rust and corrosion, you need to sand the pan. Use a fine-grit sandpaper to sand the pan evenly. Start by sanding the edges and corners, then move on to the rest of the pan. Make sure to sand the entire surface of the pan, including any grooves or crevices.
Step 3: Clean the pan
After sanding the pan, use a damp cloth to wipe away any dust or debris. Then, use a mild detergent and warm water to clean the pan thoroughly. This will remove any remaining dirt or grime and prepare the pan for painting.
Step 4: Prepare the surface for painting
Before painting the pan, you need to prepare the surface. Start by taping off any areas that you don’t want to paint, such as the handles or edges. Then, use a primer to coat the entire surface of the pan. This will help the paint adhere better and prevent any rust from coming through.
Step 5: Paint the pan
Once the primer is dry, you can start painting the pan. Use a high-quality, exterior-grade paint that is designed to withstand high temperatures. Start by painting the edges and corners, then move on to the rest of the pan. Use a brush or roller to apply the paint evenly.
Step 6: Allow the paint to dry
After painting the pan, allow the paint to dry completely. This will take several hours, depending on the type of paint you used. Once the paint is dry, remove the tape and inspect the pan for any imperfections.
By following these steps, you can easily revive your old baking pan and give it a new look. Sanding and painting the pan is a simple and effective way to remove rust and corrosion and give your pan a fresh new look.
Replace Worn-Out Handles
Remove the Handles
Before replacing the handles of your old baking pan, it is important to remove them carefully. Here are the steps to follow:
- Gather the necessary tools: You will need a screwdriver, pliers, and a replacement handle.
- Loosen the screws: Use the screwdriver to loosen the screws that hold the handle in place. Be careful not to damage the pan or the screws.
- Pull the handle off: Use the pliers to pull the handle off the pan. Be gentle to avoid damaging the pan or the handle.
- Clean the pan: Once the handle is removed, clean the pan thoroughly to remove any residue or debris.
- Measure for the new handle: Use a measuring tape to determine the dimensions of the new handle. Make sure it is the right size and shape for the pan.
By following these steps, you can safely remove the old handle from your baking pan and prepare it for a new one.
Purchase Replacement Handles
If your baking pan’s handles are worn out or broken, it’s time to replace them. Here are some tips to help you find the right replacement handles for your pan:
Measure the Length and Diameter of the Handles
Before purchasing replacement handles, make sure to measure the length and diameter of the existing handles on your baking pan. This will ensure that the new handles fit your pan properly and provide a secure grip.
Choose the Right Material
Handles can be made from various materials, including plastic, silicone, and metal. Consider the type of material that was originally used for the handles on your baking pan. If the original handles were made of metal, it’s best to choose metal replacement handles to maintain consistency. Silicone and plastic handles can also be a good option, as they are durable and easy to grip.
Purchase Replacement Handles Online or In-Store
Replacement handles can be purchased online or in-store at most home goods stores. Online retailers offer a wide variety of replacement handles, allowing you to choose the length, material, and style that best fits your needs. In-store options may be more limited, but you can often find replacement handles in the baking section of the store.
Install the New Handles
Once you’ve purchased replacement handles, it’s time to install them on your baking pan. This typically involves removing the old handles and attaching the new ones using screws or adhesive. Be sure to follow the instructions provided with the replacement handles for proper installation.
By replacing the worn-out handles on your baking pan, you can give it a new look and ensure that it continues to function properly for years to come.
Install the New Handles
When your baking pan’s handles have become worn out, it’s time to replace them. This is a simple and inexpensive way to give your old pan a new look and extend its lifespan. Here’s how to do it:
Tools and Materials
- New handle set
- Adjustable wrench or pliers
- Silicone sealant
- Sandpaper (optional)
Step-by-Step Guide
- Disassemble the Pan: Remove the handle from the pan by gently pulling it away from the pan body. Set aside the handle and the pan body.
- Remove the Old Handle Screws: Use an adjustable wrench or pliers to remove the screws that held the old handle in place. Keep the screws in a safe place, as you will need them later.
- Clean the Pan: Use a clean cloth to wipe away any residue or debris from the pan. If there are any rust or stains, you can use sandpaper to remove them.
- Install the New Handles: Place the new handle set onto the pan body, making sure it aligns properly. Use the screws you removed earlier to secure the new handle in place. Use an adjustable wrench or pliers to tighten the screws until they are snug.
- Apply Silicone Sealant: Use a silicone sealant to create a watertight seal between the handle and the pan body. Apply a thin bead of sealant around the edge of the handle, making sure to cover any gaps or cracks. Allow the sealant to dry according to the manufacturer’s instructions.
- Attach the New Handles: Once the sealant is dry, attach the new handles to the pan body. Use the adjustable wrench or pliers to tighten the screws until they are snug.
- Test the New Handles: Once the new handles are installed, test them to make sure they are secure and comfortable to hold.
With these simple steps, you can replace the worn-out handles on your old baking pan and give it a new look. Not only will this make your pan look new again, but it will also make it safer and more comfortable to use.
Prevent Future Damage
Clean the Pan Properly
When it comes to maintaining your baking pans, proper cleaning is crucial to prevent future damage. Here are some tips to ensure that your pans stay in good condition:
- Use the right cleaning tools: Avoid using abrasive sponges or brushes that can scratch the surface of the pan. Instead, opt for soft sponges or cloths that won’t cause any damage.
- Hand-wash your pans: If possible, hand-wash your pans instead of putting them in the dishwasher. The dishwasher’s harsh detergents and high temperatures can cause damage to the non-stick coating of your pans.
- Dry your pans properly: After washing, make sure to dry your pans thoroughly. If you leave them wet, they may develop rust or other types of damage.
- Don’t stack your pans on top of each other: This can cause scratches or dents on the surface of the pans. Instead, store them flat and separated to prevent any damage.
By following these simple tips, you can keep your baking pans in great condition and extend their lifespan.
Store the Pan Correctly
Storing your baking pan correctly is essential to prevent future damage. Here are some tips to help you store your pan safely:
- Always cool the pan before storing it. This is especially important if you’ve baked something sugary or sticky, as these residues can harden and become difficult to remove if left to cool on the pan.
- Wrap the pan in a cloth or paper towel to absorb any excess moisture. This will help prevent rust and corrosion, which can damage the pan over time.
- Place the pan in a cool, dry place. Avoid storing the pan in a damp or humid environment, as this can encourage rust and corrosion.
- Consider investing in a baking pan organizer. These organizers can help keep your pans organized and prevent them from getting scratched or dented.
By following these simple tips, you can ensure that your old baking pan stays in good condition for years to come.
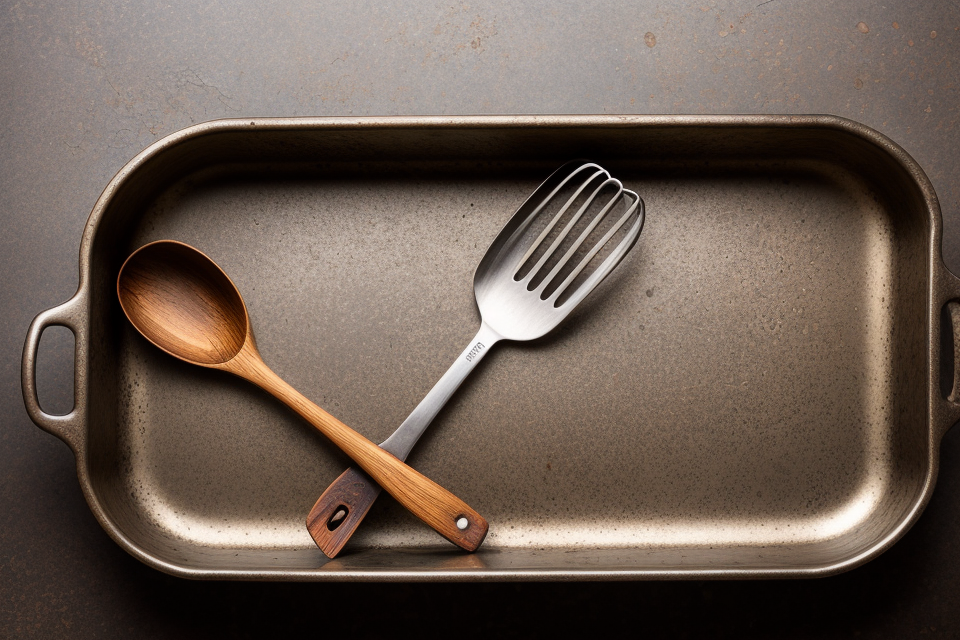
Avoid Using Metal Utensils
One of the most effective ways to prevent future damage to your baking pan is to avoid using metal utensils. Metal utensils can scratch and dent the surface of your pan, which can cause food to stick and burn more easily. Instead, opt for silicone, wooden, or plastic utensils that are gentle on the surface of your pan.
Here are some additional tips to keep in mind when using utensils on your baking pan:
- Avoid using metal spatulas or tongs, as they can easily scratch the surface of your pan.
- Use silicone spatulas or tongs, as they are gentle on the surface of your pan and can easily lift and remove batter.
- If you must use metal utensils, coat them with a non-stick cooking spray before using them on your pan. This will help prevent scratches and dents.
- Always use a soft cloth or paper towel to wipe down your pan after using it. This will help prevent scratches and damage to the surface of your pan.
By following these tips, you can help extend the life of your baking pan and prevent future damage. So the next time you’re baking, be sure to reach for silicone, wooden, or plastic utensils to keep your pan looking like new.
Upgrade Your Pan
Consider a Non-Stick Coating
- A non-stick coating can breathe new life into an old baking pan by making it easier to clean and preventing sticking.
- When choosing a non-stick coating, look for a food-grade material that is safe for use with food and will not flake or peel off over time.
- Some popular options include Teflon, ceramic, and silicone coatings.
- Teflon is a durable and non-reactive material that provides excellent non-stick properties, but it can be prone to scratching and can release toxic fumes at high temperatures.
- Ceramic coatings are free of PTFE and PFOA, making them a safer choice for cooking, but they may not be as durable as Teflon.
- Silicone coatings are non-reactive, heat-resistant, and easy to clean, but they may not provide the same level of non-stick performance as Teflon or ceramic coatings.
- Some popular options include Teflon, ceramic, and silicone coatings.
- To maintain the non-stick coating, avoid using metal utensils, which can scratch the surface, and avoid cooking at extremely high temperatures, which can damage the coating.
- When cleaning a non-stick pan, use gentle detergents and avoid abrasive sponges or scrubbers, which can scratch the surface.
- To remove any stuck-on food, try using a non-abrasive sponge or cloth soaked in warm, soapy water, and avoid using metal utensils or abrasive cleaners, which can damage the coating.
- Regularly re-seasoning the pan can help maintain the non-stick coating and prevent damage from water spots and stains.
- When choosing a non-stick coating, look for a food-grade material that is safe for use with food and will not flake or peel off over time.
Opt for a Darker Color
One way to revive your old baking pan is to upgrade it by opting for a darker color. This can not only make your pan look newer, but it can also help to prevent over-browning and make it easier to see when your baked goods are done. Here are some tips on how to do it:
- Start by washing your pan thoroughly with soap and water to remove any grease or debris.
- Apply a coat of high-heat paint or a high-heat resistant coating. This will protect the pan from the heat of the oven and help it to retain its color.
- Let the paint or coating dry completely according to the manufacturer’s instructions before using the pan.
- If you prefer a more DIY approach, you can try covering the pan with aluminum foil and then painting it with a heat-resistant paint. Allow the paint to dry and then remove the foil before using the pan.
By upgrading your pan to a darker color, you can give it a new look and improve its performance in the kitchen.
Invest in a High-Quality Pan
Why High-Quality Pans Last Longer
High-quality baking pans are made from durable materials that can withstand the heat of the oven and resist warping or bending. They are also typically coated with non-stick surfaces that make cleanup easier and prevent sticking. Additionally, high-quality pans are often designed with precise measurements and a balanced construction that ensures even baking and prevents hot spots. All of these features can help to prolong the life of your baking pan and ensure that it continues to perform well over time.
Signs It’s Time to Upgrade Your Pan
There are several signs that it may be time to upgrade your baking pan. If your pan is showing signs of wear and tear, such as rust spots or dented corners, it may be time to replace it. Additionally, if you notice that your baked goods are not turning out as expected, it could be due to a faulty pan. Finally, if you find that your pan is difficult to clean or requires frequent seasoning to prevent sticking, it may be time to invest in a new one.
How to Choose the Right Pan for Your Needs
When choosing a new baking pan, consider the types of baked goods you will be making most often. For example, if you love baking cakes, you may want to invest in a set of pans specifically designed for cake baking. If you enjoy baking bread, look for pans with a tight-fitting lid and a large surface area for rising dough. Additionally, consider the size of your pan and whether it will fit in your oven. It’s also important to consider the material of the pan, as some materials may be better suited for certain types of baked goods or cooking methods.
Benefits of Investing in a High-Quality Pan
Investing in a high-quality baking pan can have several benefits. First, it can help to ensure that your baked goods turn out perfectly every time. Additionally, a high-quality pan can make cleanup easier and save you time in the long run. Finally, a well-made pan can last for many years, making it a wise investment for any baker.
Frequently Asked Questions
How do I know if my baking pan is still safe to use?
- Check for any visible signs of damage: If your baking pan has any dents, rust, or warping, it may not be safe to use.
- Listen for any unusual sounds: If you hear any unusual sounds when using your baking pan, such as clanking or banging, it may be damaged and should be avoided.
- Use a magnet: A magnet can help you determine if your baking pan is made of iron or steel, which can be prone to rusting. If the magnet sticks to your pan, it may not be safe to use.
- Look for any signs of discoloration: If your baking pan has any discoloration or staining, it may not be safe to use.
- Consult the manufacturer: If you are unsure about the safety of your baking pan, you can contact the manufacturer for guidance. They may be able to provide you with more information on whether your pan is still safe to use.
Can I use a baking pan with a hole in it?
When it comes to baking, having the right tools is essential for success. But what if you have an old baking pan with a hole in it? Can you still use it, or is it time to replace it? The answer is yes, you can still use a baking pan with a hole in it, but there are some things you need to keep in mind.
First, it’s important to understand why the hole is there in the first place. In many cases, a hole is present in the baking pan to allow for airflow and prevent the formation of hot spots. However, this can also lead to uneven baking, so it’s important to adjust your recipe accordingly.
To use a baking pan with a hole in it, you’ll need to cover the hole with aluminum foil or a silicone baking sheet. This will help to create a more even baking surface and prevent any food from falling through the hole. It’s also a good idea to use a smaller amount of batter or filling when baking in a pan with a hole, as this will help to prevent overflow.
In addition to covering the hole, you may also need to adjust your baking time and temperature. Since there is less surface area for heat to transfer to the food, the baking time may need to be longer, and the temperature may need to be higher.
Overall, while a baking pan with a hole in it may require some adjustments to your recipe and baking technique, it can still be used to create delicious baked goods. Just be sure to cover the hole and adjust your recipe accordingly, and you’ll be on your way to success in the kitchen.
Can I fix a dented baking pan?
Yes, you can fix a dented baking pan. Here are some tips to help you:
- Use a baking pan that is oven-safe. This is important because you will need to put the pan in the oven to fix the dent.
- Heat the oven to 350°F (175°C).
- Apply a small amount of aluminum foil to the dented area of the pan. This will help to smooth out the dent.
- Place the pan in the oven and bake for about 10-15 minutes. The foil will help to soften the metal and allow it to return to its original shape.
- Once the pan is out of the oven, remove the foil and check to see if the dent is gone. If the dent is still visible, you can try gently tapping the pan with a hammer or mallet to help it return to its original shape.
- If the dent is still not fixed, you can try using pliers to gently squeeze the metal in the dented area. This will help to stretch the metal and allow it to return to its original shape.
By following these steps, you can fix a dented baking pan and give it a new look. Remember to always use caution when working with hot pans, and to never use abrasive materials or harsh chemicals on your baking pan.
FAQs
1. How can I make my old baking pan look new again?
There are several ways to revive an old baking pan and give it a new look. One way is to use a metal polish to remove any scratches or discoloration. Another way is to use a mixture of equal parts baking soda and water to clean and deodorize the pan. You can also try sanding down the pan with fine-grit sandpaper to remove any scratches or rust. Finally, you can try painting the pan with a non-toxic paint to give it a fresh new look.
2. What are some tips for cleaning an old baking pan?
When cleaning an old baking pan, it’s important to use gentle detergents and avoid using abrasive cleaners or scouring pads, which can scratch the surface of the pan. Instead, try using a soft sponge or cloth to wipe down the pan and remove any baked-on food or residue. You can also try filling the pan with warm water and a few drops of dish soap, then let it sit for a few minutes before scrubbing away any grime.
3. Can I use my old baking pan after reviving it?
Yes, you can definitely use your old baking pan after reviving it. In fact, reviving an old baking pan can breathe new life into a tired, worn-out pan and give it a new lease on life. Just be sure to wash and dry the pan thoroughly before using it again, and avoid using abrasive cleaners or scratchy sponges, which can damage the surface of the pan.
4. Is it safe to use a metal polish on my baking pan?
Yes, it is safe to use a metal polish on your baking pan, as long as you follow the instructions carefully and avoid getting the polish on any non-metal surfaces, such as silicone or plastic. When using a metal polish, be sure to apply it sparingly and avoid scrubbing too hard, as this can cause scratches or damage to the surface of the pan.
5. Can I paint my old baking pan?
Yes, you can definitely paint your old baking pan to give it a fresh new look. When painting a baking pan, it’s important to use a non-toxic, food-safe paint that is designed for use on cookware. Be sure to apply the paint evenly and allow it to dry completely before using the pan again. Additionally, avoid using abrasive cleaners or scrubbers when cleaning the painted pan, as this can scratch or damage the surface of the paint.


