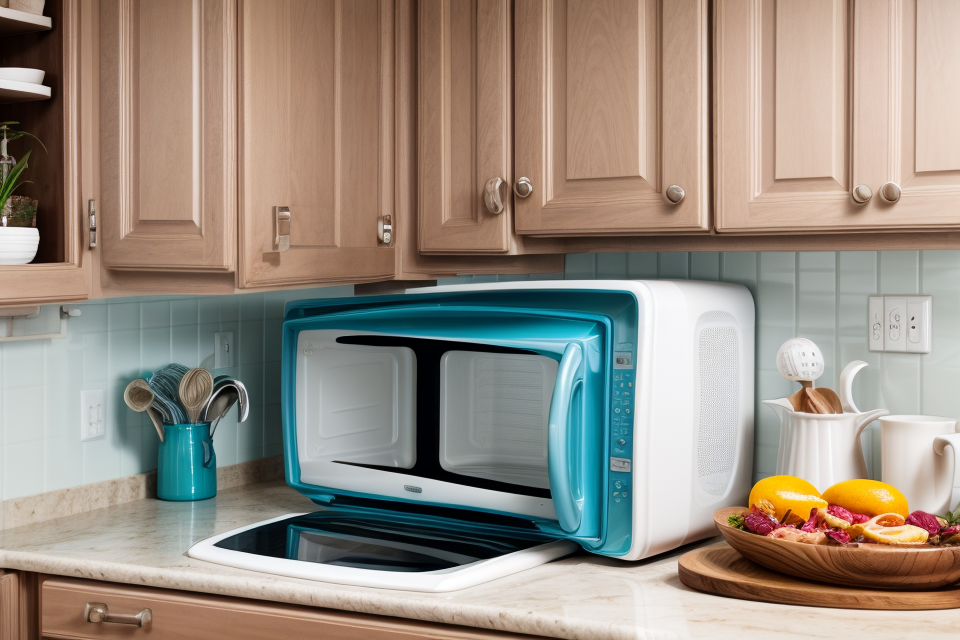
A clean and well-maintained microwave is a must-have in every kitchen. However, with daily use, the inside of the microwave can become dirty and greasy, making it difficult to clean. But don’t worry, deep cleaning your microwave is easy and can be done in just 7 simple steps. In this article, we will guide you through the process of cleaning the inside of your microwave, from removing the grime and grease to restoring it to its former glory. So, let’s get started and make your microwave sparkling clean!
Understanding Microwave Cleaning
Why Is It Important to Clean Your Microwave?
Microwaves are a staple in most modern kitchens, providing a convenient and efficient way to heat up leftovers, cook meals, and even sterilize dishes. However, despite their convenience, microwaves can quickly become breeding grounds for bacteria, mold, and other harmful microorganisms if not properly cleaned. In addition to the health risks associated with these microorganisms, a dirty microwave can also affect the taste and quality of the food you cook.
There are several reasons why it is important to clean your microwave regularly. One of the most obvious is to prevent the growth of harmful bacteria and other microorganisms. These can multiply quickly in the warm, moist environment inside the microwave, and can cause food poisoning or other illnesses if ingested. Additionally, a dirty microwave can lead to unpleasant odors and flavors in the food you cook, which can be difficult to remove once they have taken hold. Finally, a clean microwave is simply more hygienic and visually appealing, which can improve the overall look and feel of your kitchen.
What Are the Consequences of Not Cleaning Your Microwave?
- Build-up of grease and grime can lead to unpleasant odors emanating from the microwave
- The accumulation of bacteria and germs can lead to food poisoning and other health hazards
- A dirty microwave can affect the overall appearance of your kitchen
- The performance of your microwave can be compromised, leading to uneven heating and potentially damaging the appliance
- Over time, a dirty microwave can become a breeding ground for pests such as cockroaches and ants
- Not cleaning your microwave regularly can result in the buildup of toxic chemicals, which can be harmful to your health if ingested or inhaled.
Preparing for Microwave Cleaning
What Tools Do You Need for Cleaning Your Microwave?
To deep clean the inside of your microwave, you will need the following tools:
- A microwave-safe bowl
- A microwave-safe sponge or cloth
- A mixture of water and vinegar
- A cleaning brush or non-abrasive sponge
- A paper towel or microfiber cloth
- A cleaning agent or microwave-safe detergent
It is important to use only microwave-safe tools and cleaning agents to avoid any damage to your microwave.
Note: If you do not have a microwave-safe sponge or cloth, you can use a damp paper towel to wipe down the interior of your microwave.
How to Safely Turn Off and Unplug Your Microwave
Before starting the cleaning process, it is essential to ensure that you have safely turned off and unplugged your microwave. Here are the steps to follow:
- Press the “Stop” button on your microwave to stop the cooking process.
- Press the “Off” button to turn off the microwave.
- Wait for a few minutes for the microwave to cool down completely.
- Unplug the microwave from the power source.
- Be careful when handling the cords and plugs to avoid any accidents.
- Place a dishcloth or towel under the microwave to catch any spills or splatters.
- Place a stopper or blockage under the microwave to prevent the door from being opened accidentally.
By following these steps, you can ensure that your microwave is safely turned off and unplugged before starting the cleaning process.
Removing Exterior Debris
How to Remove Visible Debris from the Exterior of Your Microwave
Before cleaning the inside of your microwave, it’s important to remove any visible debris from the exterior. This will help prevent any loose debris from falling into the microwave during the cleaning process. Here’s how to do it:
- Unplug the microwave: Before attempting to clean the exterior of your microwave, make sure it’s unplugged to avoid any accidents.
- Remove visible debris: Use a soft-bristled brush or a cloth to remove any visible debris from the exterior of the microwave. Start at the top and work your way down to the bottom.
- Use a vacuum cleaner: Use a vacuum cleaner with a hose attachment to reach tight spaces and remove any debris that may have accumulated in those areas.
- Check for loose parts: Check to see if there are any loose parts on the exterior of the microwave, such as buttons or handles. If there are, remove them and clean them separately.
- Use a mild detergent: If there is stubborn grime or stains on the exterior of the microwave, use a mild detergent and water to clean it. Be sure to test the detergent on a small area first to ensure it won’t damage the paint or finish.
- Dry the exterior: Once you’ve cleaned the exterior of the microwave, use a clean cloth to dry it thoroughly. This will help prevent any water spots from forming.
- Check for damage: After cleaning the exterior of the microwave, check for any damage or scratches. If you notice any, contact a repair professional to avoid further damage.
How to Clean the Handle and Controls
When it comes to cleaning the exterior of your microwave, one of the most important parts to focus on is the handle and controls. These areas can quickly become dirty and discolored, and they can also harbor bacteria and other germs. Fortunately, cleaning the handle and controls is a relatively simple process that anyone can do.
Here are the steps you can follow to clean the handle and controls on your microwave:
- Start by unplugging your microwave and removing any visible debris from the handle and controls. Use a soft cloth or brush to gently remove any loose dirt or dust.
- Next, mix equal parts water and vinegar in a small bowl. Use a sponge or cloth to apply the mixture to the handle and controls, making sure to cover all surfaces.
- Allow the mixture to sit on the handle and controls for several minutes, then use a soft cloth to wipe away any remaining residue.
- If there is stubborn grime or stains on the handle and controls, you can use a small amount of baking soda to help lift the dirt. Sprinkle a small amount of baking soda onto a damp cloth, then use it to scrub the area.
- Rinse the handle and controls with clean water, then dry them with a soft cloth.
- Once the handle and controls are clean and dry, use a disinfectant wipe or spray to thoroughly clean the area. This will help to kill any remaining germs and bacteria.
- Finally, use a clean cloth to wipe down the entire handle and control area to remove any excess moisture.
By following these steps, you can effectively clean the handle and controls on your microwave and help to keep it looking and functioning its best.
Removing Interior Debris
How to Remove Grease and Food Residue from the Interior of Your Microwave
When it comes to cleaning the interior of your microwave, one of the biggest challenges is removing grease and food residue. These substances can build up over time and create a difficult-to-clean mess. Fortunately, there are several methods you can use to effectively remove grease and food residue from your microwave’s interior.
First, start by turning off your microwave and unplugging it from the wall outlet. This is an important safety precaution that will help prevent electric shock. Next, remove any items that may be inside the microwave, such as a turntable or cooking tray.
One effective method for removing grease and food residue is to use a microwave-safe bowl filled with water. Place the bowl in the microwave and heat it on high for several minutes, until the water reaches a boiling point. The steam produced by the boiling water will help loosen and remove the grease and food residue from the interior of the microwave.
Another method you can use is to mix equal parts of water and vinegar in a microwave-safe bowl. Heat the mixture in the microwave for several minutes, until it becomes steamy. The steam produced by the mixture will help loosen and remove the grease and food residue from the interior of the microwave.
It’s important to note that you should never use abrasive cleaners or scouring pads to clean the interior of your microwave. These can scratch the surface of the microwave and potentially damage it. Additionally, avoid using cleaning products that contain harsh chemicals, as these can release harmful fumes when heated in the microwave.
Once you have removed the grease and food residue from the interior of your microwave, you can proceed with the rest of the cleaning process.
How to Clean the Fan Filter
The fan filter is a crucial component of your microwave, responsible for circulating air and preventing the buildup of odors and smoke. Over time, it can become clogged with debris, affecting the performance of your microwave. To clean the fan filter, follow these steps:
- Disconnect Power: Before you begin, ensure that your microwave is unplugged from the power source to avoid any accidents.
- Remove the Filter: The fan filter is usually located at the back of the microwave, near the top. Remove it by gently pulling it outward, taking care not to damage the filter or its attachments.
- Examine the Filter: Once you have removed the filter, examine it for any visible debris or buildup. If there is any, use a soft brush or cloth to gently remove it.
- Soak the Filter: If there is stubborn grime or residue, you can soak the filter in a mixture of warm water and mild dish soap for about 15-20 minutes. This will help loosen the debris, making it easier to remove.
- Scrub the Filter: Use a soft-bristled brush or non-abrasive sponge to scrub the filter gently. Be sure to reach all corners and crevices to remove any remaining debris.
- Rinse the Filter: After scrubbing, rinse the filter thoroughly with clean water to remove any soap residue.
- Dry the Filter: Use a clean towel to pat the filter dry, ensuring that it is completely free from moisture before reinstalling it.
- Reinstall the Filter: Gently push the filter back into its original position, ensuring that it is securely in place.
- Plug in the Microwave: Once the filter is reinstalled, plug in the microwave and run a test to ensure that it is functioning properly.
By following these steps, you can easily clean the fan filter in your microwave, improving its performance and ensuring that your microwave is free from unpleasant odors and smoke.
Cleaning the Interior Walls
How to Clean the Walls of Your Microwave with a Mixture of Water and Vinegar
One of the most effective ways to clean the interior walls of your microwave is by using a mixture of water and vinegar. Here’s how you can do it:
Step 1: Prepare the Mixture
First, fill a microwave-safe bowl with equal parts of water and white vinegar. Make sure the bowl is big enough to fit inside your microwave with some room to spare.
Step 2: Microwave the Mixture
Microwave the bowl of water and vinegar on high for about 5-10 minutes or until the mixture has reached boiling point. This will create steam that will help loosen any grime or residue on the walls of your microwave.
Step 3: Let it Sit
After microwaving the mixture, let it sit for about 10-15 minutes. This will allow the steam to penetrate the walls of your microwave and loosen any stubborn grime or residue.
Step 4: Scrub if Necessary
If there is still grime or residue on the walls of your microwave after the steam treatment, you may need to scrub it off. Use a soft-bristled brush or a non-abrasive sponge to gently scrub the walls of your microwave.
Step 5: Wipe Down the Walls
Once you have removed all the grime and residue, use a clean sponge or cloth to wipe down the walls of your microwave. This will remove any remaining moisture and leave your microwave looking and smelling fresh.
Step 6: Dry the Walls
To prevent any water spots from forming on the walls of your microwave, use a clean towel to dry them thoroughly.
Step 7: Repeat as Needed
If your microwave’s interior walls are particularly dirty or grimy, you may need to repeat the above steps a few times to achieve the desired results.
Overall, cleaning the interior walls of your microwave with a mixture of water and vinegar is a simple and effective way to deep clean your microwave. Just make sure to follow the steps carefully and repeat as needed to achieve the best results.
How to Clean the Walls of Your Microwave with a Mixture of Baking Soda and Water
- First, remove any loose debris from the walls of your microwave using a damp cloth or sponge.
- Next, mix together equal parts baking soda and water to create a paste.
- Apply the paste to the walls of your microwave using a sponge or cloth, making sure to cover the entire surface.
- Allow the paste to sit on the walls for about 15 minutes, then use a sponge or cloth to scrub away any remaining grime and stains.
- Rinse the walls of your microwave thoroughly with water, then dry them with a clean towel.
- Once the walls are completely dry, wipe them down with a damp cloth to remove any lingering baking soda residue.
- Finally, use a microwave-safe disinfectant to sanitize the walls and remove any remaining bacteria or germs.
Note: Be sure to avoid using abrasive or harsh chemicals when cleaning the walls of your microwave, as these can damage the surface and cause permanent stains.
Cleaning the Turntable
How to Clean the Turntable with a Soft Brush
When cleaning the turntable of your microwave, using a soft brush is a recommended method. Here’s how you can do it:
- Unplug the Microwave: Before cleaning the turntable, make sure to unplug the microwave from the power source to avoid any electrical shocks.
- Remove the Turntable Plate: Remove the turntable plate by using a screwdriver to loosen the screws holding it in place. Place the plate in a safe location.
- Use a Soft Brush: Use a soft brush to clean the turntable. This can be a natural bristle brush or a microfiber cloth. Avoid using abrasive materials, as they can scratch the surface of the turntable.
- Dampen the Brush: Dampen the brush with water, but not too much that it becomes soaked. This will help the brush to pick up any dirt or grime on the turntable.
- Clean the Turntable: Gently scrub the turntable with the damp brush, moving in a circular motion. Be sure to clean all the crevices and corners.
- Rinse the Brush: After cleaning the turntable, rinse the brush thoroughly with water to remove any remaining dirt or grime.
- Dry the Turntable: Use a clean towel to dry the turntable, making sure to remove any excess moisture.
- Reassemble the Microwave: Once the turntable is clean, reassemble the microwave by placing the turntable plate back in its original position and tightening the screws.
- Plug in the Microwave: Finally, plug in the microwave and test it to make sure it’s working properly.
By following these steps, you can easily clean the turntable of your microwave and keep it in good condition.
How to Clean the Turntable with a Mixture of Water and Vinegar
The turntable is a crucial component of your microwave as it rotates to evenly distribute heat. To clean it, you can use a mixture of water and vinegar. Here’s how:
- Remove any visible debris from the turntable with a soft brush or cloth.
- In a microwave-safe bowl, mix equal parts of water and white vinegar. Microwave the mixture for 1-2 minutes, or until hot.
- Dip a soft cloth into the hot vinegar mixture and wipe down the turntable, using a circular motion to ensure all areas are covered.
- Let the turntable dry completely before replacing the microwave’s turntable cover.
It’s important to note that vinegar is a natural cleaning agent and can help remove any stubborn stains or odors. Additionally, the heat from the microwave will help to sanitize the turntable, leaving it clean and fresh.
Drying and Reassembling Your Microwave
How to Dry the Interior of Your Microwave
To effectively dry the interior of your microwave, follow these steps:
- Remove any excess water: Before attempting to dry the interior, make sure to remove any leftover water from the cleaning process. This can be done by wiping down the interior with a clean, damp cloth.
- Open the microwave door: Ensure that the microwave door is fully open, providing unobstructed access to the interior.
- Place a clean, dry towel or cloth: Place a clean, dry towel or cloth inside the microwave. This will help to absorb any remaining moisture.
- Leave the towel or cloth inside for a few hours: Allow the towel or cloth to remain inside the microwave for several hours, or overnight if possible. This will give it sufficient time to absorb as much moisture as possible.
- Check for moisture: After the specified time, check the towel or cloth for moisture. If it is still damp, repeat the process with a fresh towel or cloth until the interior of the microwave is completely dry.
- Remove the towel or cloth: Carefully remove the towel or cloth from the microwave, ensuring that it does not leave any lint or debris behind.
- Inspect the interior: Once the interior is completely dry, inspect it for any signs of damage or residue. If necessary, repeat the cleaning process as needed.
By following these steps, you can effectively dry the interior of your microwave and ensure that it is completely clean and ready for use.
How to Reassemble Your Microwave and Plug It Back In
Once you have dried the inside of your microwave thoroughly, it’s time to reassemble it. This is a simple process that can be completed in a few easy steps.
First, start by inserting the turntable wheel back into the microwave. Make sure it is securely in place before moving on to the next step.
Next, insert the microwave handle back into its designated hole. Ensure that it is properly aligned and securely attached.
After that, plug the microwave back into the power source. Turn it on and run a test to make sure that it is working properly.
It’s important to note that before plugging in the microwave, ensure that all the interior components are dry and clean. Failure to do so could result in damage to the microwave or even a fire.
Once you have successfully plugged in the microwave, run a test to make sure that it is heating food properly. If everything seems to be working correctly, you can proceed with using your microwave as you normally would.
Remember to always follow the manufacturer’s instructions when it comes to reassembling your microwave. Failure to do so could result in damage to the microwave or even a fire.
In conclusion, reassembling your microwave after a deep clean is a simple process that can be completed in a few easy steps. Make sure to follow the manufacturer’s instructions and ensure that all interior components are dry and clean before plugging in the microwave.
Tips and Tricks for Keeping Your Microwave Clean
How to Prevent Future Buildup
- Regular Cleaning: Regular cleaning is essential to prevent future buildup. Wipe down the interior of the microwave with a damp cloth after each use. This will remove any food particles or spills before they have a chance to dry and harden.
- Use Microwave-Safe Utensils: Always use microwave-safe utensils when cooking or reheating food. Metal utensils can scratch the interior of the microwave, which can lead to buildup over time.
- Clean the Turntable: The turntable is the circular plate in the microwave that spins around to cook food evenly. Clean the turntable regularly to prevent buildup from collecting on it.
- Check the Vent Filter: The vent filter is located behind the turntable and filters the air that circulates through the microwave. Check the filter regularly and clean it if it becomes dirty. A clogged filter can cause the microwave to become less efficient and may even cause damage to the motor.
- Avoid Overloading the Microwave: Overloading the microwave can cause food to be cooked unevenly and can also lead to buildup. Avoid putting too much food in the microwave at once, and distribute the food evenly.
- Don’t Use Non-Stick Cookware: Non-stick cookware can release chemicals into the air when heated in the microwave. These chemicals can cause buildup over time and may be harmful to your health. Use only microwave-safe cookware in the microwave.
- Check for Leaks: Check the microwave for any leaks regularly. A leaking microwave can cause buildup to form in the walls and can be difficult to clean. If you notice any leaks, repair them immediately.
How to Maintain a Clean Microwave Between Deep Cleanings
Maintaining a clean microwave between deep cleanings is essential to ensure that it remains in good working condition and continues to function efficiently. Here are some tips and tricks for keeping your microwave clean between deep cleanings:
- Clean spills immediately: One of the most important things you can do to maintain a clean microwave is to clean up spills immediately. If you don’t clean up a spill right away, it can harden and become difficult to remove later on. Use a microwave-safe cleaning cloth or paper towels to wipe up spills as soon as they happen.
- Use microwave-safe utensils: To prevent scratches and other damage to the interior of your microwave, use microwave-safe utensils when heating or cooking food. Avoid using metal utensils, as they can cause sparks and damage to the interior of the microwave.
- Keep the door closed: When the microwave is not in use, keep the door closed to prevent dust and other particles from entering the microwave. This will also help to keep the interior of the microwave clean and free from debris.
- Clean the control panel: The control panel of your microwave can accumulate dirt and grime over time. Use a soft, damp cloth to wipe down the control panel regularly to keep it clean and free from dust and debris.
- Use microwave-safe cleaning products: When it comes time to clean the interior of your microwave, use microwave-safe cleaning products. Avoid using harsh chemicals or abrasive cleaners, as they can damage the interior of the microwave.
- Replace the filter: If your microwave has a filter, be sure to replace it regularly. The filter helps to prevent the buildup of grease and other debris inside the microwave, and replacing it regularly will help to keep the interior of the microwave clean and functioning properly.
- Check for leaks: If you notice any leaks coming from your microwave, it’s important to address the issue immediately. A leak can cause damage to the interior of the microwave and lead to other problems down the line. Check for leaks regularly and repair any issues as soon as they arise.
By following these tips and tricks, you can help to maintain a clean microwave between deep cleanings. This will help to ensure that your microwave continues to function properly and that it remains in good working condition.
FAQs
1. What are the benefits of deep cleaning the inside of my microwave?
There are several benefits to deep cleaning the inside of your microwave. One of the most obvious is that it will help to remove any built-up grime and food residue, which can make your microwave smell unpleasant and affect its performance. Deep cleaning your microwave can also help to prevent the growth of bacteria and other microorganisms, which can thrive in a dirty microwave. Finally, deep cleaning your microwave can help to extend its lifespan by preventing damage to the interior components.
2. How often should I deep clean my microwave?
It is recommended to deep clean your microwave at least once every six months, or more frequently if you use your microwave frequently. If you notice that your microwave is not working as well as it should, or if it has a strange odor, it may be time to deep clean it.
3. What are the best cleaning products to use on my microwave?
There are many different cleaning products that you can use to deep clean your microwave. You can use a microwave-safe soap or a solution of water and vinegar. You can also use a microwave-safe cleaning cloth or sponge. It is important to use products that are specifically designed for use in a microwave, as other cleaning products can damage the interior of your microwave.
4. How do I prepare my microwave for deep cleaning?
Before you begin deep cleaning your microwave, it is important to remove any food or dishes that may be inside. You should also unplug your microwave and let it cool down completely before cleaning it. This will help to prevent any damage to the interior components.
5. How do I remove grime and food residue from the interior of my microwave?
To remove grime and food residue from the interior of your microwave, you can use a soft cloth or sponge and a microwave-safe cleaning solution. You can also use a microwave-safe scrubbing sponge or non-abrasive cleaning pad. Be sure to scrub gently, as you do not want to damage the interior of your microwave.
6. How do I clean the inside of the microwave door?
To clean the inside of the microwave door, you can use a soft cloth and a microwave-safe cleaning solution. You can also use a microfiber cloth or non-abrasive cleaning pad. Be sure to clean the seals around the door as well, as they can become dirty and affect the performance of your microwave.
7. How do I keep my microwave clean after deep cleaning?
To keep your microwave clean after deep cleaning, you can use a microwave-safe cleaning cloth or sponge to wipe down the interior of your microwave after each use. You can also use a microwave-safe disinfectant to help prevent the growth of bacteria and other microorganisms. Finally, you should avoid using any products that are not specifically designed for use in a microwave, as they can damage the interior of your microwave.


