A dirty refrigerator can be a breeding ground for bacteria and other harmful microorganisms, which can cause illness and spoil food. However, cleaning a refrigerator can be a daunting task, especially if you don’t know where to start. But fear not, because in this ultimate guide, we will explore the best methods and products for deep cleaning your refrigerator, so you can keep your food safe and your fridge looking and smelling fresh. Whether you’re dealing with stubborn odors, mold, or just general dirt and grime, we’ve got you covered. So, let’s get started and give your fridge the deep clean it deserves!
Prepare for the Cleaning
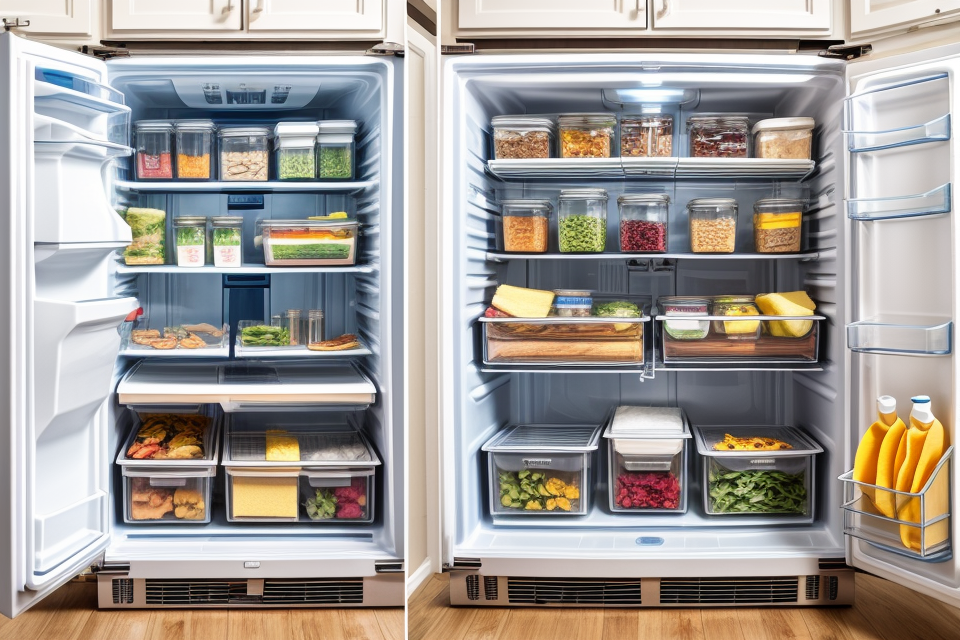
Remove all items from the fridge
Before you start deep cleaning your refrigerator, it is essential to remove all the items from the fridge. This includes food, drinks, and any other items that may be stored inside. Here are the steps to follow when removing items from the fridge:
- Check the expiration dates: Before removing any items from the fridge, check the expiration dates to determine whether they are still safe to consume. If any items have expired, discard them immediately.
- Label and date items: To keep track of what you have removed from the fridge, label and date each item. This will help you keep track of what needs to be consumed first and prevent any spoilage.
- Dispose of expired items properly: Expired items should be disposed of properly. This means that they should be thrown away in a secure container or disposed of in the trash.
- Clean containers and utensils: Before placing items back in the fridge, make sure to clean any containers or utensils that may have come into contact with expired items. This will help prevent cross-contamination and keep your fridge clean.
- Store items properly: Once you have removed all the items from the fridge, make sure to store them properly. This means keeping perishable items in the fridge and freezer, and storing non-perishable items in a cool, dry place.
By following these steps, you can ensure that your fridge is clean and free of any expired or spoiled items before you begin the deep cleaning process.
Clean the interior and exterior of the fridge
Before beginning the cleaning process, it is important to prepare the area around the refrigerator. This includes moving any items that are stored on or near the fridge, such as dishes or furniture. It is also a good idea to remove any items that are inside the fridge, such as food or drinks. This will allow you to thoroughly clean the interior of the fridge without having to worry about damaging any items.
Once you have prepared the area around the fridge, you can begin cleaning the interior of the fridge. This involves removing any dust or debris that has accumulated on the shelves and walls of the fridge. You can use a soft-bristled brush or a vacuum cleaner to remove any loose debris. It is also a good idea to use a mild detergent and water to clean the interior of the fridge. Be sure to rinse thoroughly with water to remove any soap residue.
After cleaning the interior of the fridge, you can move on to cleaning the exterior of the fridge. This includes wiping down the outside of the fridge with a damp cloth to remove any dust or debris. You can also use a mild detergent and water to clean the exterior of the fridge, but be sure to rinse thoroughly with water to remove any soap residue.
In addition to cleaning the interior and exterior of the fridge, it is also important to clean the filters and vents of the fridge. These components help to regulate the temperature inside the fridge and should be kept clean to ensure proper functioning. You can use a vacuum cleaner or a soft-bristled brush to clean the filters and vents of the fridge.
Overall, cleaning the interior and exterior of the fridge is an important part of maintaining a clean and functional kitchen. By following these steps, you can ensure that your fridge is clean and free of debris, helping to keep your food and drinks fresh and safe to consume.
Check for any damage or worn-out parts
Before embarking on the deep cleaning process, it is essential to check for any damage or worn-out parts in your refrigerator. This step is crucial because if there are any damaged components, it may be dangerous to attempt a cleaning process that could worsen the situation.
Firstly, inspect the seals around the refrigerator door. If the seals are worn out or damaged, it could lead to air leaks, which can affect the temperature regulation inside the fridge. If the seals are damaged, it is recommended to replace them before proceeding with the cleaning process.
Next, check the temperature control thermostat. If the thermostat is not working correctly, it can affect the temperature inside the fridge, leading to spoiled food or frost buildup. If the thermostat is damaged, it is recommended to replace it to ensure that the refrigerator is functioning optimally.
Additionally, inspect the evaporator fan motor and the condenser fan motor. If these motors are not working correctly, it can affect the cooling system of the refrigerator, leading to overheating or frost buildup. If either of these motors is damaged, it is recommended to replace them to ensure that the refrigerator is functioning correctly.
Lastly, check the water line and water filter. If the water filter is clogged or damaged, it can affect the water dispenser function and may even lead to leaks. If the water filter is damaged, it is recommended to replace it before proceeding with the cleaning process.
In summary, checking for any damage or worn-out parts in your refrigerator is an essential step in the deep cleaning process. By identifying and replacing any damaged components, you can ensure that your refrigerator is functioning optimally and avoid any potential safety hazards.
Cleaning the Refrigerator
Cleaning the shelves and drawers
Removing the Shelves and Drawers
The first step in cleaning the shelves and drawers is to remove them from the refrigerator. Unplug the refrigerator before attempting to remove the shelves and drawers to ensure your safety.
Scrubbing the Shelves and Drawers
Once the shelves and drawers are removed, use a mixture of warm water and mild dish soap to scrub away any stubborn grime and stains. Use a non-abrasive sponge or cloth to avoid scratching the surfaces.
Rinsing the Shelves and Drawers
After scrubbing, rinse the shelves and drawers thoroughly with clean water to remove any soap residue.
Drying the Shelves and Drawers
Allow the shelves and drawers to air dry completely before placing them back into the refrigerator. Alternatively, you can use a clean towel to pat them dry.
Disposing of Cleaning Solutions
Make sure to dispose of any used cleaning solutions safely, following local regulations.
Inspecting the Shelves and Drawers
Before replacing the shelves and drawers, inspect them for any damage or wear and tear. If necessary, replace them to ensure the refrigerator functions properly and is safe to use.
Cleaning the Refrigerator Door
The refrigerator door is another area that requires attention when cleaning the refrigerator. Remove any magnets or stickers from the door and wipe it down with a damp cloth and mild dish soap. Rinse thoroughly and dry with a clean towel.
Cleaning the Refrigerator’s Interior
In addition to the shelves and drawers, the interior of the refrigerator should be cleaned as well. Remove any food residue by wiping down the walls and floors with a mixture of warm water and mild dish soap. Rinse thoroughly and dry with a clean towel.
Cleaning the Refrigerator’s Exterior
The exterior of the refrigerator should also be cleaned to remove any dirt or dust buildup. Use a damp cloth and mild dish soap to clean the exterior, and rinse thoroughly with clean water. Dry the exterior with a clean towel.
Putting it All Back Together
Once all surfaces have been cleaned and dried, it’s time to put everything back together. Place the shelves and drawers back into the refrigerator, making sure they are securely in place. Place any magnets or stickers back onto the refrigerator door.
Now that the refrigerator is clean and refreshed, it’s time to restock the shelves and drawers with fresh produce and food items. With a clean refrigerator, you can ensure that your food stays fresh and safe to eat.
Cleaning the condenser coils
Cleaning the condenser coils is a crucial step in deep cleaning your refrigerator. These coils are responsible for removing heat from the refrigerator and expelling it outside. Over time, they can become dirty and clogged with dust and debris, which can impair their ability to function properly.
Here are the steps to clean the condenser coils:
- Unplug the refrigerator: Before you start cleaning the condenser coils, make sure to unplug the refrigerator from the power source to avoid any electrical hazards.
- Turn off the compressor: To access the condenser coils, you’ll need to turn off the compressor. In most refrigerators, the compressor is located at the bottom or back of the unit. Consult your refrigerator’s manual if you’re unsure where the compressor is located.
- Remove debris: Use a vacuum cleaner or a soft brush to remove any visible debris from the condenser coils. Avoid using harsh brushes or abrasive cleaners, as they can damage the coils.
- Use a coil cleaner: If there is stubborn grime or dirt on the coils, use a coil cleaner or a mixture of water and vinegar to clean them. Be sure to follow the instructions on the cleaner carefully, and avoid spraying it directly onto the coils.
- Allow the coils to dry: Once you’ve cleaned the condenser coils, allow them to dry completely before plugging the refrigerator back in and turning on the compressor.
It’s important to clean the condenser coils regularly to ensure that your refrigerator is functioning properly and efficiently.
Cleaning the evaporator coils
Cleaning the evaporator coils is a crucial step in deep cleaning your refrigerator. The evaporator coils are responsible for removing heat from the refrigerator, and if they become dirty, they can impede the cooling process. This can lead to higher energy bills and can even cause damage to the refrigerator. Here’s how to clean the evaporator coils:
Step 1: Unplug the Refrigerator
Before you start cleaning the evaporator coils, make sure to unplug the refrigerator. This is important for safety reasons, as you don’t want to risk electrocution while working on the appliance.
Step 2: Remove the Refrigerator Door
Next, remove the refrigerator door. This will give you access to the evaporator coils. Depending on the design of your refrigerator, you may need to remove screws or other fasteners to access the coils.
Step 3: Clean the Evaporator Coils
Once you have access to the evaporator coils, use a vacuum cleaner to remove any loose debris. You can also use a brush attachment to gently remove any dust or dirt that has accumulated on the coils. If there is stubborn grime or residue, you can use a mixture of warm water and mild dish soap to clean the coils. Be sure to rinse the coils thoroughly with clean water after cleaning.
Step 4: Dry the Evaporator Coils
After cleaning the evaporator coils, it’s important to dry them thoroughly. Use a clean towel or cloth to wipe away any excess moisture. If you leave the coils wet, it can lead to mold and mildew growth, which can cause further damage to the refrigerator.
Step 5: Replace the Refrigerator Door and Plug in the Appliance
Finally, replace the refrigerator door and plug the appliance back in. Make sure to test the temperature inside the refrigerator to ensure that it is functioning properly.
Cleaning the drip tray
The drip tray is a crucial component of your refrigerator that helps collect spills and leaks from inside the fridge. Over time, the drip tray can become clogged with food debris, mold, and bacteria, which can cause unpleasant odors and affect the overall cleanliness of your fridge. To clean the drip tray, follow these steps:
- Empty the drip tray: Carefully remove any contents from the drip tray and discard them in the trash.
- Clean the drip tray: Use warm water and mild dish soap to clean the drip tray. Scrub it gently with a non-abrasive sponge or cloth to remove any residue.
- Dry the drip tray: Allow the drip tray to air dry completely before placing it back into the refrigerator. You can also use a clean towel to pat it dry.
- Inspect the drip tray: Check for any damage or signs of wear and tear. If necessary, replace the drip tray to ensure proper function.
Remember to clean the drip tray regularly to maintain a clean and odor-free refrigerator.
Cleaning the Door Gaskets
When it comes to cleaning the door gaskets of your refrigerator, there are a few steps you can follow to ensure that the job is done properly. Here’s what you need to know:
Remove the Door Gaskets
The first step in cleaning the door gaskets is to remove them from the refrigerator. This can usually be done by gently pulling them away from the fridge with your hands. If they’re stuck, you may need to use a knife or scissors to cut them free.
Clean the Gaskets
Once you’ve removed the door gaskets, you can start cleaning them. You can use warm water and mild soap to clean the gaskets, or you can use a vinegar and water solution. Simply soak the gaskets in the solution for a few minutes, then use a soft brush to scrub away any grime or dirt.
Dry the Gaskets
After you’ve cleaned the gaskets, you’ll need to dry them thoroughly. You can use a clean towel to wipe away any excess moisture, or you can let them air dry. It’s important to make sure that the gaskets are completely dry before you put them back on the fridge, as wet gaskets can lead to mold and mildew growth.
Inspect the Gaskets
Finally, once you’ve cleaned and dried the gaskets, you should inspect them for any damage. If you notice any tears or holes in the gaskets, you may need to replace them. You can usually find replacement door gaskets at your local hardware store or online.
By following these steps, you can ensure that your refrigerator’s door gaskets are clean and functioning properly.
Cleaning the water dispenser and ice maker
Step-by-Step Guide
- Turn off the water supply: Before you start cleaning the water dispenser and ice maker, it’s important to turn off the water supply to avoid any water damage. Turn the shut-off valve clockwise to close it.
- Remove any visible debris: Use a brush or your fingers to remove any visible debris from the water dispenser and ice maker.
- Disassemble the water dispenser: Remove the water dispenser by pulling it away from the wall of the refrigerator. Unscrew the mounting screws and take it apart.
- Clean the water dispenser: Use warm water and mild dish soap to clean the water dispenser. Make sure to get into all the nooks and crannies. Rinse it thoroughly with clean water.
- Disassemble the ice maker: Remove the ice maker by pulling it away from the wall of the refrigerator. Unscrew the mounting screws and take it apart.
- Clean the ice maker: Use warm water and mild dish soap to clean the ice maker. Make sure to get into all the nooks and crannies. Rinse it thoroughly with clean water.
- Reassemble the ice maker: Once you’ve cleaned the ice maker, reassemble it by screwing the mounting screws back into place.
- Reassemble the water dispenser: Once you’ve cleaned the water dispenser, reassemble it by screwing the mounting screws back into place.
- Turn on the water supply: After you’ve finished cleaning and reassembling the water dispenser and ice maker, turn the shut-off valve counterclockwise to turn on the water supply.
Tips and Tricks
- Use a brush or your fingers to remove any visible debris from the water dispenser and ice maker.
- Use warm water and mild dish soap to clean the water dispenser and ice maker.
- Make sure to get into all the nooks and crannies when cleaning the water dispenser and ice maker.
- Rinse the water dispenser and ice maker thoroughly with clean water after cleaning.
- Be careful when disassembling and reassembling the water dispenser and ice maker to avoid any damage.
- Turn off the water supply before cleaning the water dispenser and ice maker to avoid any water damage.
Cleaning the fan and vents
Cleaning the fan and vents is an essential part of deep cleaning your refrigerator. Over time, dust and debris can accumulate in these areas, causing them to become clogged and affecting the performance of your refrigerator. Here are the steps to follow when cleaning the fan and vents:
The first step in cleaning the fan and vents is to unplug the refrigerator. This is an important safety precaution as you do not want to risk electrocution while cleaning the refrigerator. Once the refrigerator is unplugged, you can proceed with the cleaning process.
Step 2: Remove the Front Panel
The next step is to remove the front panel of the refrigerator. This will give you access to the fan and vents. Depending on the design of your refrigerator, the front panel may be held in place by screws or clips. Use a screwdriver or your hands to remove the panel.
Step 3: Clean the Fan and Vents
Once you have removed the front panel, you can clean the fan and vents. Use a vacuum cleaner with a brush attachment to remove any dust and debris that has accumulated in these areas. You can also use a soft brush or cloth to gently remove any stubborn dirt.
Step 4: Check for Blockages
After cleaning the fan and vents, check for any blockages that may be affecting the performance of your refrigerator. Use a flashlight to inspect the areas around the fan and vents. If you find any blockages, remove them carefully using a pair of tweezers or your fingers.
Step 5: Reassemble the Refrigerator
Once you have cleaned the fan and vents and removed any blockages, you can reassemble the front panel of the refrigerator. Make sure that it is properly aligned and securely in place before plugging in the refrigerator.
Step 6: Plug in the Refrigerator
Finally, plug in the refrigerator and turn it on to ensure that it is working properly. Listen for any unusual noises or smells that may indicate a problem. If you notice anything unusual, contact a professional appliance repair service for assistance.
By following these steps, you can ensure that your refrigerator’s fan and vents are clean and functioning properly, which will help keep your food fresh and your refrigerator running efficiently.
Maintenance Tips
Changing the water filter
The water filter in your refrigerator plays a crucial role in keeping your drinking water clean and fresh. Over time, the filter becomes dirty and clogged, which can lead to poor-tasting water and even damage to the refrigerator. Therefore, it is essential to change the water filter regularly to ensure that your refrigerator is functioning properly.
Here are the steps to follow when changing the water filter in your refrigerator:
- Locate the water filter: The water filter is usually located at the bottom left or right corner of the refrigerator, behind a small door or panel.
- Turn off the water supply: Before changing the water filter, turn off the water supply to the refrigerator. This is usually done by closing the shut-off valve located behind the refrigerator or by disconnecting the water line from the back of the refrigerator.
- Remove the old filter: Remove the old filter by opening the door or panel and pulling the filter out gently. Be careful not to damage the filter or the housing.
- Clean the housing: Use a soft brush or cloth to clean the housing where the filter sits. This will help remove any dust or debris that may have accumulated over time.
- Install the new filter: Insert the new filter into the housing, making sure it is firmly seated. Check the manual of your refrigerator to ensure that the filter is installed correctly.
- Turn on the water supply: Once the new filter is installed, turn on the water supply to the refrigerator.
- Test the water: Finally, test the water to ensure that it is clean and fresh. Run the ice maker or dispenser to check for any leaks or issues.
Changing the water filter regularly is an essential maintenance task that can help prolong the life of your refrigerator and ensure that your drinking water is always clean and fresh.
Defrosting the freezer
When it comes to deep cleaning your refrigerator, defrosting the freezer is an essential step. Over time, ice can build up in the freezer, making it harder to open and closing the door properly. This buildup can also make it difficult to remove and store items properly. Here are some tips on how to defrost your freezer:
Method 1: Using the defrost setting on your refrigerator
If your refrigerator has a built-in defrost setting, it’s easy to use this method. Simply turn on the defrost setting and let the ice melt overnight. Make sure to empty the contents of the freezer before defrosting it. Once the ice has melted, clean the area with a damp cloth and a mild detergent. Dry the area thoroughly before restocking the freezer.
Method 2: Using a hairdryer
If your refrigerator doesn’t have a built-in defrost setting, you can use a hairdryer to melt the ice. Turn off the power to the freezer before starting this process. Place the hairdryer near the ice buildup and turn it on to its highest setting. Hold it in place for several minutes until the ice starts to melt. Be careful not to touch the hairdryer to the ice or any metal surfaces as this can cause burns. Once the ice has melted, clean the area with a damp cloth and a mild detergent. Dry the area thoroughly before restocking the freezer.
Method 3: Using a vacuum cleaner
If you have a lot of ice buildup in your freezer, a vacuum cleaner can be a helpful tool. Turn off the power to the freezer before starting this process. Remove any items from the freezer and place them in a safe place. Attach the hose of the vacuum cleaner to the freezer door or wall and turn it on. Move the vacuum cleaner over the ice buildup until it starts to break up. Use a brush attachment to remove any remaining ice chunks. Once the ice has been removed, clean the area with a damp cloth and a mild detergent. Dry the area thoroughly before restocking the freezer.
No matter which method you choose, make sure to dispose of any ice or water that has melted properly. Also, it’s important to clean the drip pan under the freezer if there is one. The drip pan can accumulate water and prevent it from properly evaporating, leading to further ice buildup. By defrosting your freezer regularly, you can help prevent further ice buildup and keep your refrigerator running smoothly.
Cleaning the drain holes
When it comes to maintaining a refrigerator, one often overlooked task is cleaning the drain holes. These holes are located at the bottom of the refrigerator and are responsible for draining any water that accumulates inside the fridge. Over time, food particles, dust, and other debris can accumulate in these holes, causing a blockage and potentially leading to water damage. Here’s how to clean the drain holes in your refrigerator:
Steps to Clean the Drain Holes
- Unplug the refrigerator: Before starting any maintenance task on your refrigerator, it’s important to unplug it to avoid any electrical hazards.
- Locate the drain holes: The drain holes are typically located at the bottom of the refrigerator, either on the back or on the side.
- Remove any debris: Use a clean cloth or brush to remove any visible debris that may be blocking the drain holes.
- Use a solution of warm water and vinegar: Mix equal parts warm water and white vinegar in a spray bottle. Spray the solution into the drain holes, letting it sit for a few minutes before rinsing with clean water.
- Use a long brush: Insert a long, narrow brush into the drain holes to remove any remaining debris.
- Dry the area: Use a clean cloth to dry the area around the drain holes.
- Repeat the process: Repeat the process of cleaning the drain holes every six months to ensure that your refrigerator is running efficiently and effectively.
Importance of Cleaning the Drain Holes
Cleaning the drain holes is important for several reasons. Firstly, it helps to prevent water damage, which can lead to costly repairs if left unaddressed. Secondly, it helps to keep the fridge running efficiently by ensuring that water is properly drained away from the food. Finally, cleaning the drain holes can help to prevent unpleasant odors from building up inside the fridge.
In conclusion, cleaning the drain holes is an important maintenance task that should be performed every six months. By following the steps outlined above, you can help to ensure that your refrigerator is running efficiently and effectively, while also preventing costly repairs and unpleasant odors.
Troubleshooting Common Issues
Fridge not cooling
If your fridge is not cooling, there are several potential causes and solutions to consider.
- Inadequate Insulation: If your fridge is not insulated properly, the cold air can escape, causing the fridge to warm up and not cool effectively. Check if there are any gaps or cracks in the insulation, and seal them using foam or insulation tape.
- Blocked Air Vents: Make sure that the air vents at the back of the fridge are not blocked by anything. If they are, remove the blockage and check if the fridge is cooling better.
- Dusty Condenser Coils: Over time, dust and debris can accumulate on the condenser coils at the back of the fridge, preventing them from working properly. Clean the coils using a vacuum cleaner or a brush attachment.
- Faulty Thermostat: If the thermostat is not working correctly, it can cause the fridge to warm up. Check if the thermostat is set correctly and replace it if necessary.
- Dirty Evaporator Coils: If the evaporator coils inside the fridge are dirty, they can also cause the fridge to warm up. Clean them using a soft brush or a vacuum cleaner.
- Malfunctioning Fridge: If none of the above solutions work, it’s possible that the fridge is malfunctioning and needs to be repaired or replaced. Contact a professional technician to diagnose and fix the issue.
Food spoilage
Food spoilage is a common issue that can arise in a dirty refrigerator. Spoiled food not only smells bad, but it can also pose health risks to you and your family. To prevent food spoilage, it’s important to clean your refrigerator regularly. Here are some tips for preventing food spoilage:
- Store fresh produce properly: Fresh produce like tomatoes, potatoes, and onions should be stored in a cool, dry place with good ventilation.
- Check the temperature: The refrigerator temperature should be between 32°F and 40°F. Make sure the temperature is set correctly to prevent food spoilage.
- Keep the fridge clean: Regularly clean the fridge to remove any mold, mildew, or bacteria that can cause food spoilage.
- Label and date items: Label and date all items in the fridge to keep track of when they were stored and when they need to be used.
- Avoid overstocking: Overstocking the fridge can lead to food spoilage. Try to store items evenly and avoid filling the fridge too full.
- Use proper storage containers: Use proper storage containers to keep food fresh and prevent spoilage. Glass containers with tight-fitting lids are a good option.
- Inspect for spoilage: Regularly inspect items in the fridge for signs of spoilage, such as mold, discoloration, or off odors. If you notice any signs of spoilage, remove the item immediately.
By following these tips, you can prevent food spoilage and keep your refrigerator clean and healthy.
Foul odors
Refrigerators are designed to keep food fresh and safe, but sometimes they can develop unpleasant odors. This can be caused by a variety of factors, including spoiled food, bacteria, and mold. Here are some steps you can take to troubleshoot and eliminate foul odors in your refrigerator:
Step 1: Remove any spoiled food
The first step in eliminating foul odors in your refrigerator is to remove any spoiled food. This can include food that has expired, as well as any food that has been left in the fridge for too long. It’s important to dispose of this food properly, either by throwing it away or by washing it thoroughly before consuming.
Step 2: Clean and disinfect the fridge
Once you’ve removed any spoiled food, it’s time to clean and disinfect the fridge. This can be done using a mixture of warm water and a mild detergent. Be sure to clean all surfaces, including the shelves, the walls, and the door seals. You may also want to use a disinfectant specifically designed for refrigerators to help eliminate any bacteria or mold that may be present.
Step 3: Air out the fridge
After cleaning and disinfecting the fridge, it’s important to air it out to remove any lingering odors. You can do this by leaving the door open for a few hours, or by placing an open box of baking soda inside the fridge. The baking soda will absorb any odors and help to freshen the air.
Step 4: Run a cycle of vinegar and water
Another effective way to eliminate foul odors in your refrigerator is to run a cycle of vinegar and water. Simply mix equal parts white vinegar and water, and pour the mixture into a bowl. Place the bowl in the fridge and let it sit for several hours, or overnight. The vinegar will help to neutralize any odors and leave the fridge smelling fresh and clean.
By following these steps, you can troubleshoot and eliminate foul odors in your refrigerator, helping to keep your food fresh and your fridge smelling great.
Power issues
When dealing with power issues in your refrigerator, it’s important to identify the root cause before taking any action. Here are some steps you can take to troubleshoot power issues in your refrigerator:
Check the Power Source
The first step in troubleshooting power issues is to check the power source. Make sure that the power cord is plugged into a working outlet and that the outlet is not switched off. You can also try plugging the refrigerator into a different outlet to see if that resolves the issue.
Check the Circuit Breaker
If the power cord is plugged into a working outlet and the outlet is not switched off, the next step is to check the circuit breaker. If the circuit breaker has tripped, you will need to reset it before the refrigerator will work again. To reset the circuit breaker, follow the manufacturer’s instructions or consult an electrician.
Check the Refrigerator’s Power Switch
If the power cord is plugged into a working outlet and the circuit breaker is not tripped, the next step is to check the refrigerator’s power switch. The power switch is usually located on the back or bottom of the refrigerator. If the power switch is not in the “on” position, the refrigerator will not work. To switch the power on, simply flip the switch to the “on” position.
Check the Thermostat
If none of the above steps resolve the power issue, the next step is to check the thermostat. The thermostat controls the temperature inside the refrigerator and is located on the back or bottom of the refrigerator. If the thermostat is not set to the correct temperature, the refrigerator may not work properly. To adjust the thermostat, follow the manufacturer’s instructions.
If you are still experiencing power issues after trying these steps, it may be time to call a professional repair service.
Leaks and water damage
If your refrigerator is leaking or has water damage, it’s important to address the issue immediately to prevent further damage and ensure the safety of your food. Here are some steps you can take to troubleshoot leaks and water damage in your refrigerator:
Step 1: Identify the source of the leak
The first step in addressing a leak in your refrigerator is to identify the source of the leak. Common sources of leaks include the water dispenser, ice maker, drip tray, and evaporator coils. To identify the source of the leak, turn off the power to the refrigerator and locate the source of the water. If the leak is coming from the water dispenser or ice maker, it may be a simple fix such as a loose connection or a clogged water filter. If the leak is coming from the drip tray or evaporator coils, it may be a more serious issue that requires professional repair.
Step 2: Clean or replace any damaged components
Once you have identified the source of the leak, the next step is to clean or replace any damaged components. This may involve removing and cleaning the drip tray, replacing a faulty water filter, or repairing or replacing the evaporator coils. If you are not comfortable performing these repairs yourself, it may be best to contact a professional repair service.
Step 3: Dry out any water damage
If your refrigerator has suffered water damage, it’s important to dry out any affected areas as soon as possible to prevent mold and mildew growth. This may involve removing any wet insulation or drywall, using a dehumidifier to remove moisture from the air, and running the refrigerator on a dry cycle to remove any remaining moisture.
Step 4: Check for any further damage
After you have addressed the source of the leak and dried out any water damage, it’s important to check for any further damage to the refrigerator or its contents. This may involve checking the temperature of the refrigerator to ensure that it is maintaining a consistent temperature, and checking the food inside the refrigerator for any spoilage or damage.
By following these steps, you can troubleshoot leaks and water damage in your refrigerator and ensure the safety of your food.
FAQs
1. What are the best cleaning solutions for a dirty refrigerator?
There are several cleaning solutions that can be used to clean a dirty refrigerator. Baking soda and vinegar are popular choices, as they are both effective at removing odors and stains. Other options include using a mixture of water and lemon juice, or a commercial fridge cleaner. It’s important to choose a solution that is safe for your fridge’s surfaces and finishes.
2. How often should I clean my refrigerator?
It’s recommended to clean your refrigerator at least once a month, or more frequently if it’s used heavily. This will help prevent the buildup of bacteria and odors, and keep your fridge looking and smelling fresh.
3. Can I use bleach to clean my refrigerator?
Bleach can be used to clean some parts of a refrigerator, such as the exterior and the floor, but it’s not recommended for use on the interior or on any metal or plastic components. Bleach can cause damage to these surfaces and may leave a residue behind.
4. How do I clean the fridge’s interior?
To clean the interior of a refrigerator, start by removing all food and items from the shelves and drawers. Wipe down the shelves and walls with a mixture of warm water and mild soap, then rinse thoroughly and dry with a clean cloth. For tough stains or odors, you can use a mixture of baking soda and water, or a commercial fridge cleaner.
5. Can I use natural cleaners to clean my refrigerator?
Yes, natural cleaners such as baking soda and vinegar can be used to clean a refrigerator. These cleaners are safe for most surfaces and are effective at removing odors and stains. They are also eco-friendly and gentle on the environment.
6. How do I clean the fridge’s exterior?
To clean the exterior of a refrigerator, start by wiping down the exterior with a damp cloth and mild soap. For tough stains or grime, you can use a mixture of baking soda and water, or a commercial fridge cleaner. Be sure to rinse thoroughly and dry the exterior with a clean cloth.
7. How do I clean the fridge’s condenser coils?
The condenser coils are located at the bottom or back of the refrigerator, and they help to cool the interior. To clean the coils, remove any dust or debris using a vacuum cleaner or a brush. You can also use a coil cleaner or a mixture of water and vinegar to remove any grime or stains. It’s important to keep the coils clean in order to maintain the efficiency of the refrigerator.


