Are you tired of struggling with greasy, grimy baking trays that seem impossible to clean? It’s time to say goodbye to those stubborn stains and hello to a spotless kitchen! In this article, we’ll show you how to deep clean a baking tray like a pro, so you can enjoy a clean and organized space. Whether you’re a seasoned baker or just starting out, this guide has got you covered. So, let’s get started and learn how to make your baking trays sparkle!
Prepare Your Workspace
Gather necessary tools and supplies
Before starting the deep cleaning process, it is essential to gather all the necessary tools and supplies to ensure a thorough and efficient cleaning. Here are the tools and supplies you will need:
- Baking tray: The baking tray that needs to be cleaned should be readily available for use during the cleaning process.
- Hot water: Hot water is necessary for loosening and removing stubborn grease and stains from the baking tray.
- Baking soda: Baking soda is an excellent natural abrasive that can help scrub away stubborn grime and stains from the baking tray.
- Aluminum foil: Aluminum foil can be used to cover areas of the baking tray that you do not want to clean at the moment, such as areas with non-stick coatings.
- Scouring sponge or non-abrasive sponge: A scouring sponge or non-abrasive sponge can be used to scrub away stubborn grime and stains from the baking tray.
- Soap or dish soap: Soap or dish soap can be used to create a rich lather that can help loosen and remove grease and stains from the baking tray.
- Kitchen paper towels or cloth: Kitchen paper towels or cloth can be used to wipe away loose dirt and debris from the baking tray during the cleaning process.
By having all these tools and supplies readily available, you can ensure a smooth and efficient deep cleaning process for your baking tray.
Put on protective gear
When it comes to deep cleaning a baking tray, it’s important to take necessary precautions to ensure your safety. Here are some essential protective gear that you should put on before starting the cleaning process:
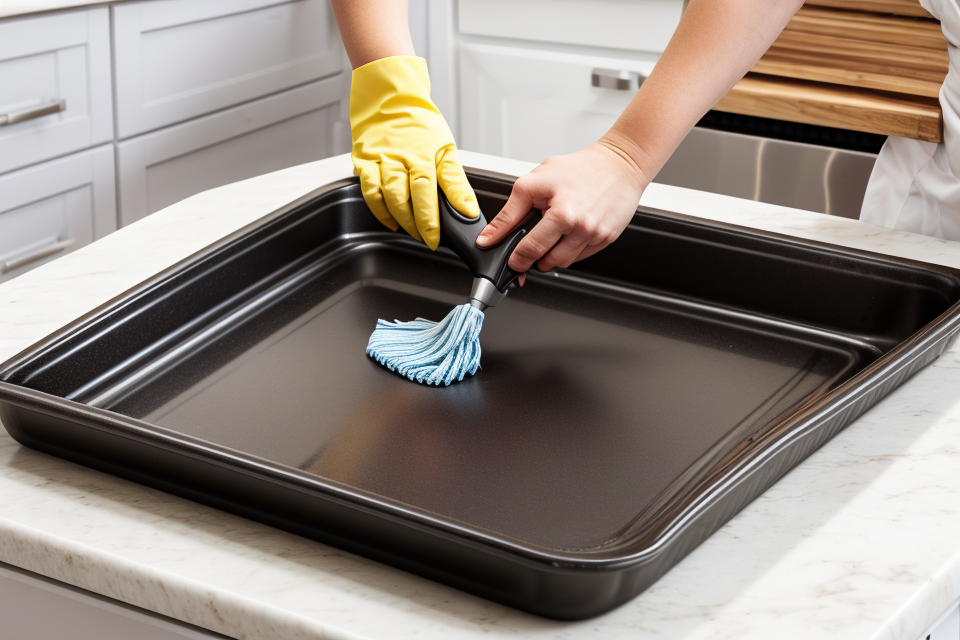
- Gloves: Wearing gloves is crucial when dealing with harsh chemicals or abrasive cleaning agents. It will protect your hands from any irritation or damage caused by the cleaning solutions. Make sure to choose gloves that are made of a durable material that can withstand the chemicals and abrasion.
- Apron or old clothes: To protect your clothing from any stains or damage caused by the cleaning solutions, it’s best to wear an apron or old clothes. This will also help in keeping your clothes clean and hygienic.
It’s important to note that the type of protective gear you need may vary depending on the cleaning solution you’re using. Always read the label and follow the manufacturer’s instructions to ensure your safety.
Additionally, make sure to work in a well-ventilated area to avoid inhaling any fumes or particles. This will help to ensure your safety and prevent any adverse reactions to the cleaning solutions.
Descaling the Baking Tray
Use hot water to loosen stuck-on food
Pouring hot water over the baking tray is an effective method to loosen stuck-on food. This is because hot water can penetrate and dissolve the food particles that have hardened on the surface of the tray. Here are the steps to follow:
- Fill a sink or a large container with hot water. Use enough water to fully submerge the baking tray.
- Immerse the tray into the hot water, ensuring that it is completely submerged.
- Let the tray soak in the hot water for several minutes, depending on the amount of food residue. This will allow the hot water to penetrate and loosen the stuck-on food.
- After soaking, carefully remove the tray from the hot water using a sponge or cloth.
- Use a sponge or cloth to scrub gently while the tray is still warm. This will help to remove any remaining food particles that were loosened by the hot water.
It is important to use caution when handling hot water and baking trays to avoid burns or scalds. Make sure the water is hot but not boiling, and handle the tray carefully to prevent damage. Additionally, if there are stubborn stains or residue that do not come off with hot water, consider using a mixture of baking soda and water to scrub the tray before rinsing with hot water.
Apply baking soda paste
Mix baking soda with a small amount of water to form a paste. It is important to use a small amount of water as too much water can dilute the effectiveness of the baking soda. The paste should be thick enough to adhere to the baking tray but not so thick that it is difficult to apply.
Apply the paste to the baking tray using a sponge or cloth. Make sure to cover the entire surface of the baking tray, including any crevices or hard-to-reach areas. The paste should be applied in a thick layer to allow for maximum descaling.
Let it sit for a few minutes. This will allow the baking soda paste to penetrate the layers of grease and grime on the baking tray. The longer it sits, the more effective it will be at breaking down the grime. However, be careful not to let it sit for too long as it may start to dry out and become difficult to remove.
Scrub with a non-abrasive sponge or cloth. Use a soft, non-abrasive sponge or cloth to scrub the baking tray. This will help to loosen and remove the grime without scratching or damaging the surface of the baking tray. Avoid using abrasive sponges or cleaning products as they can scratch or damage the surface of the baking tray.
Remove tough stains with a mixture of soap and water
- Identify the tough stains on the baking tray that need to be removed. These could be burn marks, grease stains, or other stubborn grime that won’t come off with a simple wipe down.
- Mix a solution of soap and water in a small bowl. You can use any type of soap that you have on hand, such as dish soap, laundry detergent, or even castile soap. Just make sure it’s a mild soap that won’t scratch the surface of the baking tray.
- Apply the soap mixture to the stains using a non-abrasive sponge or cloth. Work the mixture into the stains with a gentle, circular motion, making sure to cover the entire stain.
- Scrub gently, but firmly, to remove the stains. Be careful not to use too much pressure, as this could scratch the surface of the baking tray.
- Rinse the baking tray thoroughly with hot water to remove any remaining soap residue. You can use a clean sponge or cloth to help with the rinsing process.
Remember, when descaling your baking tray, it’s important to be patient and persistent. The tough stains may take some time and effort to remove, but with the right tools and techniques, you can get your baking tray looking like new again.
Dry the baking tray
Drying the baking tray is an essential step in the descaling process, as it ensures that all moisture is removed from the surface, leaving it clean and ready for the next use. Here are some tips to help you dry the baking tray properly:
- Use a clean cloth or kitchen paper towels to wipe off any excess moisture: It is important to use a clean cloth or paper towels to avoid any contamination. You can use a soft cloth to gently wipe off any excess moisture from the baking tray. If you are using paper towels, make sure they are clean and dry to prevent any lint from being left behind.
- Let the baking tray air dry completely before using it again: Once you have wiped off the excess moisture, let the baking tray air dry completely before using it again. You can place it in a well-ventilated area or use a fan to speed up the drying process. It is important to allow the baking tray to dry completely to prevent any water spots or residue from being left behind.
Removing Odors from the Baking Tray
Sprinkle baking soda on the baking tray
When it comes to removing odors from a baking tray, one of the most effective methods is to sprinkle baking soda on the surface. This is because baking soda is a great odor absorber and can neutralize any lingering smells.
Here’s how to do it:
- First, make sure the baking tray is cool to the touch.
- Then, take a large spoon or your hand and sprinkle baking soda evenly over the entire surface of the baking tray. Be sure to cover every nook and cranny, as baking soda is great at getting into the corners and crevices of the tray.
- Once you have covered the entire surface, let the baking soda sit for a few hours or overnight. This will give it enough time to absorb any odors that are present.
- After the baking soda has sat for a while, simply shake out the excess baking soda and clean the baking tray as usual.
It’s important to note that baking soda is safe to use on baking trays and won’t leave any harmful residue behind. So, you can use this method with confidence knowing that it will leave your baking tray smelling fresh and clean.
Use vinegar to remove odors
- Apply a small amount of vinegar to a cloth or sponge
- Rub the vinegar onto the baking tray in a circular motion
- Rinse with hot water and clean the baking tray as usual
Using vinegar to remove odors from a baking tray is a simple and effective method. Here’s how to do it:
- Apply a small amount of vinegar to a cloth or sponge. It’s important to use a small amount of vinegar as too much can leave a strong smell behind.
- Rub the vinegar onto the baking tray in a circular motion. Use a circular motion to ensure that the vinegar is evenly distributed over the surface of the baking tray.
- Rinse with hot water and clean the baking tray as usual. After rubbing the vinegar onto the baking tray, rinse it with hot water to remove any remaining odors. Then, clean the baking tray as usual with soap and water or a specialized baking tray cleaner.
By using vinegar to remove odors from a baking tray, you can deep clean your kitchen and leave it spotless.
Use lemon juice to remove stubborn odors
When it comes to removing stubborn odors from a baking tray, lemon juice is a simple and effective solution. This is because lemon juice contains natural bleaching properties that can help to break down and eliminate tough odors.
To use lemon juice to remove stubborn odors from your baking tray, follow these steps:
- Apply lemon juice to a cloth or sponge. You can squeeze fresh lemon juice directly onto the cloth or sponge, or you can mix lemon juice with water to create a diluted solution.
- Rub the lemon juice onto the baking tray in a circular motion. Be sure to cover the entire surface of the tray, including any crevices or hard-to-reach areas.
- Allow the lemon juice to sit on the tray for a few minutes. This will give the lemon juice time to penetrate the surface and break down the odors.
- Rinse with hot water and clean the baking tray as usual. Use a non-abrasive sponge or cloth to remove any remaining residue, and then dry the tray thoroughly before using it again.
By using lemon juice to remove stubborn odors from your baking tray, you can enjoy a spotless kitchen that smells fresh and clean.
Use tea tree oil to disinfect and deodorize
- Mix tea tree oil with a small amount of water to form a solution
- Tea tree oil is known for its antimicrobial properties, making it an effective disinfectant for baking trays. It is also a natural deodorizer, helping to eliminate any lingering odors that may be present.
- Apply the solution to a cloth or sponge
- To apply the solution, first wet a cloth or sponge with the tea tree oil mixture. This will help the solution to penetrate the baking tray and disinfect it more effectively.
- Rub the solution onto the baking tray in a circular motion
- Use a circular motion to rub the solution onto the baking tray, ensuring that all areas are covered. This will help to remove any stubborn odors and disinfect the baking tray thoroughly.
- After rubbing the solution onto the baking tray, rinse it with hot water to remove any remaining residue. Then, clean the baking tray as usual, either by hand or in a dishwasher, to remove any remaining tea tree oil mixture.
Storing the Baking Tray
Use aluminum foil to protect the baking tray
Aluminum foil is a useful tool when it comes to storing baking trays. By placing a piece of aluminum foil on the baking tray, you can protect it from any damage that may occur during storage. The foil also helps to keep the baking tray clean and free from any debris that may have accumulated on its surface.
To use aluminum foil to protect the baking tray, follow these steps:
- Place a piece of aluminum foil on the baking tray. The foil should be large enough to cover the entire surface of the tray.
- Fold the edges of the foil to create a barrier between the baking tray and other utensils. This will help to prevent any scratches or damage to the tray.
- Store the baking tray in a dry place. It is important to keep the baking tray in a dry place to prevent any rust or corrosion from forming on the metal.
By using aluminum foil to protect the baking tray, you can ensure that it stays clean and free from any damage. This simple step can help to extend the lifespan of your baking tray and make it easier to maintain a spotless kitchen.
Use a baking tray cover
- Place a baking tray cover on the baking tray
- The baking tray cover should be made of a durable material that can withstand the heat of the oven without melting or disintegrating.
- It should also fit the baking tray snugly to prevent dust and crumbs from getting in between the cover and the tray.
- Store the baking tray in a dry place
- The baking tray should be stored in a cool, dry place, away from direct sunlight and moisture.
- It is best to store the baking tray in a cupboard or pantry, as this will help to keep it clean and prevent the accumulation of crumbs and other debris.
- If possible, store the baking tray in a separate container or bin to further protect it from dust and crumbs.
Clean the baking tray before storing it
Before storing your baking tray, it’s important to thoroughly clean it to prevent the buildup of food residue and bacteria. Here are some steps to follow:
- Remove any remaining food residue: Use a spatula or your fingers to remove any crumbs or leftover food from the baking tray.
- Dissolve any stubborn residue: If there is any tough residue remaining, you can use a mixture of warm water and mild soap or dish soap to dissolve it. Apply the soap mixture to the baking tray and use a non-abrasive sponge or cloth to scrub it off.
- Rinse thoroughly: After scrubbing, rinse the baking tray thoroughly with clean water to remove any soap residue.
- Dry the baking tray completely: Before storing the baking tray, make sure it is completely dry to prevent the growth of mold and bacteria. You can use a clean towel to pat it dry or place it in the oven at a low temperature for a few minutes to ensure it is completely dry.
By following these steps, you can ensure that your baking tray is thoroughly clean and ready to be stored in a spotless kitchen.
Tips and Tricks
Check for scratches and damage
When it comes to deep cleaning a baking tray, the first step is to check for scratches and damage. This is an important step because if the baking tray is damaged, it may not be safe to use, and cleaning it may not be effective. Here are some tips to help you check for scratches and damage:
- Inspect the baking tray for scratches or damage before cleaning it. Look for any deep scratches, rust, or other signs of wear and tear.
- Use a soft cloth or sponge to gently run your fingers along the surface of the baking tray. If you feel any rough spots or bumps, this could be a sign of damage.
- Check the edges and corners of the baking tray as well. These areas can be easy to miss, but they are important to check for damage.
- If you notice any scratches or damage, you may need to replace the baking tray. It’s better to replace it sooner rather than later to ensure that it is safe to use and that your baked goods will turn out perfectly.
By following these tips, you can ensure that your baking tray is in good condition before cleaning it. This will help you get the best results and keep your kitchen spotless.
Use eco-friendly cleaning products
Cleaning your baking tray can be a daunting task, especially when you have to choose between harsh chemicals and a spotless kitchen. To achieve a spotless kitchen while also being environmentally conscious, consider using eco-friendly cleaning products.
Here are some reasons why you should use eco-friendly cleaning products:
- Reduce environmental impact: Eco-friendly cleaning products are designed to have minimal environmental impact. They are made from natural ingredients that break down quickly and do not harm the environment. By using these products, you can help reduce the amount of harmful chemicals that end up in our waterways and air.
- Protect your health: Harsh chemicals can be harmful to your health, especially if you have allergies or respiratory problems. Eco-friendly cleaning products are gentler on your skin and do not emit harmful fumes. They are also safer to use around pets and children.
- Save money: While eco-friendly cleaning products may be more expensive than their chemical counterparts, they are often more efficient and last longer. This means you can use less product to get the same results, saving you money in the long run.
When choosing eco-friendly cleaning products, look for products that are certified by reputable organizations such as EcoLogo or Green Seal. These organizations certify products that meet strict environmental standards.
Here are some eco-friendly cleaning products that you can use to deep clean your baking tray:
- Baking soda: Baking soda is a natural abrasive that can help remove stains and odors from your baking tray. Sprinkle baking soda onto the tray, add a little water to create a paste, and scrub away. Rinse with warm water and dry with a clean cloth.
- White vinegar: White vinegar is a natural disinfectant that can help kill bacteria and remove odors from your baking tray. Mix equal parts white vinegar and water, pour onto the tray, and let sit for a few minutes. Scrub with a non-abrasive sponge and rinse with warm water.
- Castile soap: Castile soap is a gentle, biodegradable soap that can be used to clean your baking tray. Mix a few drops of castile soap with warm water, add a non-abrasive sponge or cloth, and scrub away. Rinse with warm water and dry with a clean cloth.
By using eco-friendly cleaning products, you can achieve a spotless kitchen without harming the environment or your health.
Clean the baking tray regularly
Regular cleaning of your baking tray is essential to prevent the buildup of food and odors. By cleaning the tray after each use, you can prevent the formation of bacteria and the spread of unwanted smells throughout your kitchen.
To make cleanup easier and faster, consider using a baking tray liner. These liners can be placed in the tray before baking and removed afterward, making it simple to dispose of any crumbs or spills. This can save you time and effort when it comes to cleaning your baking tray.
In addition to using a baking tray liner, there are other methods you can use to clean your baking tray regularly. Here are some tips:
- Use warm water and mild dish soap to wash the tray by hand. Gently scrub any stuck-on food or stains with a non-abrasive sponge or cloth.
- If you have a dishwasher, you can wash the tray in the dishwasher using a mild detergent. Make sure to pre-soak any stubborn stains before washing.
- If you notice any rust or discoloration on the tray, use a mixture of equal parts white vinegar and water to clean the area. Apply the mixture to the affected area with a cloth and let it sit for a few minutes before rinsing with warm water.
- To prevent the buildup of odors, consider using baking soda to clean the tray. Sprinkle baking soda on the tray and let it sit for a few hours before washing the tray with warm water and mild dish soap.
By following these tips and cleaning your baking tray regularly, you can maintain a spotless kitchen and prevent the buildup of unwanted odors and bacteria.
FAQs
1. What is the best way to deep clean a baking tray?
The best way to deep clean a baking tray is to first remove any food residue by hand or with a non-abrasive sponge. Then, mix a solution of warm water and mild dish soap, and use a soft cloth or sponge to scrub the tray. Rinse thoroughly with warm water, and then dry the tray with a clean towel. If there are stubborn stains, you can use a mixture of baking soda and water to scrub the tray before rinsing.
2. How often should I deep clean my baking trays?
It is recommended to deep clean your baking trays at least once a month, or more frequently if you use them frequently. Neglecting regular cleaning can lead to the buildup of bacteria and odors, which can contaminate your food and kitchen.
3. Can I use abrasive cleaners or steel wool on my baking trays?
No, you should not use abrasive cleaners or steel wool on your baking trays, as they can scratch or damage the surface of the tray. Instead, use a soft cloth or sponge and mild dish soap to clean the tray.
4. How do I prevent rust on my baking trays?
To prevent rust on your baking trays, make sure to clean them thoroughly after each use and dry them completely before storing them. You can also apply a layer of oil or wax to protect the surface of the tray from moisture.
5. Can I put my baking trays in the dishwasher?
Yes, you can put your baking trays in the dishwasher for a deep clean. However, make sure to remove any metal parts or decorations before washing, as they can be damaged by the dishwasher’s sharp edges.


