Building a can food organizer is an excellent way to optimize your kitchen storage space. Not only does it keep your pantry organized, but it also helps you keep track of expiration dates and save space in your kitchen. With a little bit of creativity and some basic tools, you can easily build your own can food organizer. This guide will walk you through the steps of building a can food organizer, from gathering materials to putting it all together. Whether you’re a beginner or an experienced DIY-er, this guide will help you build a can food organizer that will make your kitchen more efficient and functional.
Understanding the Need for a Can Food Organizer
Reasons for Organizing Canned Food
Properly organizing canned food in the kitchen is crucial for several reasons. Firstly, it helps to ensure that the food remains fresh and lasts longer. When canned goods are stored haphazardly, they can easily become dented or damaged, which can lead to spoilage. Additionally, disorganized canned food can make it difficult to locate specific items when you need them, leading to frustration and wasted time.
Another reason to organize canned food is to maximize storage space. Canned goods take up a lot of room in the pantry or cupboard, and if they are not arranged properly, it can be challenging to fit everything in. By using a can food organizer, you can make the most of your available space and keep your kitchen looking neat and tidy.
Finally, organizing canned food can help to prevent accidents and injuries. When cans are stacked haphazardly, they can be prone to falling and causing damage or injury. By storing them in an organized manner, you can reduce the risk of accidents and keep your kitchen a safer place.
Overall, there are many benefits to organizing canned food in your kitchen. Not only will it help to keep your food fresh and prevent waste, but it will also make your kitchen more efficient and easier to navigate.
Types of Canned Food Organizers
There are various types of canned food organizers available in the market. These organizers are designed to help you store your canned goods in an organized and efficient manner. Here are some of the most common types of canned food organizers:
- Rack-based organizers: These organizers feature a series of metal or plastic racks that are designed to hold cans upright. The racks are usually adjustable, allowing you to customize the storage space to fit different sizes of cans. Rack-based organizers are great for small kitchens or pantries where space is limited.
- Stackable organizers: These organizers are designed to be stacked on top of each other, providing multiple levels of storage for your canned goods. Stackable organizers are great for larger pantries or kitchens where you need to store a large number of cans.
- Wall-mounted organizers: These organizers are designed to be mounted on the wall, providing a space-saving solution for storing your canned goods. Wall-mounted organizers are great for small kitchens or pantries where floor space is limited.
- Drawer-based organizers: These organizers feature a series of drawers that are designed to hold cans upright. The drawers are usually adjustable, allowing you to customize the storage space to fit different sizes of cans. Drawer-based organizers are great for small kitchens or pantries where space is limited.
- Rotating organizers: These organizers feature a series of rotating bins that allow you to easily access your canned goods. Rotating organizers are great for pantries or kitchens where you need to access your canned goods frequently.
Each type of canned food organizer has its own unique set of benefits and drawbacks. By understanding the different types of organizers available, you can choose the one that best fits your needs and preferences.
Gathering Materials for the Can Food Organizer
Wooden Boxes
When building a can food organizer, wooden boxes are an essential material to have on hand. These boxes will serve as the base for the organizer and provide a sturdy surface for the cans to rest on. The following steps will guide you through the process of gathering the necessary wooden boxes for your can food organizer:
- Determine the size of the wooden boxes you will need. The size will depend on the number of cans you plan to store in the organizer and the space available in your kitchen. It’s important to choose a size that will fit comfortably in your kitchen without taking up too much space.
- Measure the dimensions of the wooden boxes you will need. You will need to know the length, width, and height of the boxes to ensure they are the right size for your organizer.
- Choose a type of wood for the boxes. Different types of wood have different properties, such as durability and resistance to moisture. Consider the characteristics of the wood you choose and how it will affect the overall quality of your can food organizer.
- Cut the wood to the appropriate size. Using a saw or other cutting tool, cut the wood to the dimensions you measured in step 2. Make sure the edges are smooth and even to ensure a professional-looking finish.
- Sand the edges of the wooden boxes. Use a sandpaper to smooth out any rough edges and create a uniform surface. This will help prevent the cans from getting scratched or damaged.
- Assemble the wooden boxes. Use nails or screws to join the boxes together, creating a sturdy base for your can food organizer. Make sure the boxes are level and even to ensure the cans are stored properly.
By following these steps, you can gather the necessary wooden boxes for your can food organizer and create a functional and efficient storage solution for your kitchen.
Pallets
Pallets are a popular choice for building a can food organizer as they are readily available, durable, and inexpensive. Here are the steps to gather the necessary pallets:
- Check local businesses: Start by checking local businesses such as grocery stores, wholesale clubs, and warehouses. These places often have excess pallets that they are willing to give away for free.
- Ask online: You can also try asking online forums or social media groups if anyone is giving away pallets. Many people are happy to get rid of their unwanted pallets, so this can be a great option.
- Buy new or used: If you can’t find any free pallets, you can buy new or used ones from a variety of sources. Some popular options include home improvement stores, online marketplaces, and even individuals who are selling their old pallets.
When gathering pallets, make sure to check for any damage or signs of wear. Look for pallets that are in good condition and made from durable materials such as wood or plastic. You may also want to consider the size of the pallets, as they will need to be large enough to hold your cans of food.
Galvanized Pipe
Galvanized pipe is a popular choice for building can food organizers due to its durability and resistance to corrosion. It is also easy to work with and can be cut to size as needed.
Here are the materials required for building a can food organizer using galvanized pipe:
- Galvanized pipe (1 inch or 1 1/4 inch)
- Couplings and elbows (for connecting the pipes)
- Pipe clamps or straps (to hold the pipes together)
- End caps (to cover the ends of the pipes)
- Can clips or hangers (to hold the cans in place)
Once you have gathered all the necessary materials, you can begin building your can food organizer. The next step is to measure and cut the galvanized pipe to the desired length for your organizer.
L brackets
L brackets, also known as angle brackets, are essential components for building a can food organizer. They are used to create a frame for the organizer and provide support for the cans. To gather the necessary L brackets for the can food organizer, follow these steps:
- Measure the width and height of the organizer: Before gathering the materials, measure the width and height of the organizer to determine the size of the L brackets needed.
- Purchase L brackets: Once you have the measurements, purchase L brackets that are the appropriate size for the organizer. The L brackets should be made of sturdy metal to provide support for the cans.
- Cut the L brackets to size: Cut the L brackets to the appropriate size based on the measurements taken earlier. This will ensure that the brackets fit properly and provide the necessary support for the cans.
- Assemble the L brackets: Once the L brackets are cut to size, assemble them to create the frame for the organizer. This can be done by attaching the L brackets to a wall or a piece of furniture using screws or adhesive.
By following these steps, you can gather the necessary L brackets for your can food organizer and ensure that it is sturdy and durable.
Building the Can Food Organizer
Measuring and Cutting Wooden Boxes
Measuring and cutting wooden boxes is the first step in building a can food organizer. To start, you will need to gather the materials you will need, including wood for the boxes and screws or nails to hold them together. The next step is to measure the width, height, and depth of the wooden boxes that you will be building.
To measure the boxes, you can use a measuring tape or a ruler. You will want to make sure that the boxes are the same size so that they can fit together properly. Once you have the measurements, you can use a saw or a miter box to cut the wood into the appropriate sizes.
It is important to be precise when measuring and cutting the wood, as any mistakes can affect the overall size and shape of the can food organizer. To ensure that the boxes are the correct size, you can use a template or a pattern to guide you as you cut the wood.
After you have cut the wood into the appropriate sizes, you can begin assembling the can food organizer. Start by sanding the edges of the wood to remove any splinters or rough spots. Then, use screws or nails to attach the pieces together, making sure that they are aligned properly.
Once the can food organizer is assembled, you can add any additional features, such as handles or a lid. With a little bit of time and effort, you can create a functional and efficient kitchen storage solution that will help you keep your pantry organized and clutter-free.
Assembling the Base and Sides
Gather the necessary materials, including wooden planks, screws, and a drill. Begin by cutting the wooden planks to the desired size and shape for the base and sides of the organizer. Use a drill to create pilot holes and insert screws to secure the pieces together. Ensure that the base is sturdy and level, as it will serve as the foundation for the entire organizer. Next, attach the sides to the base using screws, ensuring that they are flush and even. Finally, sand the surface of the organizer to remove any rough edges and ensure a smooth finish.
Attaching Galvanized Pipe
Galvanized pipe is an excellent material to use when building a can food organizer as it is durable and easy to work with. Here are the steps to attach the galvanized pipe:
- Measure and cut the galvanized pipe to the desired length.
- Use a pipe cutter or a hacksaw to cut the pipe.
- Deburr the cut ends of the pipe using a deburring tool or a file.
- Apply a generous amount of PVC cement to the end of one of the pipes.
- Insert the other pipe into the cement-coated end of the first pipe.
- Use a pipe wrench to tighten the pipes together until they are firmly connected.
- Repeat the process for the remaining connections.
Once the galvanized pipe is attached, the next step is to attach the hardware cloth to the frame. This will provide a secure surface for the cans to rest on and prevent them from falling over. The hardware cloth can be attached using staples or screws, depending on personal preference.
Adding L Brackets
To start building the can food organizer, you will need to add L brackets to the sides of the top shelf. L brackets are used to support the weight of the cans and to provide additional stability to the organizer. Here’s how to add L brackets:
- Measure the width of the top shelf and determine the appropriate length for the L brackets. You will need to add L brackets to both sides of the shelf.
- Cut the L brackets to the appropriate length using a miter saw or a handsaw.
- Screw the L brackets onto the sides of the top shelf using screws. Make sure the brackets are securely attached and able to support the weight of the cans.
- Repeat the process for the other side of the top shelf.
By adding L brackets to the sides of the top shelf, you will provide additional support and stability to the can food organizer. This will ensure that the organizer can hold a large number of cans without toppling over or becoming unstable.
Customizing the Can Food Organizer
Painting or Staining the Wooden Boxes
Painting or staining the wooden boxes is an essential step in customizing the can food organizer. This process not only enhances the visual appeal of the organizer but also protects the wood from moisture and other elements. Here are the steps to follow when painting or staining the wooden boxes:
- Choose the right paint or stain: There are various types of paint and stain available in the market, and it is essential to choose the right one for your wooden boxes. For example, if you want a natural look, you can choose a stain that highlights the wood’s natural grain. On the other hand, if you prefer a more vibrant color, you can choose a paint that complements your kitchen’s overall color scheme.
- Clean the wooden boxes: Before painting or staining the wooden boxes, it is crucial to clean them thoroughly. This step is necessary to remove any dirt, dust, or debris that may interfere with the adhesion of the paint or stain. You can use a mild detergent and warm water to clean the boxes.
- Sand the wooden boxes: After cleaning the wooden boxes, you need to sand them to create a smooth surface. This step is necessary to ensure that the paint or stain adheres evenly to the surface. You can use a fine-grit sandpaper to sand the boxes.
- Apply the paint or stain: Once you have cleaned, sanded, and chosen the right paint or stain, you can begin applying it to the wooden boxes. Start by applying the paint or stain to one side of the box and work your way across to the other side. Make sure to apply the paint or stain evenly, and avoid any drips or runs.
- Allow the paint or stain to dry: After applying the paint or stain, you need to allow it to dry completely. This step is crucial to ensure that the paint or stain adheres properly to the wooden boxes. Depending on the type of paint or stain you used, it may take several hours or even days to dry completely.
By following these steps, you can create a customized can food organizer that not only looks great but also provides efficient storage for your kitchen.
Attaching Label Holders
Attaching label holders to your can food organizer is an excellent way to keep your pantry organized and make it easy to identify the contents of each can. Label holders can be purchased at most hardware stores or online, and they come in a variety of sizes and materials.
Here are the steps to attach label holders to your can food organizer:
- Measure the width and height of the label holder you will be using to ensure that it fits the size of your cans.
- Mark the location where you want to attach the label holder to the organizer. Make sure it is in a visible location and easily accessible.
- Use a drill to make a small hole at each mark. Be careful not to drill too deep or too close to the edge of the organizer.
- Insert the screws into the holes and tighten them securely.
- Place the label holder on the screws and make sure it is level.
- Use the screwdriver to tighten the screws, securing the label holder in place.
Repeat these steps for each label holder you want to attach to your organizer. Once the label holders are attached, you can begin labeling your cans and keeping your pantry organized.
Remember to choose labels that are clear and easy to read, and make sure they are large enough to be seen from a distance. You can also use different colors or labels with images to help you quickly identify the contents of each can.
Installing a Locking Mechanism
When building a can food organizer, installing a locking mechanism is an essential step to ensure efficient kitchen storage. Here are the steps to follow:
- Measure the Width and Height of the Organizer
Before installing a locking mechanism, it is important to measure the width and height of the organizer to ensure that the locking mechanism will fit properly. Measure the width and height of the organizer, and note down the measurements. - Choose a Locking Mechanism
There are various types of locking mechanisms available, such as latches, hinges, and clasps. Choose a locking mechanism that is suitable for the organizer’s size and purpose. For example, if the organizer is large, a latch may be more appropriate than a clasp. - Cut the Locking Mechanism to Size
Once you have chosen a locking mechanism, cut it to size using a hacksaw or a metal cutting saw. Make sure to cut the locking mechanism to the same width and height as the organizer. - Attach the Locking Mechanism
Attach the locking mechanism to the organizer using screws or bolts. Make sure to follow the manufacturer’s instructions for attaching the locking mechanism. - Test the Locking Mechanism
After attaching the locking mechanism, test it to ensure that it works properly. Make sure that the locking mechanism is sturdy and secure, and that it can be easily opened and closed.
By following these steps, you can install a locking mechanism on your can food organizer for efficient kitchen storage.
Installing the Can Food Organizer
Choosing the Right Location
Choosing the right location for your can food organizer is crucial to ensure maximum efficiency and ease of access. Here are some factors to consider when selecting the ideal location:
- Lighting: Ideally, the location should have ample natural light or good artificial lighting to make it easy to see the contents of the organizer.
- Accessibility: The organizer should be easily accessible to prevent unnecessary bending, stretching, or reaching to retrieve items. Ensure that the location is close to frequently used areas in the kitchen, such as the stove or refrigerator.
- Space Availability: Consider the available space in your kitchen when choosing the location for the organizer. Make sure that the location does not obstruct traffic flow or take up too much space that could be used for other kitchen activities.
- Temperature and Humidity: If you are storing perishable items in the organizer, make sure that the location is away from direct sunlight and extreme temperatures. Also, ensure that the location has a consistent humidity level to prevent spoilage.
- Aesthetics: Finally, consider the aesthetics of the location. The organizer should complement the overall design of your kitchen without being an eyesore.
Mounting the Organizer to the Wall
Securing the organizer to the wall is a crucial step in building a can food organizer for efficient kitchen storage. Here are the steps to follow:
- Determine the location: Decide on the best location to mount the organizer on the wall. Choose a spot that is easily accessible and close to the area where you usually store your canned goods.
- Gather materials: You will need screws, a screwdriver, and anchors. The anchors will depend on the type of wall you have. If you have drywall, use toggle bolts. If you have concrete or masonry, use wall anchors.
- Mark the location: Use a pencil to mark the location where you plan to mount the organizer on the wall. Make sure the marks are level and straight.
- Drill the holes: Use a drill to create holes where you marked the location. Be careful not to drill too deep or too close to the edge of the wall.
- Insert the anchors: Insert the anchors into the holes you drilled. Make sure they are level and flush with the wall.
- Attach the organizer: Hold the organizer against the wall and use the screws to secure it in place. Make sure the organizer is level and secure.
- Check for stability: Test the organizer to make sure it is stable and won’t fall off the wall.
By following these steps, you can mount your can food organizer to the wall and create a convenient and efficient storage solution for your kitchen.
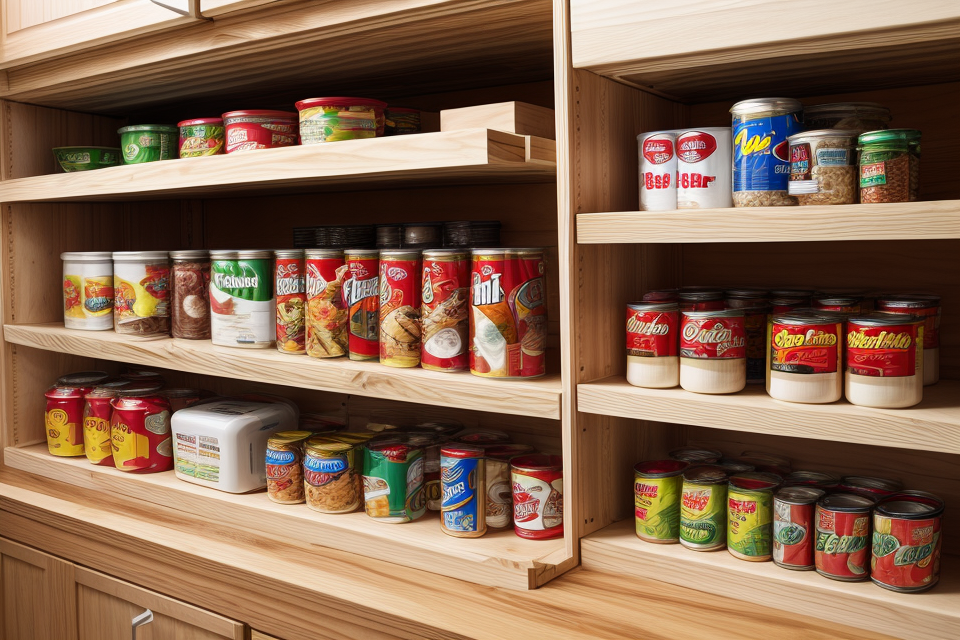
Organizing Canned Food
Organizing canned food in a can food organizer is an efficient way to keep your kitchen storage neat and tidy. Here are some tips on how to do it:
- Sort Canned Food
Sort canned food items based on their usage, expiration date, or type. This will make it easier to locate and retrieve the items you need. - Use Labels
Label the bins or shelves with the names of the items they contain. This will help you quickly identify what’s inside each bin or shelf. - Keep Heavy Items on the Bottom
Keep heavy items on the bottom shelf to prevent them from falling and causing damage. This will also help maintain the organization of the can food organizer. - Group Similar Items Together
Group similar items together, such as all canned soups or all canned vegetables, to make it easier to find what you need. - Rotate Stock
Rotate your stock by using older items first to ensure that everything stays fresh and is used before it expires. - Clean Regularly
Clean the can food organizer regularly to prevent the buildup of dust and debris, which can attract pests and affect the quality of your food.
By following these tips, you can ensure that your can food organizer is always organized and efficient, making it easier to find what you need in your kitchen storage.
Maintaining the Can Food Organizer
Dusting and Wiping Down the Organizer
To keep your can food organizer in top condition, it’s important to regularly dust and wipe it down with a damp cloth. This will help to remove any loose debris or crumbs that may have accumulated in the organizer, as well as prevent the buildup of dust and dirt.
Here are the steps you can follow to dust and wipe down your can food organizer:
- First, remove any items from the organizer that may be dirty or dusty. This will make it easier to clean the organizer thoroughly.
- Use a soft-bristled brush or a small broom to gently sweep away any loose debris or crumbs that may have accumulated in the organizer.
- Next, take a dry cloth and wipe down the entire organizer, paying particular attention to any crevices or hard-to-reach areas. This will help to remove any dust or dirt that may have accumulated on the surface of the organizer.
- If there is still dust or dirt remaining on the organizer, you can use a damp cloth to wipe it down. Be sure to wring out the cloth thoroughly before using it to avoid leaving any water spots on the organizer.
- Once you have wiped down the organizer, allow it to air dry completely before placing any items back inside. This will help to prevent any moisture from getting trapped inside the organizer and causing damage to your canned goods.
By following these simple steps, you can keep your can food organizer looking and functioning its best, even after repeated use.
Removing Dirt and Debris
One of the most important aspects of maintaining a can food organizer is ensuring that it remains clean and free of dirt and debris. This is because food residue, dust, and other particles can accumulate over time, leading to unpleasant odors, spoilage, and the growth of bacteria and other microorganisms.
To remove dirt and debris from your can food organizer, start by taking it apart and separating the components. This will make it easier to access all areas and remove any accumulated debris. Use a soft-bristled brush or a vacuum cleaner with a gentle attachment to gently sweep away any loose debris.
Next, use warm water and mild dish soap to wash the various components of the organizer. Be sure to pay special attention to any areas where food may have spilled or become trapped, such as the edges of shelves or the spaces between cans. Use a sponge or cloth to wipe down each component thoroughly, making sure to remove all soap residue before drying with a clean towel.
Once everything is clean and dry, reassemble the organizer and replace any components that were removed for cleaning. Finally, consider using a food-grade silicone spray or other protectant to help keep the organizer clean and free of odors in the future.
Keeping the Organizer Clean and Sanitary
- Regularly inspect the organizer for any signs of damage or wear and tear
- Wipe down the organizer with a damp cloth and mild soap to remove any dirt or debris
- Use a disinfectant solution to thoroughly clean the organizer, paying special attention to any areas with visible stains or residue
- Allow the organizer to air dry completely before using it again
- Consider covering the organizer with a food-grade plastic cover to protect it from crumbs and other food particles
- Check the hardware and hinges of the organizer regularly and tighten them if necessary to ensure it stays in good working condition.
Tips for an Efficient Can Food Organizer
Rotating Canned Goods
When it comes to storing canned goods, one of the most effective ways to ensure that they remain fresh and tasty is by rotating them. This means that you should keep the oldest cans at the front of your shelves and replace them with newer ones as they are used up.
Here are some tips for rotating your canned goods:
- Label Your Cans: One of the best ways to keep track of the oldest cans is by labeling them with the date that they were purchased or opened. This will make it easier to rotate them properly.
- Use a Shelf System: To make it easier to rotate your canned goods, consider using a shelf system that allows you to store them in a specific order. This can be as simple as using a stack of boxes or bins, or you can invest in a specialized can organizer that is designed to help you keep your cans in order.
- Store Similar Items Together: To make it easier to rotate your canned goods, consider storing similar items together. For example, you can group all of your canned fruits together, or all of your canned vegetables. This will make it easier to rotate them as a group, rather than having to sort through individual cans.
- Consider the Expiration Dates: When rotating your canned goods, be sure to consider the expiration dates. Cans that are close to their expiration date should be used first, while newer cans should be stored at the back of the shelf.
By following these tips, you can ensure that your canned goods are always fresh and tasty, and that you are making the most of your kitchen storage space.
Labeling Containers
Labeling containers is an essential step in building an efficient can food organizer. Here are some tips to keep in mind when labeling your containers:
- Use clear and concise labels: It’s important to use labels that are easy to read and understand. Avoid using labels that are too fancy or complicated, as they may be difficult to decipher.
- Use a consistent labeling system: To make it easier to find what you’re looking for, use a consistent labeling system throughout your organizer. For example, you could use a color-coding system or assign numbers to each type of food.
- Include important information: In addition to the name of the food, include other important information such as the expiration date, quantity, and any special storage instructions.
- Place labels in a visible location: Make sure to place labels in a visible location so that you can easily see what’s inside each container. Avoid placing labels on the bottom of containers, as they may be difficult to see.
- Update labels as needed: As you add or remove food from your organizer, be sure to update your labels accordingly. This will help ensure that your organizer stays organized and efficient.
By following these tips, you can ensure that your can food organizer is efficient and easy to use.
Planning Meals
Creating a meal plan is an essential step in building an efficient can food organizer. Meal planning helps to ensure that you have the right ingredients on hand and reduces the likelihood of waste. Here are some tips for planning meals:
- Make a list of meals you want to prepare for the week. Consider the preferences of everyone in your household and plan meals that are easy to prepare.
- Check your pantry and fridge to see what ingredients you already have on hand. This will help you avoid purchasing duplicate items and will ensure that you use up the ingredients you already have.
- Plan your meals around the ingredients you have. For example, if you have a lot of canned goods, you can plan meals that incorporate those items.
- Be realistic about the amount of time you have to prepare meals. If you know you have a busy week ahead, plan meals that can be prepared quickly and easily.
- Consider including leftovers in your meal plan. Leftovers can be used to create new meals or eaten as is. This helps to reduce waste and saves money.
By following these tips, you can create a meal plan that works for your household and helps you build an efficient can food organizer.
Frequently Asked Questions
What are the benefits of organizing canned food?
Organizing canned food has numerous benefits that can help you make the most out of your pantry. Here are some of the key advantages of organizing your canned goods:
- Saves Space: Organizing your canned food in an organized manner can help you save space in your pantry or kitchen cabinets. When you have a system in place, you can easily see what you have and what you need, which can help you avoid duplicate purchases and ensure that you are making the most of your storage space.
- Easier Access: When your canned goods are organized, you can easily access the items you need, which can save you time and effort when you are cooking. Instead of rummaging through your pantry or cabinets, you can quickly find what you need and get back to cooking.
- Prevents Waste: When you have a well-organized pantry, you are less likely to forget about the items you have or accidentally purchase duplicates. This can help you prevent waste and ensure that you are making the most of your food purchases.
- Makes Meal Planning Easier: When you have a clear idea of what you have in your pantry, you can more easily plan your meals. You can see what ingredients you have on hand and plan your meals accordingly, which can help you save time and money.
- Reduces Clutter: A disorganized pantry can be a source of clutter and make your kitchen feel cramped and overwhelming. By organizing your canned goods, you can reduce clutter and create a more organized and pleasant kitchen environment.
What materials are needed to build a can food organizer?
To build a can food organizer, you will need the following materials:
- Wooden Boards: You will need wooden boards to build the frame of the organizer. You can use any type of wood, but it is recommended to use sturdy and durable wood like oak or pine.
- Screws: You will need screws to fasten the wooden boards together. It is recommended to use long-lasting and rust-resistant screws to ensure durability.
- Canvas or Mesh: You will need canvas or mesh to cover the wooden frame. The canvas or mesh should be strong enough to hold the weight of the cans and able to prevent them from falling out.
- Hardware: You will need hardware like hinges, handles, and brackets to assemble the organizer. These hardware materials can be purchased from a hardware store.
- Paints or Stains: You can paint or stain the wooden frame to enhance its appearance and add protection to the organizer.
- Cans: You will need the cans that you want to store in the organizer. Make sure that the cans are clean and dry before storing them in the organizer.
By using these materials, you can create a can food organizer that is efficient, durable, and easy to maintain.
How do I install a can food organizer in my kitchen?
To install a can food organizer in your kitchen, follow these steps:
- Measure the space: Determine the available space in your kitchen where you want to place the organizer. Measure the width, height, and depth of the area to ensure the organizer fits properly.
- Choose the location: Decide on the most convenient location for the organizer, considering factors such as accessibility, lighting, and proximity to frequently used items.
- Select the organizer type: Choose the type of organizer that best suits your needs, whether it’s a wall-mounted, freestanding, or modular organizer. Make sure it’s compatible with the space and layout of your kitchen.
- Gather materials: Prepare the necessary materials for installation, which may include screws, anchors, a drill, and a level. The specific materials required may vary depending on the type of organizer and installation method.
- Follow the manufacturer’s instructions: Most can food organizers come with detailed installation instructions. Follow these instructions carefully, ensuring that you attach the organizer securely to the wall or surface using the appropriate hardware.
- Level and align: Use a level to ensure that the organizer is properly aligned and installed at the correct height. This will help ensure a sturdy and secure installation.
- Organize your cans: Once the organizer is installed, begin organizing your cans according to type, size, or expiration date. Place them in the appropriate compartments or sections, ensuring that they fit comfortably and securely.
- Adjust and fine-tune: If necessary, adjust the organizer’s position or configuration to optimize its functionality and suit your preferences. This may involve rearranging compartments or adjusting the spacing between them.
By following these steps, you can install a can food organizer in your kitchen with ease, maximizing your storage space and streamlining your meal preparation process.
How do I maintain my can food organizer?
Importance of Regular Maintenance
Regular maintenance of your can food organizer is crucial to ensure its longevity and efficiency. Neglecting maintenance can lead to damage, which can affect the organization’s functionality and ultimately impact your kitchen storage. By investing a little time in maintenance, you can avoid costly repairs and replacement in the long run.
Cleaning the Organizer
Regular cleaning is a crucial aspect of maintaining your can food organizer. Start by removing all the cans from the organizer and washing it with mild soap and warm water. If there are stubborn stains or odors, you can use a mixture of baking soda and water to scrub the organizer. After cleaning, let it air dry completely before putting the cans back in.
Lubricating the Wheels
Lubricating the wheels of your can food organizer is essential to ensure smooth movement. Applying a lubricant such as silicone spray or oil to the wheels can help reduce friction and prevent them from getting stuck. Be sure to apply the lubricant sparingly and only to the wheels, not the entire organizer.
Checking for Damage
Regularly inspecting your can food organizer for any signs of damage is crucial. Check for any loose or broken parts, such as wheels or shelves, and replace them immediately if necessary. Additionally, look out for any rust or corrosion, which can weaken the organizer over time.
Storing the Organizer
Properly storing your can food organizer when not in use can help prolong its lifespan. Consider storing it in a dry, cool place, away from direct sunlight or moisture. This will prevent any damage to the organizer and ensure it remains in good condition for future use.
By following these maintenance tips, you can ensure that your can food organizer remains efficient and functional for years to come. Regular cleaning, lubrication, and inspection will help maintain the organizer’s quality and extend its lifespan, ultimately saving you time and money in the long run.
What are some tips for an efficient can food organizer?
Space Utilization
- Use Vertical Space: Utilize the height of the storage space by using shelves or hanging organizers to store canned goods vertically.
- Maximize Shelf Space: Install adjustable shelves or use dividers to maximize the space on each shelf, ensuring that each item has its designated place.
- Corner Storage: Take advantage of the corners of the room by installing corner shelves or using a corner unit to store less frequently used items.
Labeling and Categorization
- Label Each Shelf: Label each shelf or section with the type of items stored there to easily identify what’s inside.
- Categorize by Use: Organize canned goods based on their frequency of use, such as frequently used items near the stove and less frequently used items in higher storage areas.
- Rotate Stock: Regularly rotate the stock to ensure that older items are used first and to prevent waste.
Accessibility
- Clear Aisles: Ensure that there is enough space to access items easily by leaving clear aisles between shelves or organizers.
- Adjustable Shelves: Use adjustable shelves or baskets that can be easily moved or adjusted to accommodate changes in stock levels.
- Ergonomic Design: Design the storage system with ergonomics in mind, making it easy to reach and access items without strain or injury.
Materials and Durability
- Durable Materials: Use durable materials for the storage system, such as sturdy metal or heavy-duty plastic, to ensure that it can withstand regular use and weight.
- Adjustable or Removable Components: Use adjustable or removable components, such as shelves or dividers, to make it easy to modify or rearrange the storage system as needed.
- Safe Storage: Ensure that the storage system is safe for storing canned goods, with features such as non-tip shelves or sturdy brackets to prevent accidents.
FAQs
1. What materials do I need to build a can food organizer?
To build a can food organizer, you will need some wooden boards, screws, hinges, and a saw. The exact materials needed will depend on the size and design of the organizer you want to build. You may also need some sandpaper and paint or varnish to finish the organizer.
2. How do I design the can food organizer?
Designing the can food organizer will depend on your personal preferences and the space available in your kitchen. You can draw a rough sketch of the organizer on paper and then use the measurements to cut the wooden boards to size. Alternatively, you can search online for can food organizer plans and modify them to suit your needs.
3. How do I attach the wooden boards together?
To attach the wooden boards together, you can use screws and hinges. First, pre-drill the holes for the screws to prevent the wood from splitting. Then, attach the hinges to the boards and screw them together. You can also add wooden dowels or other supports to help keep the organizer sturdy.
4. How do I attach the can food organizer to the wall?
To attach the can food organizer to the wall, you will need to use screws or anchors. It’s important to make sure the organizer is securely attached to the wall to prevent it from falling and causing injury or damage. You may also want to add a layer of plaster or drywall compound to the wall before attaching the organizer to create a smooth surface.
5. How do I organize the cans in the organizer?
To organize the cans in the organizer, you can use dividers or partitions to separate them by type or size. You can also add labels to the dividers to help you quickly identify the contents of each section. Additionally, you can use small baskets or bins to further organize the cans and keep them from rolling around.
6. Can I customize the can food organizer to fit my specific needs?
Yes, you can customize the can food organizer to fit your specific needs. You can add more or fewer shelves, change the size or shape of the organizer, or add additional features such as a lid or locking mechanism. You can also paint or stain the organizer to match your kitchen decor.


