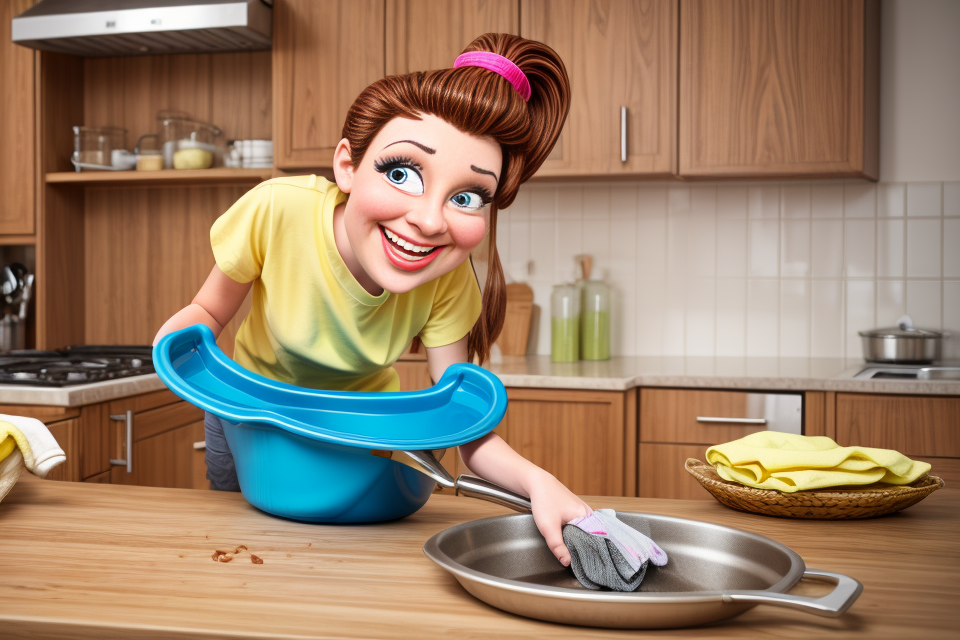
Are you tired of struggling to clean your baking pans, which are covered in a thick layer of grease and flour? Look no further! In this article, we will provide you with effective techniques to make cleaning your heavily soiled baking pans a breeze. From the best cleaning agents to use, to tips on how to get into those hard-to-reach corners, we’ve got you covered. Don’t let dirty pans stress you out anymore, because with these techniques, you’ll have your pans looking like new in no time.
Preparing for Cleaning
Gathering Essential Tools and Equipment
Cleaning heavily soiled baking pans can be a challenging task, but with the right tools and equipment, it can be done efficiently. Here are some essential tools and equipment that you will need for the job:
- Scouring pad or steel wool: These are great for removing tough baked-on grease and food residue from baking pans. A scouring pad is more abrasive and can be used for pans with heavier grime, while steel wool is gentler and can be used for pans with lighter stains.
- Non-abrasive sponge or cloth: After using the scouring pad or steel wool, you will need a non-abrasive sponge or cloth to clean the pan and remove any remaining residue.
- Hot water: Hot water helps to loosen the grease and food residue, making it easier to remove.
- Dish soap or baking soda: Dish soap is a good choice for cleaning baking pans, as it is effective at breaking down grease and food residue. Baking soda is also a great option, as it is a natural abrasive that can help to remove tough stains.
- Brush or spatula: You will need a brush or spatula to scrub the pan and remove any remaining residue.
- Dish rack or tray: You will need a dish rack or tray to place the pan on while you clean it, to catch any water or soap that may spill.
- Bucket or sink: You will need a bucket or sink to rinse the pan and wash it thoroughly.
By gathering these essential tools and equipment, you will be well-prepared to tackle the task of cleaning heavily soiled baking pans.
Removing Parts and Components for Cleaning
When it comes to cleaning heavily soiled baking pans, one of the most important steps is to remove any parts or components that can be taken off. This can include things like baffles, racks, or other accessories that may have been used in the baking process.
It’s important to note that some baking pans may have different types of removable parts or components, so it’s important to familiarize yourself with your specific equipment. For example, some pans may have removable wire racks that can be easily taken out and cleaned separately. Other pans may have baffles or other structures that need to be carefully removed before cleaning.
In general, it’s best to remove any parts or components that can be taken off before starting the cleaning process. This will make it easier to get at the soil and grease that may have accumulated in hard-to-reach places. It will also make the cleaning process more efficient and effective overall.
Here are some specific tips for removing parts and components from baking pans:
- Carefully remove any wire racks or other accessories that can be taken off. These can usually be lifted out easily with a bit of gentle force.
- Be careful when removing baffles or other structures that may be more difficult to remove. These may need to be carefully disassembled before cleaning.
- Make sure to inspect the parts and components for any damage or wear and tear before reassembling the baking pan. If any parts are damaged, they may need to be replaced before the pan can be used again.
Overall, removing parts and components from baking pans is an important step in the cleaning process. By taking off any accessories that can be removed, you’ll be able to get at the soil and grease more easily, making the cleaning process more efficient and effective.
Checking the Condition of the Baking Pan
Before starting the cleaning process, it is essential to check the condition of the baking pan. The condition of the pan can determine the effectiveness of the cleaning method. Here are some factors to consider when checking the condition of the baking pan:
- Material: Different materials require different cleaning methods. For example, cast iron pans need to be seasoned after cleaning, while non-stick pans should not be scratched.
- Damage: Check for any visible damage such as cracks, warping, or bending. Damaged pans may need to be replaced to ensure even cooking and to prevent safety hazards.
- Buildup: Check for any buildup on the pan, such as burnt-on food or grease. The type of buildup will determine the cleaning method needed.
- Residue: Check for any residue left on the pan after baking, such as sugar or fruit puree. This residue can be difficult to remove and may require a specific cleaning method.
By checking the condition of the baking pan, you can determine the most effective cleaning method and prevent any damage to the pan. It is also essential to wash the pan immediately after use to prevent food buildup and make the cleaning process easier.
Cleaning the Baking Pan
Using Hot Water and Dish Soap
One of the most straightforward methods for cleaning heavily soiled baking pans is by using hot water and dish soap. This technique is simple, effective, and can be completed in a matter of minutes.
Here’s how to do it:
- Remove any leftover food particles from the baking pan by hand or using a spatula.
- Fill a sink or large container with hot water, preferably around 120-140 degrees Fahrenheit, which is hot enough to kill any bacteria but not so hot that it could damage the pan.
- Add a few drops of dish soap to the hot water. The soap will help break down the grease and grime on the pan, making it easier to remove.
- Immerse the baking pan in the soapy water, ensuring it is completely submerged. Allow the pan to soak for a few minutes, depending on the level of soilage.
- Use a non-abrasive sponge or cloth to gently scrub the pan while it’s still submerged in the soapy water. Be sure to rinse the sponge or cloth frequently to avoid reintroducing grime into the water.
- Once the pan is clean, remove it from the soapy water and rinse it thoroughly under running hot water to remove any remaining soap residue.
- Dry the pan with a clean towel or let it air dry.
Using hot water and dish soap is an excellent option for cleaning baking pans because it is gentle on the surface of the pan, won’t scratch or damage the non-stick coating, and is highly effective at removing grease and grime. This method is particularly useful for pans with a lot of built-up residue, as the hot water and soap combination will help break down the toughest of stains.
Scouring the Pan with a Non-Abrasive Sponge or Brush
When it comes to cleaning heavily soiled baking pans, one effective technique is to use a non-abrasive sponge or brush to scour the pan. This method is particularly useful when dealing with stubborn baked-on grease and flour residue.
To start, first, soak the pan in warm, soapy water for about 10-15 minutes. This will help loosen up any baked-on residue, making it easier to remove later. Once the pan has soaked, use a non-abrasive sponge or brush to scrub away the residue. It’s important to use a non-abrasive sponge or brush to avoid scratching the surface of the pan.
When scrubbing, make sure to cover all areas of the pan, including the corners and edges. If there are particularly stubborn stains, you can use a small amount of baking soda or vinegar to help break them down before scrubbing. Rinse the pan thoroughly with warm water to remove any remaining soap residue.
Drying the pan is the final step in the cleaning process. Use a clean towel to pat the pan dry, or place it in the oven at low heat to dry it. Once the pan is completely dry, it’s ready to be used again for your next baking project.
By using a non-abrasive sponge or brush to scour the pan, you can effectively remove baked-on residue without damaging the surface of the pan. This technique is a simple yet effective way to keep your baking pans clean and ready for your next recipe.
Removing Tough Grease and Stains with Baking Soda and Vinegar
Cleaning heavily soiled baking pans can be a challenging task, especially when it comes to removing tough grease and stains. However, there are effective techniques that can make the process easier and more efficient. One such technique is using a combination of baking soda and vinegar to remove grease and stains from baking pans.
Baking soda is a natural abrasive that can help to break down grease and stains, while vinegar is an acidic substance that can help to dissolve them. Together, they make a powerful cleaning duo that can effectively clean even the dirtiest of baking pans.
Here’s how to use baking soda and vinegar to clean your baking pans:
- Scrub the pan with baking soda: Sprinkle a generous amount of baking soda onto the pan and use a non-abrasive sponge or cloth to scrub the pan. The baking soda will help to break down the grease and stains, making them easier to remove.
- Apply vinegar: After scrubbing the pan with baking soda, apply vinegar to the pan using a sponge or cloth. The vinegar will help to dissolve any remaining grease and stains, making them easier to remove.
- Scrub again: Once you’ve applied the vinegar, scrub the pan again with a non-abrasive sponge or cloth. This will help to remove any remaining grease and stains, leaving your pan clean and shiny.
- Rinse the pan: After scrubbing the pan, rinse it thoroughly with warm water to remove any remaining baking soda and vinegar.
- Dry the pan: Finally, dry the pan thoroughly with a clean towel or let it air dry. This will help to prevent any water spots from forming on the pan.
By using baking soda and vinegar to clean your baking pans, you can effectively remove even the toughest grease and stains, leaving your pans looking like new.
Cleaning with a Mixture of Salt and Olive Oil
When it comes to cleaning heavily soiled baking pans, a mixture of salt and olive oil is an effective technique that should not be overlooked. Here’s how to do it:
Ingredients:
- 1 tablespoon of olive oil
- 1 tablespoon of salt
Steps:
- Preheat your oven to 350°F (175°C).
- Pour the mixture of salt and olive oil onto the soiled baking pan.
- Scrub the pan with a non-abrasive sponge or cloth, using circular motions to help the mixture penetrate the stuck-on food.
- Let the mixture sit on the pan for about 15 minutes, allowing it to loosen the stuck-on food.
- Use a spatula or sponge to scrape off the loosened food, and then rinse the pan with warm water.
- Dry the pan with a clean towel, and then wipe it with a small amount of vegetable oil to prevent rusting.
Why it works:
The combination of salt and olive oil is effective at breaking down grease and grime, making it easier to remove stuck-on food from baking pans. The salt acts as a natural abrasive, while the olive oil helps to moisturize and soften the food, making it easier to remove.
In addition, preheating the oven helps to increase the effectiveness of the mixture by heating up the pan and causing the grease and grime to melt and loosen. This technique is particularly useful for pans that have been used to bake onions, chocolate, or other foods that tend to leave behind stubborn residue.
Overall, cleaning baking pans with a mixture of salt and olive oil is a simple, effective, and eco-friendly technique that can save time and effort in the kitchen.
Using a Pressure Washer or Hose for Tough Cleaning Jobs
When baking pans become heavily soiled, it can be challenging to remove the baked-on grease and food residue. In such cases, using a pressure washer or hose can be an effective technique for cleaning the baking pans.
Benefits of Using a Pressure Washer or Hose
- A pressure washer or hose can provide a high-pressure stream of water that can effectively remove stubborn grime and stains from baking pans.
- This method is particularly useful for cleaning large or deep pans that may be difficult to clean by hand.
- Using a pressure washer or hose can save time and effort compared to scrubbing the pan by hand.
Safety Precautions
- Always wear protective gear such as gloves, safety goggles, and a dust mask when using a pressure washer or hose to clean baking pans.
- Ensure that the surface to be cleaned is stable and can withstand the pressure of the water stream.
- Never aim the water stream directly at your body or anyone else.
Step-by-Step Guide to Using a Pressure Washer or Hose
- Disassemble the baking pan and remove any loose parts such as handles or racks.
- Use a sponge or brush to scrub the pan with mild dish soap and warm water to loosen the grime.
- Attach a high-pressure hose to a garden hose and turn on the water.
- Adjust the pressure setting to a low setting to avoid damaging the pan.
- Direct the water stream at the pan, starting at the top and working your way down to the bottom.
- Use a scraper or non-abrasive sponge to remove any remaining residue.
- Rinse the pan with clean water and dry it thoroughly with a clean towel.
By following these steps, you can effectively clean heavily soiled baking pans using a pressure washer or hose.
Cleaning with Baking Pan Cleaner or Specific Cleaning Products
Cleaning baking pans can be a daunting task, especially when they are heavily soiled. One effective technique for cleaning baking pans is to use a baking pan cleaner or specific cleaning products. These cleaners are designed to dissolve and remove tough baked-on grease and food residue, making the cleaning process much easier and more efficient.
When using a baking pan cleaner or specific cleaning product, it is important to follow the instructions carefully. Some cleaners may require the pan to be scrubbed before applying the cleaner, while others may be applied directly to the pan. It is also important to note that some cleaners may not be safe for use on certain types of baking pans, such as those with non-stick coatings.
There are several types of baking pan cleaners and specific cleaning products available on the market, including:
- Baking soda and vinegar paste: This mixture can be made by combining equal parts of baking soda and white vinegar. The paste can be applied to the pan and left to sit for several hours before rinsing and scrubbing the pan clean.
- Scouring pads and steel wool: These abrasive cleaning tools can be used to scrub the pan and remove tough stains and residue. However, they can also scratch the surface of the pan, so it is important to use them with caution.
- High-pressure washers: These cleaners use a powerful stream of water to blast away tough stains and residue. They are typically used in commercial kitchens, but can also be used in home kitchens with the proper safety precautions.
Regardless of which cleaner is used, it is important to rinse the pan thoroughly with warm water and dry it completely before storing it. This will help prevent rust and corrosion, and keep the pan in good condition for future use.
Drying and Storing the Baking Pan
Drying the Pan with a Towel or Paper Towels
Cleaning heavily soiled baking pans can be a challenging task, but it is essential to ensure that the pans are free from any residue before storing them. One effective technique for drying and storing the baking pan is by using a towel or paper towels.
Here are some steps to follow when drying the pan with a towel or paper towels:
- Allow the pan to cool completely before attempting to dry it. This is to prevent any damage to the pan or the towel.
- Once the pan has cooled down, gently wipe it with a clean towel or paper towels to remove any excess moisture. Be sure to blot the pan rather than rubbing it, as this can cause scratches or damage to the surface.
- If there is still moisture on the pan, repeat the process until the pan is completely dry.
- Once the pan is completely dry, you can store it in a safe and dry place. It is best to store the pan in a cool and dry place, away from direct sunlight or heat sources, as this can cause damage to the pan.
Overall, using a towel or paper towels is an effective technique for drying and storing the baking pan. It is important to ensure that the pan is completely dry before storing it to prevent any damage or rusting.
Storing the Pan in a Dry Place
When it comes to storing your baking pan after cleaning it, it’s important to make sure that it’s completely dry before putting it away. This will help prevent any rust or corrosion from forming on the pan, which can be difficult to remove in the future. Here are some tips for storing your baking pan in a dry place:
- Choose a well-ventilated area: Ideally, you should choose a spot that has good ventilation to help the pan dry more quickly. Avoid storing the pan in a humid or damp area, such as a bathroom or kitchen with high humidity.
- Avoid stacking pans on top of each other: If you have multiple baking pans that you need to store, make sure that you don’t stack them on top of each other. This can cause moisture to become trapped between the pans, which can lead to rusting and corrosion.
- Consider using a baking pan rack: A baking pan rack can be a great way to store your pans in a dry place. It allows for good ventilation and prevents the pans from touching each other, which can help to keep them dry.
- Use a towel to absorb any excess moisture: If your pan is still slightly damp after washing, you can use a clean towel to absorb any excess moisture before storing it. This will help to prevent any moisture from getting trapped in the pan and causing rusting or corrosion.
By following these tips, you can help to ensure that your baking pan stays in good condition for years to come.
Inspecting the Pan for Residual Soap or Detergent Residue
After cleaning the baking pan, it is essential to inspect it for any residual soap or detergent residue. This step is crucial because even if the pan appears clean, there might still be some soap or detergent residue left on it. Residual soap or detergent residue can react with the baking ingredients and alter the taste and texture of the baked goods.
To inspect the pan for residual soap or detergent residue, follow these steps:
- Dry the pan thoroughly: Before inspecting the pan, make sure it is completely dry. If there is any water on the pan, it can create a false impression that the pan is still dirty.
- Check for visible residue: Check the pan for any visible soap or detergent residue. If you see any residue, repeat the cleaning process until the pan is completely clean.
- Use a white cloth: Use a white cloth to wipe the pan. If the cloth turns brown or has a dirty appearance, it indicates that there is still soap or detergent residue on the pan. In this case, repeat the cleaning process until the pan is completely clean.
- Use a test batch: To ensure that the pan is completely clean, you can use a test batch of batter. Drop a small amount of batter onto the pan and bake it. If the batter sticks to the pan or has an unusual color or taste, it indicates that there is still soap or detergent residue on the pan. In this case, repeat the cleaning process until the pan is completely clean.
By following these steps, you can ensure that the baking pan is completely clean and free of any residual soap or detergent residue.
Cleaning the Tools and Equipment Used for Cleaning
- It is essential to clean the tools and equipment used for cleaning the baking pan properly to ensure that they are ready for the next use.
- Here are some effective techniques for cleaning the tools and equipment used for cleaning:
- Kitchen towels and rags: These can be used to wipe down surfaces and remove any excess dirt or debris. It is important to discard of these after use to avoid cross-contamination.
- Scouring pads and steel wool: These can be used to scrub away tough stains and residue. It is important to use a non-abrasive scouring pad or steel wool to avoid damaging the surface of the tools and equipment.
- Soap and water: This is a simple and effective cleaning solution that can be used to clean the tools and equipment. It is important to rinse thoroughly with water to remove any soap residue.
- Bleach and water: This solution can be used to disinfect the tools and equipment. It is important to follow the instructions on the bleach packaging and rinse thoroughly with water after use.
- Microwave: This can be used to sanitize the tools and equipment by placing them in the microwave for a set amount of time. It is important to check the manufacturer’s instructions for the specific tools and equipment being cleaned.
- Dishwasher: This can be used to clean the tools and equipment if they are dishwasher safe. It is important to check the manufacturer’s instructions for the specific tools and equipment being cleaned.
- Hot water and vinegar: This solution can be used to descale and clean the tools and equipment. It is important to rinse thoroughly with water to remove any vinegar residue.
- Alcohol-based cleaners: These can be used to disinfect the tools and equipment. It is important to follow the instructions on the cleaner packaging and rinse thoroughly with water after use.
- Baking soda and water: This solution can be used to clean the tools and equipment. It is important to mix baking soda with water to form a paste and scrub away stains and residue. Rinse thoroughly with water after use.
- Oven cleaner: This can be used to clean the oven and other tools and equipment that may have been used to bake the soiled pans. It is important to follow the instructions on the cleaner packaging and avoid contact with skin or eyes.
- Cleaning brushes and sponges: These should be cleaned regularly to avoid cross-contamination and to ensure that they are ready for the next use. It is important to wash them in soap and water or in a dishwasher if they are dishwasher safe.
- Disposable gloves: These should be worn when cleaning the tools and equipment to avoid cross-contamination. They should be disposed of after use.
- Apron and protective clothing: These should be worn when cleaning the tools and equipment to avoid cross-contamination. They should be washed and dried after use.
- Mop and bucket: These should be used to clean the floors and surfaces around the baking area. They should be washed and disinfected after use.
- Trash cans and disposal bags: These should be used to dispose of the dirty water and cleaning materials. They should be emptied and cleaned after use.
- Dish rack and sponge holder: These should be cleaned regularly to avoid cross-contamination and to ensure that they are ready for the next use. They should be washed in soap and water or in a dishwasher if they are dishwasher safe.
- Countertops and cabinets: These should be cleaned and disinfected after use to ensure that they are ready for the next use. They should be wiped down with a cleaning solution or disinfectant and rinsed with water.
Maintaining Baking Pans for Easy Cleaning
Regularly Removing Food Residue and Grease
One of the most important steps in maintaining baking pans for easy cleaning is to regularly remove food residue and grease. Here are some effective techniques for doing so:
- Immediate Clean-up: As soon as you’re done baking, remove any leftover food or batter from the pan with a spatula or tongs. This will prevent any residue from hardening and making the cleaning process more difficult.
- Hand-washing: For pans that can be hand-washed, use a gentle detergent and warm water to scrub away any residue. Make sure to rinse thoroughly and dry the pan completely before storing it.
- Dishwasher-safe: If your baking pans are dishwasher-safe, load them into the dishwasher as soon as possible after use. This will help prevent hardening of residue and make cleaning easier.
- Non-abrasive cleaning agents: Avoid using abrasive cleaning agents or scouring pads as they can scratch the surface of the pan and cause damage. Instead, opt for non-abrasive cleaning agents such as baking soda or vinegar.
- Avoid stacking: When not in use, avoid stacking baking pans on top of each other as this can cause scratches and dents, making cleaning more difficult.
By following these simple steps, you can maintain your baking pans in good condition and make cleaning them easier and more efficient.
Avoiding Abuse and Overuse of the Pan
One of the most important things to keep in mind when it comes to maintaining baking pans is to avoid abuse and overuse of the pan. This means that you should not use your baking pans for every single recipe, regardless of whether or not it’s the right size. Additionally, you should not use metal utensils to scrape the pan, as this can scratch the surface and make it more difficult to clean.
Instead, it’s best to use baking pans specifically designed for the recipe you’re making. For example, if you’re baking a cake, use a round cake pan. If you’re baking brownies, use a square pan. This will help to ensure that the pan is the right size and shape for the recipe, and that it’s less likely to be damaged during use.
Additionally, it’s important to use non-abrasive, non-metal utensils to scrape the pan. Silicone spatulas or rubber spoons are ideal, as they are gentle on the surface of the pan and won’t scratch it.
Finally, if you do notice that your baking pan is looking a bit worse for wear, it’s important to replace it. Pans that are damaged or scratched can be more difficult to clean, and can also lead to uneven baking. So, if your pan is looking a bit worse for wear, it’s best to replace it with a new one.
Using the Right Utensils and Tools for Mixing and Baking
Maintaining the right utensils and tools for mixing and baking is essential for ensuring that your baking pans remain in good condition and are easy to clean. Here are some tips to help you achieve this:
- Choose the Right Utensils for Mixing: When mixing ingredients, it’s important to use utensils that are made of materials that won’t react with the ingredients. For example, metal utensils should be avoided when mixing acidic ingredients like lemon juice or vinegar, as they can react and alter the taste of the final product. Instead, opt for silicone or wooden utensils, which are non-reactive and won’t affect the taste of your baked goods.
- Avoid Using Metal Utensils for Baking: Metal utensils can scratch the surface of baking pans, making them difficult to clean. Instead, use silicone or wooden utensils, which are gentle on the surface of the pan and won’t leave any scratches.
- Clean Utensils and Tools Properly: After each use, make sure to clean your utensils and tools thoroughly to prevent any buildup of ingredients that can harden and make your baking pans difficult to clean. For metal utensils, wash them in soapy water and dry them thoroughly before storing them. Silicone and wooden utensils can be washed in a dishwasher or washed by hand with warm water and a mild detergent.
- Use a Non-Stick Spray for Baking: Non-stick sprays can help prevent ingredients from sticking to the surface of the pan, making it easier to clean. However, make sure to use a non-toxic and food-safe spray to avoid any contamination.
By following these tips, you can ensure that your baking pans remain in good condition and are easy to clean, even after multiple uses.
Seasoning the Pan after Each Use
- Importance of Seasoning:
- Protects the Non-Stick Coating:
- Preserves the Non-Stick Properties: Regular seasoning helps maintain the non-stick properties of the pan, preventing food from sticking and making cleanup easier.
- Prevents Corrosion: Sealing the pan after each use protects against corrosion, extending the lifespan of the pan and ensuring it remains in good condition.
- Reduces Cleaning Time and Effort:
- Saves Time: Seasoning the pan after each use means less time spent cleaning, giving you more time to enjoy your favorite hobbies or spend time with loved ones.
- Reduces Effort: With a well-seasoned pan, cleanup becomes effortless, making the task more enjoyable and less tiresome.
- Protects the Non-Stick Coating:
- Steps to Season a Pan:
- Remove any leftover food: Before seasoning, make sure to remove any leftover food from the pan by hand or with a spatula.
- Apply a small amount of oil: Apply a small amount of oil, preferably the one you used for cooking, to the entire surface of the pan. This helps create a barrier against oxidation and protects the pan.
- Heat the pan: Heat the pan on medium heat for 2-3 minutes, allowing the oil to spread evenly and coat the pan. This helps create a non-stick surface and seals the pan.
- Let it cool: Allow the pan to cool completely before wiping it clean with a paper towel.
- Store the pan: After wiping the pan clean, store it in a dry place, preferably with the lid off to allow air circulation around the pan.
By following these simple steps, you can keep your baking pans in great condition and make cleaning them a breeze. Regular seasoning not only protects the non-stick coating but also reduces cleaning time and effort, making the task more enjoyable.
Properly Storing the Pan When Not in Use
One of the most effective ways to ensure that your baking pans are easy to clean is to properly store them when not in use. This means finding a safe and secure place where they can be kept free from dust, moisture, and other elements that can cause them to become dirty or damaged.
Here are some tips for properly storing your baking pans:
- Always make sure that your baking pans are completely cool before storing them. This will help prevent any damage to the pan or the handles.
- Place your baking pans in a dry, dust-free area. This could be a kitchen cabinet or a pantry, but make sure that the area is well-ventilated and free from moisture.
- If you have limited space, consider hanging your baking pans on a rack or hook. This will help keep them organized and make it easier to access them when you need them.
- If you need to store your baking pans in a more compact space, consider using a storage container or bin. Be sure to label the container with the name of the pan and the date so that you can easily find it later.
- Never stack your baking pans on top of each other. This can cause them to become dented or damaged, and it can also make them difficult to clean later on.
By following these simple tips, you can help ensure that your baking pans are always in good condition and ready to use when you need them. This will make cleaning them easier and less time-consuming, and it will also help extend the life of your pans.
Taking Care of Baking Pans with Special Coatings or Finishes
Caring for baking pans with special coatings or finishes requires extra attention to ensure that the coatings remain intact and the pans remain in good condition. Here are some tips for taking care of baking pans with special coatings or finishes:
- Avoid using metal utensils: Metal utensils can scratch or damage the special coatings or finishes on baking pans. Instead, use silicone, wooden, or nylon utensils to prevent any damage.
- Hand wash when necessary: If the baking pan has a non-stick coating, it is best to hand wash it in warm water using a mild detergent. Avoid using abrasive sponges or brushes that can scratch the surface.
- Dry immediately: After washing, make sure to dry the baking pan immediately to prevent water spots or streaks from forming on the surface. Use a clean towel to pat it dry or place it on a wire rack to air dry.
- Use the right cookware spray: Using the right cookware spray can help maintain the special coatings or finishes on baking pans. Look for a cookware spray that is specifically designed for non-stick or special coated pans and follow the instructions carefully.
- Avoid high temperatures: High temperatures can cause the special coatings or finishes on baking pans to degrade or discolor. Avoid exposing the pans to high temperatures for extended periods of time, and never place them in the dishwasher.
By following these tips, you can keep your baking pans with special coatings or finishes in good condition and make cleaning them easier and more effective.
Troubleshooting Common Cleaning Issues
Handling Rust and Corrosion
Cleaning heavily soiled baking pans can be a daunting task, especially when rust and corrosion are present. Rust and corrosion can be caused by a variety of factors, including exposure to moisture, acidic ingredients, and prolonged use without proper maintenance. Fortunately, there are effective techniques for handling rust and corrosion when cleaning baking pans.
- Identifying Rust and Corrosion
The first step in handling rust and corrosion is to identify the extent of the damage. Rust is typically red or brown in color and appears as flaky or powdery deposits on the surface of the pan. Corrosion is typically white or yellow in color and appears as a powdery or chalky deposit on the surface of the pan. If left untreated, rust and corrosion can eat away at the metal surface of the pan, causing permanent damage. - Removing Rust and Corrosion
The best way to remove rust and corrosion from baking pans is to use a combination of physical and chemical methods. First, use a stiff brush or steel wool to scrub away any loose rust or corrosion. Then, apply a mixture of equal parts white vinegar and water to the pan and let it sit for several minutes. The vinegar will help to break down the rust and corrosion, making it easier to remove. Finally, use a non-abrasive sponge or cloth to wipe away the remaining residue. If the rust or corrosion is particularly stubborn, you may need to repeat the process several times or use a stronger cleaning solution. - Preventing Future Rust and Corrosion
To prevent future rust and corrosion, it’s important to properly maintain your baking pans. After each use, wash the pan with warm water and a mild detergent, then dry it thoroughly. If the pan is prone to rusting or corroding, you can apply a thin layer of cooking oil to the surface before storing it. This will help to protect the metal and prevent moisture from causing damage. Additionally, avoid using abrasive cleaning agents or scrubbers, as these can further damage the pan and exacerbate any existing rust or corrosion.
By following these steps, you can effectively handle rust and corrosion when cleaning heavily soiled baking pans, ensuring that they remain in good condition for years to come.
Dealing with Burned-On Grease and Food Residue
When it comes to cleaning heavily soiled baking pans, one of the most common issues that home cooks and professional bakers alike encounter is dealing with burned-on grease and food residue. This stubborn grime can be difficult to remove, but with the right techniques and tools, it is possible to get your baking pans looking like new again.
Using the Right Cleaning Tools
One of the most important factors in effectively cleaning burned-on grease and food residue from baking pans is using the right cleaning tools. For starters, it’s essential to have a good quality sponge or cloth that is gentle on non-stick surfaces. Abrasive sponges or harsh bristle brushes can scratch or damage the surface of the pan, making it more difficult to clean in the future.
Applying the Right Amount of Pressure
Another key factor in cleaning burned-on grease and food residue is applying the right amount of pressure. Applying too much pressure can cause scratches or damage to the surface of the pan, while applying too little pressure can make it difficult to remove the grime. Instead, apply just enough pressure to loosen the grime without scratching the surface of the pan.
Using the Right Cleaning Solutions
In addition to using the right cleaning tools and applying the right amount of pressure, it’s also important to use the right cleaning solutions when dealing with burned-on grease and food residue. Baking pans can be difficult to clean because they often have small crevices and corners where grime can become trapped. To effectively clean these areas, consider using a combination of warm water, mild dish soap, and a soft cleaning brush or cloth.
Taking the Time to Scour Pans
Finally, when dealing with burned-on grease and food residue, it’s important to take the time to scour pans properly. This means scrubbing the pan with a soft brush or cloth and cleaning all of the crevices and corners thoroughly. If the grime is particularly stubborn, you may need to let the cleaning solution sit on the pan for a few minutes before scrubbing to allow it to penetrate the grime.
By following these effective techniques for cleaning heavily soiled baking pans, you can keep your pans looking like new and ensure that they perform at their best every time. Whether you’re a home cook or a professional baker, taking the time to clean your baking pans properly is essential for ensuring consistent results and avoiding the need for costly replacements.
Cleaning Pans with Holes or Special Features
When it comes to cleaning baking pans with holes or special features, such as trays with removable bottoms or bundt pans with fluted sides, there are a few additional considerations to keep in mind. Here are some effective techniques for cleaning these types of pans:
- Use a non-abrasive sponge or cloth: Since these pans often have delicate or decorative features, it’s important to use a non-abrasive sponge or cloth when cleaning them. This will help prevent scratches or other damage to the surface of the pan.
- Soak the pan before cleaning: For pans with a lot of residue, soaking the pan in warm, soapy water for a few minutes before cleaning can help loosen the grime and make it easier to remove.
- Clean in sections: For pans with removable bottoms or other special features, it may be necessary to clean the pan in sections. Start by cleaning the outside of the pan, then move on to the inside and any special features.
- Dry the pan thoroughly: After cleaning, make sure to dry the pan thoroughly to prevent water spots or other damage to the surface of the pan.
By following these techniques, you can effectively clean even the most heavily soiled baking pans with holes or special features.
Dealing with Expensive or Irreplaceable Baking Pans
Cleaning baking pans can be a challenge, especially when the pans are expensive or irreplaceable. In such cases, it is important to use effective techniques that will not damage the pans while still ensuring they are thoroughly clean. Here are some tips for dealing with expensive or irreplaceable baking pans:
- Start by pre-heating the oven to 350°F (175°C). This will help loosen any baked-on grease or food particles.
- Apply a small amount of baking soda or salt to the pan. These substances are effective at breaking down grease and can be safely used on most metals.
- Use a soft-bristled brush to scrub the pan gently. Avoid using metal scrubbers or abrasive sponges, as these can scratch the surface of the pan.
- Rinse the pan with warm water and dry it thoroughly with a towel.
- If there are still stubborn stains or residue, mix equal parts of water and vinegar and apply it to the pan with a cloth. Let it sit for a few minutes before rinsing and drying.
- Avoid using harsh chemicals or abrasive cleaners, as they can damage the pan and potentially compromise its safety for use in baking.
By following these steps, you can effectively clean your expensive or irreplaceable baking pans without risking damage to them.
Seeking Professional Help for Extremely Difficult Cleaning Tasks
Professional Cleaning Services
When faced with extremely difficult cleaning tasks, seeking professional help can be the most effective solution. Professional cleaning services are equipped with specialized tools and techniques to tackle even the toughest of cleaning challenges.
Advantages of Professional Cleaning Services
- Expertise: Professional cleaners have the expertise and experience to handle even the most stubborn of stains and baked-on grease.
- Specialized Tools: They have access to specialized tools and equipment that can reach and remove even the most difficult to reach grime and residue.
- Efficient: Professional cleaning services can save time and effort by efficiently and effectively cleaning your baking pans.
- Safe: They use safe and eco-friendly cleaning solutions that won’t damage your pans or your health.
When to Consider Professional Cleaning Services
If you’ve tried all the DIY cleaning techniques and still can’t get your baking pans clean, it’s time to consider professional cleaning services. They are especially useful for commercial kitchens, where the frequency of use is high, and the cleaning task is particularly challenging.
Choosing the Right Professional Cleaning Service
When choosing a professional cleaning service, consider the following factors:
- Reputation: Look for a service with a good reputation and positive reviews from other customers.
- Experience: Choose a service with experience in cleaning baking pans and equipment.
- Chemicals Used: Ensure that the cleaning solutions they use are safe, eco-friendly, and effective.
- Equipment: Check if they have the necessary equipment to clean your baking pans efficiently.
In conclusion, seeking professional help for extremely difficult cleaning tasks is a smart choice. Professional cleaning services can save you time, effort, and money in the long run, and ensure that your baking pans are clean and ready for your next batch of goodies.
FAQs
1. What are some common causes of heavily soiled baking pans?
There are several reasons why baking pans may become heavily soiled. One common cause is overuse, as pans that are used frequently may accumulate burnt-on food and residue. Another cause could be improper cleaning techniques, such as using abrasive sponges or harsh chemicals that can damage the pan’s surface. Additionally, baking pans that are not properly seasoned may be more prone to becoming heavily soiled.
2. How do I know if my baking pan needs to be cleaned?
If your baking pan has a buildup of food residue or burnt-on grease, it’s probably time to clean it. You may also notice a decrease in the quality of your baked goods if the pan is not clean. A dirty pan can affect the taste and texture of your baked goods, so it’s important to keep your pans clean for the best results.
3. What are some effective techniques for cleaning heavily soiled baking pans?
There are several techniques you can use to clean heavily soiled baking pans. One method is to use a mixture of warm water and mild dish soap to scrub away the buildup. You can also try using a non-abrasive sponge or cloth to gently wipe away the residue. If the pan is particularly stubborn, you can try heating it up before cleaning to loosen the buildup. It’s also important to dry the pan thoroughly after cleaning to prevent rust and corrosion.
4. Can I use harsh chemicals to clean my baking pans?
No, it’s not recommended to use harsh chemicals to clean your baking pans. While these chemicals may be effective at breaking down tough residue, they can also damage the pan’s surface and cause it to rust or corrode. Additionally, some harsh chemicals can be harmful to your health if you inhale them or come into contact with them. It’s best to stick with mild dish soap and warm water for cleaning your baking pans.
5. How often should I clean my baking pans?
It’s recommended to clean your baking pans after each use, especially if you’ve baked something particularly messy. However, if you only use your pans occasionally, you may be able to get away with cleaning them less frequently. Just be sure to inspect your pans regularly for any buildup and clean them as needed to ensure they’re always in good condition.


