Glassware is an essential component of any laboratory. It is used for a variety of purposes, including mixing, heating, and measuring chemicals. However, glassware can be fragile and sensitive to damage, making it crucial to properly care for it. Effective laboratory glassware care involves not only cleaning but also maintaining the glassware to prevent damage and ensure its longevity. In this article, we will discuss some tips and techniques for cleaning and maintaining laboratory glassware, helping you to keep your equipment in top condition.
Understanding Laboratory Glassware
Common Types of Laboratory Glassware
When working in a laboratory, it is important to understand the different types of glassware that are commonly used. Some of the most common types of laboratory glassware include:
- Beakers: Beakers are cylindrical containers with a flat bottom and a spout or lip for pouring. They are used for mixing, measuring, and storing liquids.
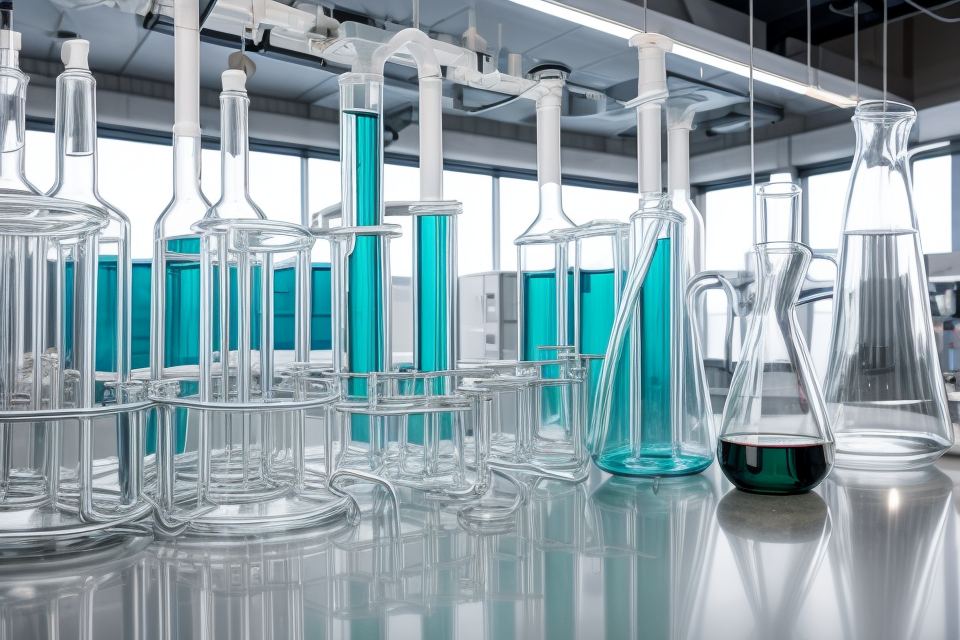
- Flasks: Flasks are used for mixing, storing, and transporting liquids. They have a round bottom and a mouth that can be closed with a stopper or a cork.
- Pipettes: Pipettes are used for accurately dispensing small volumes of liquid. They have a long, narrow tube with a bulb at one end and a tap at the other.
- Burettes: Burettes are used for measuring the volume of a liquid. They have a graduated scale on the side and a tap at the bottom that can be opened or closed to dispense the liquid.
- Centrifuge tubes: Centrifuge tubes are used for centrifugation, a process in which a mixture is separated based on density. They have a screw-top lid and are typically made of glass or plastic.
It is important to understand the specific purpose and function of each type of glassware in order to use them effectively and maintain them properly.
The Importance of Glassware Cleanliness in the Laboratory
Glassware is an essential component of any laboratory. It is used for a variety of purposes, including mixing, measuring, and storing chemicals. However, glassware can become contaminated easily, which can lead to inaccurate experiment results. Therefore, it is crucial to maintain the cleanliness of laboratory glassware to prevent contamination and ensure accurate results.
There are several reasons why glassware cleanliness is essential in the laboratory:
- Contamination prevention: Contamination can occur in the laboratory due to various reasons, such as handling, storage, and usage of chemicals. Contaminated glassware can lead to incorrect results, which can impact the entire experiment. Therefore, it is crucial to maintain the cleanliness of glassware to prevent contamination.
- Accurate experiment results: Laboratory experiments rely on accurate results to make informed decisions. If the glassware is not clean, it can lead to incorrect results, which can have a significant impact on the experiment. Therefore, it is essential to clean the glassware thoroughly before and after use.
- Ensuring laboratory safety: Laboratory glassware can be hazardous if not handled correctly. Therefore, it is crucial to maintain the cleanliness of glassware to prevent accidents and ensure laboratory safety.
Glassware Cleaning Techniques
Preparing Glassware for Cleaning
Removing Labels
Before beginning the cleaning process, it is essential to remove any labels that may be present on the glassware. This can be done using a label remover solution or by gently peeling off the labels with a razor blade. It is important to take care when removing labels to avoid damaging the glassware.
Rinsing with Tap Water
Once the labels have been removed, the glassware should be rinsed with tap water to remove any residual debris or particles. This can be done by immersing the glassware in a sink filled with water or by using a clean spray bottle to rinse the glassware.
Identifying the Appropriate Cleaning Method
After rinsing with tap water, the next step is to identify the appropriate cleaning method for the specific type of glassware being cleaned. Different types of glassware may require different cleaning methods, such as autoclaving, sonication, or chemical cleaning. It is important to choose the right cleaning method to ensure that the glassware is thoroughly cleaned without being damaged.
Handwashing Glassware
When it comes to cleaning laboratory glassware, handwashing is often the most effective method. This technique involves using warm water and soap to remove any residue or contaminants from the glassware. Here are some tips and techniques for handwashing glassware:
- Use of a sink and warm water
It is important to use a sink with warm water to ensure that the glassware is properly cleaned. Warm water helps to loosen any grime or residue on the glassware, making it easier to remove. - Appropriate use of soap
When using soap to clean the glassware, it is important to use the appropriate type of soap. Neutral detergents, such as dish soap or mild hand soap, are often the best options for cleaning laboratory glassware. Avoid using harsh or abrasive soaps, as these can scratch the glassware or leave a residue behind. - Drying techniques
After washing the glassware, it is important to dry it thoroughly to prevent water spots or streaks. One effective technique is to use a clean towel to pat the glassware dry. It is important to avoid using paper towels or other abrasive materials, as these can scratch the glassware. Alternatively, a drying rack or air dryer can be used to help speed up the drying process.
Using Autoclaves for Glassware Cleaning
When it comes to cleaning laboratory glassware, using an autoclave is a highly effective method. Autoclaves are pressurized vessels that use steam and high temperatures to sterilize and clean equipment. Here are the steps involved in using an autoclave for glassware cleaning:
Loading the autoclave
Before loading the autoclave, it is important to ensure that all personnel are clear of the area and that all safety precautions are in place. The glassware to be cleaned should be placed on the autoclave tray in a way that allows for even heating and sterilization. It is important to note that the size and shape of the glassware will determine the appropriate loading configuration.
Setting the appropriate parameters
The autoclave must be set with the appropriate parameters to ensure effective cleaning. This includes setting the temperature, pressure, and time cycles. The temperature should be set to between 121-180°C, depending on the type of glassware being cleaned. The pressure should be set to the manufacturer’s recommended level, which is typically between 15-20 psi. The time cycle should be set based on the amount and type of glassware being cleaned, with a minimum cycle time of 15 minutes.
Cleaning and drying glassware after the autoclave cycle
After the autoclave cycle is complete, the glassware should be carefully removed from the autoclave and allowed to cool to room temperature. Once cooled, the glassware should be inspected for any remaining residue or debris. If necessary, the glassware can be re-autoclaved with a detergent solution to further clean the glassware.
It is important to note that autoclaves should not be used to dry glassware. Instead, glassware should be allowed to air dry or be dried with a clean, lint-free cloth. This is because the high temperature and pressure of the autoclave can cause glassware to break or shatter.
Cleaning Glassware with Alcohol-based Solutions
Choosing the appropriate alcohol-based solution
When it comes to cleaning laboratory glassware, alcohol-based solutions are often the go-to choice for many researchers. There are several types of alcohol-based solutions available, each with its own unique properties and advantages. The most commonly used alcohol-based solutions include isopropyl alcohol (IPA), ethanol, and methanol. It is important to choose the appropriate alcohol-based solution for the specific type of glassware being cleaned, as well as the nature of the contaminants present. For example, IPA is effective at dissolving greases and oils, while ethanol is better suited for dissolving organic compounds.
Cleaning procedures
To effectively clean laboratory glassware using alcohol-based solutions, follow these steps:
- Soak the glassware in the alcohol-based solution for the recommended amount of time, typically at least 10 minutes for IPA or ethanol.
- Use a soft cloth or sponge to gently scrub the glassware while it is still submerged in the solution. This will help to loosen and remove any stubborn contaminants.
- Rinse the glassware thoroughly with distilled water to remove any remaining alcohol residue.
- Dry the glassware completely with a clean, lint-free cloth.
Drying techniques
It is important to ensure that all laboratory glassware is completely dry before use, as even small amounts of moisture can affect the accuracy of experiments. One effective method for drying glassware is to use a clean, lint-free cloth to gently wipe away any excess moisture. Another option is to use a drying rack or tray, which allows the glassware to air dry completely. It is important to avoid using heat sources, such as a blow dryer or oven, to dry glassware, as this can cause damage to the surface and potentially introduce contaminants.
Chemical Cleaning of Glassware
Chemical cleaning is an effective method for cleaning laboratory glassware, particularly when dealing with stubborn stains or residues. The following are some tips for choosing the appropriate chemical solution, cleaning procedures, and rinsing and drying techniques.
Choosing the appropriate chemical solution
Choosing the right chemical solution is crucial to ensure effective cleaning without damaging the glassware. The choice of chemical solution depends on the type of glassware, the type of stain or residue, and the desired level of cleanliness.
- Acidic solutions: These solutions are effective for removing alkaline stains and residues. Examples include hydrochloric acid, sulfuric acid, and nitric acid.
- Alkaline solutions: These solutions are effective for removing acidic stains and residues. Examples include sodium hydroxide, potassium hydroxide, and ammonium hydroxide.
- Neutral solutions: These solutions are effective for removing both acidic and alkaline stains and residues. Examples include distilled water, deionized water, and isopropyl alcohol.
Cleaning procedures
- Immerse the glassware in the chemical solution and ensure it is completely submerged.
- Allow the glassware to soak in the solution for the recommended amount of time, typically between 10-30 minutes.
- Scrub the glassware gently with a non-abrasive sponge or brush to remove any remaining residues.
- Rinse the glassware thoroughly with deionized or distilled water to remove any remaining chemical residues.
Rinsing and drying techniques
- Rinse the glassware thoroughly with deionized or distilled water to remove any remaining chemical residues.
- Dry the glassware using a clean, soft cloth or paper towel. Avoid using a towel that may leave lint or fibers on the glassware.
- If the glassware is to be stored, it should be stored in a clean, dry place away from direct sunlight.
In conclusion, chemical cleaning is an effective method for cleaning laboratory glassware, but it should be done carefully to avoid damaging the glassware. It is important to choose the appropriate chemical solution, follow the recommended cleaning procedures, and use proper rinsing and drying techniques to ensure effective cleaning.
Glassware Maintenance
Storing Glassware Properly
When it comes to storing glassware, proper storage is crucial to ensure that it remains in good condition and is easily accessible when needed. Here are some tips for storing glassware properly:
Identifying the appropriate storage area
Before storing glassware, it is important to identify the appropriate storage area. The storage area should be clean, well-ventilated, and free from dust, moisture, and other contaminants that can damage the glassware. Ideally, the storage area should be separate from other laboratory equipment and supplies to prevent damage from other materials.
Arranging glassware for efficient use of space
To make the most of the available storage space, it is important to arrange the glassware in a way that maximizes efficiency. Glassware should be arranged in a logical and easy-to-follow manner, such as by size or function. It is also helpful to label the glassware to make it easier to locate and identify.
Cleaning and maintaining storage areas
To keep the storage area clean and free from contaminants, it is important to regularly clean and maintain the area. This includes cleaning spills and wiping down surfaces as needed. It is also important to regularly inspect the glassware for any signs of damage or wear and tear, and to repair or replace any damaged glassware as needed.
Overall, proper storage of glassware is essential for maintaining its quality and functionality. By identifying the appropriate storage area, arranging the glassware efficiently, and regularly cleaning and maintaining the storage area, laboratory personnel can ensure that their glassware is always in good condition and ready for use.
Handling Glassware with Care
When it comes to maintaining laboratory glassware, handling it with care is essential. Proper handling ensures that the glassware remains in good condition and is less likely to break, which can be dangerous and expensive. Here are some tips for handling glassware with care:
Holding Glassware Properly
When holding glassware, it is important to hold it firmly but gently. One way to hold glassware is to cradle it in your hand with your fingers wrapped around the base, while your thumb supports the rim. This allows you to control the glassware while avoiding applying too much pressure to any one area.
Another method is to hold the glassware by the handle or stem, which can provide more stability. However, it is important to be careful not to twist or pull on the handle, as this can cause the glassware to break.
Avoiding Rough Handling
Rough handling can easily cause laboratory glassware to break. Therefore, it is important to avoid any rough or careless handling of the glassware. For example, do not drop glassware, slam it down on surfaces, or stack it haphazardly.
Instead, always handle the glassware carefully and place it down gently. When stacking glassware, make sure it is stable and does not topple over.
Transporting Glassware Safely
When transporting glassware, it is important to take extra precautions to ensure it arrives at its destination safely. First, make sure the glassware is clean and dry before transporting it. Moisture or residue can make the glassware slippery and more likely to break.
Next, carefully place the glassware in a protective case or wrap it in bubble wrap or paper towels to provide extra cushioning. When carrying the glassware, hold it firmly and carefully, avoiding any sudden movements or changes in direction.
By following these tips for handling glassware with care, you can help ensure that your laboratory glassware remains in good condition and is safe to use.
Regular Inspection and Maintenance of Glassware
Glassware is an essential component of any laboratory setup, and it is crucial to maintain it in good condition to ensure accurate results. Regular inspection and maintenance of glassware are critical to prevent damage and ensure that it functions correctly. Here are some tips for regular inspection and maintenance of glassware:
Identifying Signs of Wear and Tear
Laboratory glassware can be subjected to wear and tear due to regular use, handling, and storage. Some signs of wear and tear include:
- Cloudy or discolored glass
- Rust or corrosion on metal parts
- Cracks or chips in the glass
- Loose or broken fittings
Regular inspection of glassware can help identify these signs of wear and tear, which can help prevent accidents and ensure accurate results.
Cleaning and Repairing Damaged Glassware
Damaged glassware can affect the accuracy of results and pose a safety hazard. It is essential to clean and repair damaged glassware as soon as possible. Here are some tips for cleaning and repairing damaged glassware:
- Clean the glassware thoroughly with a mild detergent and warm water to remove any residue or debris.
- Inspect the glassware for any cracks or chips and repair them using a glass repair kit.
- Replace any loose or broken fittings.
- Dry the glassware thoroughly with a clean cloth.
Replacing Damaged Glassware When Necessary
In some cases, repairing damaged glassware may not be feasible, and it may be necessary to replace it. Here are some tips for replacing damaged glassware:
- Identify the type of glassware that needs to be replaced.
- Choose a replacement glassware that is compatible with the laboratory setup.
- Follow the manufacturer’s instructions for cleaning and maintaining the new glassware.
By following these tips, laboratory personnel can ensure that their glassware is in good condition, functioning correctly, and providing accurate results.
Maintaining Glassware Records
Recording the Date of Purchase and Inspection
One important aspect of maintaining glassware records is to record the date of purchase and inspection. This information can be used to track the age of the glassware and determine when it is due for inspection. By keeping track of the purchase date, laboratory personnel can ensure that they are using the appropriate equipment for their experiments and avoid using expired or damaged glassware.
Recording Any Damage or Repairs
Another crucial aspect of maintaining glassware records is to record any damage or repairs. This information can help laboratory personnel identify which glassware items require more attention and maintenance. For example, if a piece of glassware is damaged, it may need to be repaired or replaced, and recording this information can help ensure that it is handled appropriately.
Keeping Accurate Records of the Location of Glassware in the Laboratory
Lastly, keeping accurate records of the location of glassware in the laboratory is essential. This information can help laboratory personnel locate specific glassware items quickly and efficiently. By keeping track of the location of glassware, laboratory personnel can avoid misplacement or loss of equipment, which can cause delays in experiments and increase costs.
FAQs
1. What are some best practices for cleaning laboratory glassware?
Cleaning laboratory glassware requires a systematic approach to ensure that all residues are removed thoroughly. First, rinse the glassware with distilled or deionized water to remove any loose debris. Then, use a mild detergent or glassware cleaner and warm water to clean the glassware. It is important to avoid using abrasive materials or harsh chemicals, as these can damage the glassware. Finally, rinse the glassware again with distilled or deionized water and dry it with a clean cloth or paper towel.
2. How should I store laboratory glassware?
Proper storage of laboratory glassware is crucial to maintain its quality and functionality. Glassware should be stored in a clean and dry area, away from direct sunlight and sources of heat or moisture. It is recommended to store glassware with the appropriate protective caps or covers in place to prevent damage or contamination. Additionally, glassware should be stored in a organized manner to prevent damage and ensure easy access when needed.
3. How can I prevent damage to laboratory glassware?
To prevent damage to laboratory glassware, it is important to handle it carefully and avoid exposing it to excessive heat, moisture, or rough handling. Glassware should be washed by hand or in a dishwasher with a gentle cycle, and avoid using abrasive materials or harsh chemicals. Additionally, it is recommended to avoid stacking glassware too high, as this can cause damage or breakage. Finally, regularly inspecting the glassware for any signs of damage or wear is essential to prevent accidents and ensure the continued safe use of the equipment.
4. How can I identify different types of laboratory glassware?
Different types of laboratory glassware are designed for specific purposes and may have unique features or markings to indicate their function. For example, flasks may have a spout or a shut-off valve, while beakers may have a graduated scale or a flat bottom. Additionally, laboratory glassware may be labeled with the manufacturer’s name or a description of its purpose. If you are unsure about the function of a particular piece of glassware, it is best to consult the user manual or a knowledgeable colleague.
5. How can I troubleshoot common issues with laboratory glassware?
Common issues with laboratory glassware can include leaks, cracks, or clogs. To troubleshoot these issues, start by inspecting the glassware for any visible damage or blockages. If you are unable to identify the issue, try cleaning the glassware thoroughly or replacing any damaged parts. If the issue persists, it may be necessary to contact the manufacturer or a qualified technician for assistance. Regular maintenance and upkeep of the glassware can help prevent these issues from occurring in the first place.


