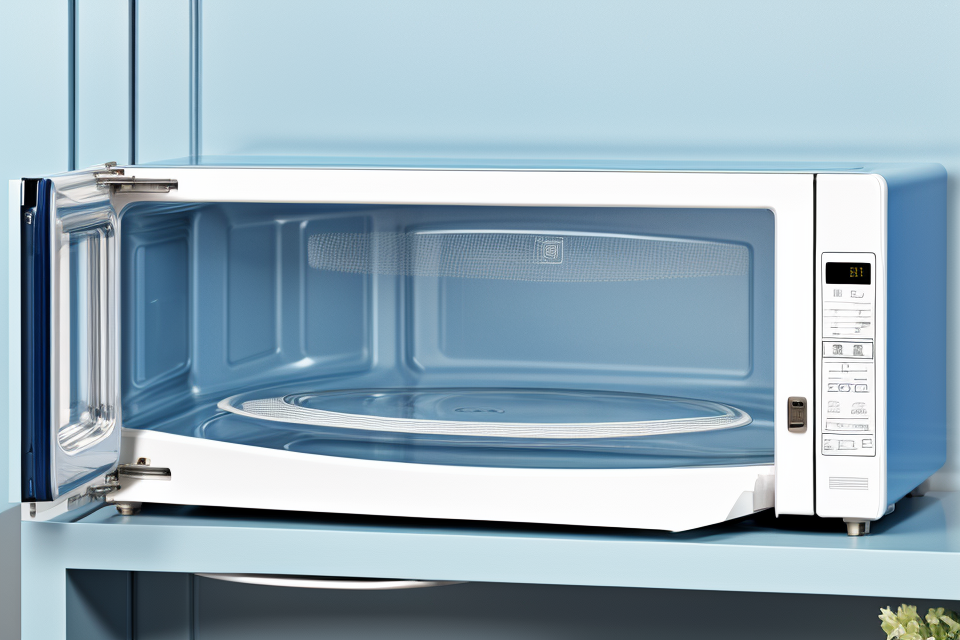
A microwave is an essential appliance in every household, but it can become dirty and grimy over time. Cleaning your microwave is important to ensure that it functions properly and to prevent the growth of bacteria. However, many people are unsure of how to clean their microwave safely and effectively. In this comprehensive guide, we will provide you with safe and effective techniques for cleaning your microwave, so that it looks and functions like new. Whether you’re dealing with stubborn stains or unpleasant odors, we’ve got you covered. Let’s get started!
The Importance of Regular Microwave Cleaning
How often should you clean your microwave?
When it comes to cleaning your microwave, the frequency with which you should perform this task may vary depending on your lifestyle and the amount of use your microwave gets. However, as a general rule of thumb, it is recommended to clean your microwave at least once every three months.
- Frequency of use: If your microwave is used heavily on a daily basis, it may require more frequent cleaning. This is because food and other debris are more likely to accumulate and build up over time, potentially causing damage to the microwave’s internal components.
- Type of food: Certain types of food can be more difficult to clean than others. For example, foods that are high in fat or sugar can leave behind stubborn residues that may require additional cleaning efforts.
- Maintenance of surrounding area: It is also important to consider the cleanliness of the surrounding area, such as the countertops and cabinets, when determining how often to clean your microwave. If these areas are prone to spills and messes, it may be necessary to clean your microwave more frequently to prevent the spread of dirt and grime.
Ultimately, the frequency with which you clean your microwave will depend on your individual circumstances. However, by following the safe and effective cleaning techniques outlined in this guide, you can help ensure that your microwave remains sparkling clean and in good working condition.
The consequences of not cleaning your microwave
- Risk of foodborne illness
- Bacteria and other pathogens can grow on dirty microwave interiors, potentially leading to food contamination and foodborne illness
- Reduced performance
- Over time, buildup of food debris and grease can impede the functioning of the microwave’s fan and other components, leading to decreased performance and possibly even damage to the appliance
- Unpleasant odors
- A dirty microwave can cause unpleasant odors to linger, making it difficult to enjoy the fresh scent of your cooked meals
- Visual appeal
- A messy and unkempt microwave can detract from the overall appearance of your kitchen, creating an unappealing and cluttered space
- Increased risk of fire
- If food debris and other flammable materials are allowed to accumulate in the microwave, there is an increased risk of fire
- Decreased efficiency
- When microwaves are not cleaned regularly, they require more energy to perform their functions, which can lead to increased energy bills and a larger carbon footprint.
Tips for maintaining a clean microwave
Regular cleaning of your microwave is crucial to ensure it operates efficiently and safely. A clean microwave not only cooks food evenly but also prevents the buildup of harmful bacteria. To maintain a clean microwave, consider the following tips:
- Clean the microwave after each use: To prevent the buildup of splatters and spills, wipe the interior of the microwave with a damp cloth or paper towel after each use. This simple step will help prevent the need for more extensive cleaning later on.
- Use microwave-safe utensils: When using metal utensils, check if they are microwave-safe before using them. Metal utensils can cause sparks and damage the microwave’s interior. Using microwave-safe utensils will help prevent this issue.
- Don’t mix metal and microwave-safe utensils: When cooking or reheating food, avoid mixing metal utensils with microwave-safe utensils. Mixing them can cause sparks and damage the microwave’s interior. It is best to use only microwave-safe utensils when cooking or reheating food.
- Clean the turntable: The turntable is responsible for rotating the food during cooking. Over time, it can become clogged with food debris, making it difficult to rotate. Cleaning the turntable regularly will help ensure it continues to rotate smoothly.
- Clean the exhaust vent: The exhaust vent is responsible for expelling hot air from the microwave. Over time, it can become clogged with food debris, preventing it from functioning properly. Cleaning the exhaust vent regularly will help ensure it continues to function correctly.
By following these tips, you can maintain a clean microwave and ensure it operates efficiently and safely.
Preparing for Microwave Cleaning
Gathering necessary supplies
Before you begin the process of cleaning your microwave, it is important to gather all the necessary supplies. This will ensure that you have everything you need to safely and effectively clean your microwave. Here are some of the supplies you will need:
- Microfiber cloths: These are soft and gentle on the microwave’s surface, making them ideal for wiping down the interior of the microwave.
- Mild dish soap: A mild dish soap will help to break down any grime or residue on the microwave’s surface.
- Scouring pad: A scouring pad can be used to scrub away tough grime or stains on the microwave’s exterior.
- Steel wool: Steel wool can be used to scrub away grime or stains on the microwave’s exterior, as well as to clean the control panel.
- Cleaning solution: Depending on the level of grime or residue on your microwave, you may need to use a cleaning solution. You can make your own cleaning solution by mixing equal parts water and white vinegar.
- Rags or paper towels: You will need rags or paper towels to clean up any spills or spots that may occur during the cleaning process.
By gathering these necessary supplies, you will be well on your way to a sparkling microwave.
Turning off the power and removing items from the microwave
Before you begin cleaning your microwave, it is important to take a few safety precautions. First, turn off the power to the microwave to prevent any accidents or damage. You can usually find the power switch on the outside of the microwave, or in some cases, you may need to unplug it from the wall outlet. Once the power is off, proceed to remove any items that may be inside the microwave.
It is important to be careful when removing items from the microwave, as some items may be hot or sharp. Use potholders or oven mitts to protect your hands, and be sure to check for any splatters or spills before removing items. Once all items have been removed, you can proceed to the next step in the cleaning process.
Choosing the right cleaning method
When it comes to cleaning your microwave, there are various methods to choose from. Each method has its own advantages and disadvantages, so it’s important to select the right one for your needs. Here are some factors to consider when choosing a cleaning method:
- Time constraints: If you’re short on time, you may want to opt for a quick and easy cleaning method, such as using a microwave-safe cleaning product or running a cycle with a cleaning bag. On the other hand, if you have more time, you may want to try a more thorough cleaning method, such as using a DIY solution or scrubbing with a sponge.
- Level of effort: Some cleaning methods require more effort than others. For example, using a DIY solution may require more scrubbing and elbow grease, while using a cleaning product may be more hands-off. Consider how much effort you’re willing to put in before choosing a cleaning method.
- Type of build-up: If your microwave has a lot of stubborn build-up, you may need to choose a cleaning method that can tackle tough grime. This may include using a stronger cleaning product or scrubbing with a more abrasive sponge. On the other hand, if your microwave is relatively clean, a more gentle cleaning method may suffice.
- Microwave materials: Different cleaning methods may be more or less suitable for different types of microwaves. For example, if your microwave has a stainless steel exterior, you may want to avoid using abrasive cleaning products or scrubbers that could scratch the surface. Similarly, if your microwave has a glass turntable, you may want to avoid using harsh chemicals that could damage the glass.
By considering these factors, you can choose the right cleaning method for your microwave and get it looking sparkling clean in no time.
Microwave Cleaning Techniques
Natural cleaning methods
Cleaning your microwave doesn’t have to involve harsh chemicals or abrasive scrubbers. Natural cleaning methods offer a safe and effective way to restore your microwave to a sparkling condition.
DIY microwave cleaning with vinegar and water
Vinegar is a powerful cleaning agent that can break down grime and stains in your microwave. To make a DIY microwave cleaner, mix equal parts of white vinegar and water in a microwave-safe bowl. Microwave the mixture on high for 5-10 minutes, or until the mixture has steamed and the microwave is free of grime. Use a cleaning cloth to wipe down the interior of the microwave, and rinse with water as needed.
Microwave cleaning with lemon and baking soda
Lemon is a natural acid that can help break down grease and grime in your microwave. To clean your microwave with lemon, cut a lemon in half and sprinkle baking soda over the lemon halves. Place the lemon halves in the microwave and microwave on high for 5-10 minutes. Let the mixture sit for a few hours, then scrub the interior of the microwave with a cleaning cloth. Rinse with water as needed.
Chemical cleaning methods
Using microwave cleaning products
- Micro cleaners: These are specially designed products that can be used in the microwave to clean and sanitize the interior.
- Micro wave cooking: Cooking specific foods, such as lemon or vinegar, can help to loosen and remove grime.
Safety precautions when using chemical cleaners
- Always read the instructions on the label carefully before using any cleaning product.
- Do not mix different cleaning products, as this can cause harmful reactions.
- Do not use abrasive or scratchy cleaners on the inside of the microwave, as this can damage the surface.
- Do not use any type of cleaning product that contains ammonia or bleach, as these can create toxic fumes when combined with other chemicals.
- Avoid using chemical cleaners on metal parts, as this can cause corrosion.
- Keep all cleaning products out of reach of children and pets.
- Never leave the microwave unattended while cleaning.
DIY cleaning with microfiber cloths and soap
DIY cleaning with microfiber cloths and soap is a simple and effective method to clean your microwave. Microfiber cloths are specially designed to capture dirt and bacteria, making them an ideal choice for cleaning your microwave.
To start, remove all food and items from the microwave and unplug it. Take a microfiber cloth and add a small amount of mild soap to it. The soap will help break down any grease or grime on the microwave walls. Gently wipe down the interior of the microwave with the soapy cloth, focusing on any areas with visible stains or residue.
Next, take a clean microfiber cloth and wipe down the interior of the microwave, paying extra attention to the corners and edges. This will remove any remaining soap and help to dry the microwave.
Once the microwave is clean, wipe down the exterior of the microwave with a dry microfiber cloth to remove any soap residue.
It’s important to note that while microfiber cloths are effective at cleaning, they are not recommended for cleaning around the buttons and control panel of the microwave. To clean these areas, use a soft, damp cloth and mild soap. Avoid using abrasive cleaners or scrubbers as they can damage the microwave’s exterior.
With regular cleaning using microfiber cloths and soap, your microwave will remain sparkling clean and ready to use.
Post-Cleaning Maintenance
Running a test cleaning cycle
After thoroughly cleaning your microwave, it’s essential to run a test cleaning cycle to ensure that the appliance is free from any leftover cleaning residue. This step is crucial to prevent any damage to your microwave and to ensure that it functions correctly. Here’s how to do it:
- Place a microwave-safe bowl of water in the microwave. Make sure the bowl doesn’t have any metal or other materials that can damage the microwave.
- Microwave the bowl of water for about 2-3 minutes. This will heat up the microwave and allow any remaining cleaning residue to be suctioned out.
- After the cycle is complete, remove the bowl of water and wipe down the interior of the microwave with a clean, damp cloth.
- Run another cleaning cycle with just water for 30 seconds to ensure that the microwave is completely clean and free from any residue.
By following these steps, you can be confident that your microwave is clean and ready to use.
Restoring lost functions
Cleaning your microwave is only half the battle. The other half is restoring any lost functions that may have been affected by the build-up of grime and dirt. This can include things like the microwave’s ability to heat food evenly, or the quality of the microwaves emitted.
One common issue that can arise after cleaning is a decrease in the microwave’s power. This can be caused by a buildup of grease and grime on the turntable, which can prevent it from spinning properly. To restore power, try wiping down the turntable with a damp cloth and making sure it is free of any debris.
Another issue that can occur is uneven heating. This can be caused by a buildup of dirt and grime on the walls of the microwave, which can block the microwaves and prevent them from heating food evenly. To restore even heating, try wiping down the walls of the microwave with a damp cloth and making sure they are free of any debris.
If your microwave’s buttons are no longer working after cleaning, it may be a sign that the button pad needs to be cleaned. Over time, dirt and grime can build up under the buttons and prevent them from functioning properly. To clean the button pad, turn off the microwave and unplug it from the wall. Use a damp cloth to wipe down the button pad and make sure it is free of any debris.
In addition to these common issues, there may be other lost functions that need to be restored after cleaning. For example, if your microwave has a built-in camera, it may need to be cleaned as well to restore its functionality. It’s important to carefully read your microwave’s manual to understand any specific maintenance requirements for your particular model.
Overall, restoring lost functions is an important part of post-cleaning maintenance for your microwave. By taking the time to address any issues that may have arisen after cleaning, you can ensure that your microwave is functioning at its best and ready to handle all of your cooking needs.
Maintaining a clean microwave
- Keeping your microwave clean is not a one-time task, but rather an ongoing process that requires regular maintenance.
- To maintain a clean microwave, follow these simple steps:
- Clean the inside of the microwave door with a soft, damp cloth after each use. This will help to remove any spills or splatters that may have occurred.
- Wipe down the control panel with a damp cloth or a solution of water and mild dish soap to remove any crumbs or smudges.
- Avoid using abrasive cleaners or scouring pads on the exterior of the microwave, as this can scratch the surface and cause damage.
- Use a microwave cleaning kit or a solution of water and vinegar to deep clean the microwave on a regular basis. This will help to remove any built-up grease or grime and leave your microwave looking and smelling fresh.
- Make sure to unplug the microwave before cleaning, and always follow the manufacturer’s instructions for safe and effective cleaning.
- After cleaning, wipe down the exterior of the microwave with a soft, dry cloth to remove any moisture.
- By following these simple steps, you can maintain a clean and sparkling microwave that will last for years to come.
Troubleshooting Common Microwave Issues
Leaking or dripping
Leaking or dripping is a common issue that can occur in microwaves. It is usually caused by a build-up of moisture or condensation within the microwave, which can seep through the seals and cause water to drip out. Here are some safe and effective techniques to troubleshoot this issue:
Cleaning the Turntable
The turntable is the round plate that the food sits on when cooking in the microwave. If it is dirty or wet, it can cause water to seep through the seals and drip out. To clean the turntable, unplug the microwave and remove any food residue or spills with a damp cloth. You can also use a microwave-safe detergent to clean the turntable. Once clean, allow the turntable to air dry completely before putting any food on it.
Cleaning the Seals
If the seals around the microwave door are dirty or wet, they can cause water to drip out. To clean the seals, use a soft, damp cloth to wipe away any excess moisture or grime. You can also use a microwave-safe soap or detergent to clean the seals. Be sure to rinse thoroughly and allow the seals to air dry completely before using the microwave again.
Using a Microwave Cover
A microwave cover can help prevent moisture from building up inside the microwave and causing leaks. When using a microwave cover, be sure to choose one that is microwave-safe and made of a material that allows for air circulation. This will help prevent moisture from building up and causing leaks.
Replacing the Turntable or Seals
If the turntable or seals are damaged or beyond cleaning, they may need to be replaced. To replace the turntable, consult the microwave’s user manual or contact the manufacturer for instructions. To replace the seals, consult a professional or the microwave’s user manual for instructions.
By following these safe and effective techniques, you can troubleshoot and prevent leaks or drips in your microwave.
Smelling smoke or fire
If you smell smoke or see signs of fire while using your microwave, it’s important to take immediate action to prevent any accidents. Here are some steps to follow:
- Turn off the microwave and unplug it from the power source. This is the first thing you should do if you smell smoke or see signs of fire. Don’t risk further damage or injury by continuing to use the microwave.
- Check the microwave door. If the door is not properly closed or if there are any gaps around the edges, it can cause smoke or fire. Make sure the door is securely closed and there are no gaps around the edges.
- Clean the microwave filters. If your microwave has filters, make sure they are clean and free from debris. If they are dirty or clogged, it can cause smoke or fire. Clean the filters according to the manufacturer’s instructions.
- Check for any loose wires or connections. If there are any loose wires or connections, it can cause smoke or fire. Check all the wires and connections and tighten them if necessary.
- Contact a professional. If you are unsure about any aspect of the microwave, or if you are unable to resolve the issue, contact a professional. They will be able to diagnose the problem and fix it safely.
It’s important to remember that microwaves are powerful appliances and should be handled with care. If you are unsure about any aspect of your microwave, it’s always best to err on the side of caution and seek professional help.
Strange noises or vibrations
- Causes:
- Improperly installed or loose microwave turntable
- Loose or damaged fan motor
- Deteriorated microwave door seal
- Microwave cavity or waveguide issues
- Fixes:
- Tighten the turntable and ensure it is properly installed
- Replace or tighten loose fan motor screws
- Check and replace damaged door seal
- Clean or replace damaged waveguide or microwave cavity components
Microwave not heating up
- Possible causes:
- Dirty or clogged turntable motor
- Blocked or damaged magnetron
- Faulty high voltage diode
- Faulty control panel or display
- Loose or damaged microwave door
- Steps to troubleshoot:
- Check if the microwave is turned on and the power cord is properly plugged in.
- Make sure the turntable motor is free from any obstructions or debris.
- Check if the magnetron is clean and not damaged.
- Inspect the high voltage diode for any visible damage or burn marks.
- Check the control panel or display for any issues or malfunctions.
- Make sure the microwave door is properly aligned and not damaged.
- If the issue persists, consult a professional technician or the manufacturer’s support for further assistance.
Seeking Professional Help
When to call a repair technician
While cleaning your microwave yourself is generally recommended, there may be instances where it’s best to seek professional help. Here are some signs that you should call a repair technician:
- Your microwave is not heating up properly: If your microwave is not producing any heat or is heating up unevenly, it could be a sign of a problem with the heating element or other internal components. In this case, it’s best to call a repair technician who can diagnose and fix the issue.
- Your microwave is making strange noises: If your microwave is making unusual noises, such as clicking, buzzing, or whirring, it could be a sign of a problem with the motor or other mechanical components. A repair technician can diagnose the issue and make any necessary repairs.
- Your microwave is leaking: If your microwave is leaking water or other fluids, it could be a sign of a serious problem with the seals or other components. In this case, it’s best to call a repair technician right away to prevent any further damage.
- Your microwave has a visible issue: If you notice a visible issue with your microwave, such as a cracked window or a damaged control panel, it’s best to call a repair technician. These issues can often be fixed with a simple repair, but if left unaddressed, they can lead to more serious problems down the line.
In general, if you’re unsure whether an issue with your microwave requires professional help, it’s best to err on the side of caution and call a repair technician. They can diagnose the issue and recommend the best course of action to get your microwave back in working order.
Choosing a reputable repair service
When it comes to repairing your microwave, it’s important to choose a reputable repair service. Here are some tips to help you make the right choice:
- Look for a company with a good reputation: Check online reviews and ask for recommendations from friends and family.
- Make sure the company is licensed and insured: This will protect you in case of any damage or accidents during the repair process.
- Check their experience: Choose a company that has experience working with your specific microwave model.
- Ask about their repair process: Find out how they diagnose and fix problems, and what kind of warranty they offer.
- Get a written estimate: Before you agree to any repairs, make sure you get a written estimate that outlines the work to be done, the cost, and the expected completion time.
By following these tips, you can ensure that you choose a reputable repair service that will provide you with high-quality and reliable microwave repair services.
Preparing for the technician’s arrival
Before inviting a technician to clean your microwave, it is essential to prepare your home for their arrival. Here are some steps to take to ensure a smooth and efficient cleaning process:
Unplug the Microwave
Before the technician arrives, unplug the microwave from the power source to ensure safety during the cleaning process. This is an essential step as microwaves contain high voltage electricity that can be hazardous if not handled properly.
Remove Items from the Microwave
Clear the microwave of any dishes, food, or containers. This will allow the technician to access all areas of the microwave and ensure a thorough cleaning. It is also important to remove any microwave turntable, if it is removable, for easier access.
Check the Microwave Door
Make sure the microwave door is functioning properly. If the door is not closing correctly or is damaged, the technician may not be able to complete the cleaning process. Inform the technician of any issues with the door before they arrive.
Remove Items from the Kitchen
Clear the area around the microwave of any items that may obstruct the technician’s movement. This will ensure that they have enough space to work comfortably and efficiently.
Prepare a Workspace
Provide a clear and stable workspace for the technician to work on. This will help them to work safely and effectively, and it will also make the cleaning process more efficient.
By following these steps, you can prepare your home and microwave for a technician’s arrival, ensuring a safe and effective cleaning process.
FAQs
1. Can I use any cleaning product to clean my microwave?
It is important to use cleaning products specifically designed for use in microwaves. Most general cleaning products, such as bleach or abrasive sponges, can damage the finish of the microwave and may cause harmful fumes. It is best to use a microwave-safe cleaning product or a mixture of water and vinegar.
2. How often should I clean my microwave?
It is recommended to clean your microwave at least once a month. However, the frequency of cleaning may vary depending on how often you use your microwave and the type of food you cook. If you cook a lot of greasy or sticky foods, you may need to clean your microwave more often.
3. Is it safe to use water in the microwave to clean it?
Yes, it is safe to use water in the microwave to clean it. You can use a mixture of water and vinegar or a microwave-safe cleaning product. Be sure to use a microwave-safe bowl or container to prevent any damage to the microwave.
4. Can I use a microwave cleaner pad?
Yes, you can use a microwave cleaner pad to clean your microwave. These pads are designed specifically for use in microwaves and are safe and effective. Simply place the pad in the microwave and heat it for a few minutes. The pad will dissolve any grease or grime, making it easy to wipe away with a damp cloth.
5. How do I clean the turntable in my microwave?
To clean the turntable in your microwave, you can use a soft brush or cloth to gently remove any food particles or debris. You can also use a mixture of water and vinegar or a microwave-safe cleaning product. Be sure to clean the turntable while it is still in the microwave to avoid damaging the wiring or other components.
6. Can I use baking soda to clean my microwave?
Yes, you can use baking soda to clean your microwave. Sprinkle baking soda on a damp cloth and use it to scrub away any grime or stains. You can also create a paste by mixing baking soda with water and applying it to the microwave walls. Let it sit for a few minutes before wiping it away with a damp cloth.


