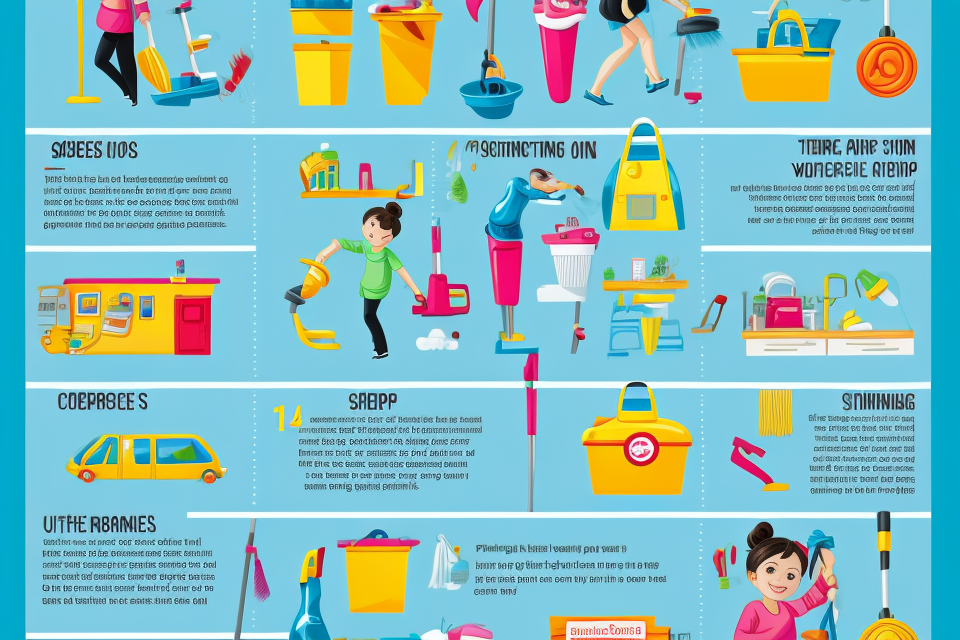
Are you tired of using the same old mop and bucket to clean your floors? Want to add some excitement and creativity to your cleaning routine? Look no further! This article will show you 5 creative homemade mopping hacks that will have your floors sparkling clean in no time. From using coffee grounds to baking soda, these hacks are sure to give your cleaning routine a boost. So grab a mop and let’s get started!
DIY Mop Solutions to Tackle Dirt and Grime
Repurposing Old Clothing
How to Repurpose Old T-Shirts and Towels
When it comes to repurposing old clothing for mopping, t-shirts and towels are two of the most commonly used items. Here’s how you can transform them into effective cleaning tools:
Materials Needed
- Old t-shirts or towels
- Scissors
- A bucket
- Water
- Floor cleaner or white vinegar
Step-by-Step Guide
- Cut the t-shirts or towels into squares that are large enough to cover the floor area you want to clean.
- Soak the cloth squares in a bucket filled with warm water and a few drops of floor cleaner or white vinegar.
- Squeeze out any excess water from the cloth squares and wring them out.
- Place the cloth squares flat on the floor and use them to mop up the dirt and grime.
- Rinse the cloth squares in clean water and wring them out before using them again.
Tips and Tricks
- If you’re using white vinegar as a cleaning solution, make sure to dilute it with water before soaking the cloth squares.
- Avoid using harsh chemicals or abrasive cleaners on your floors, as they can damage the surface and leave residue.
- For tough stains or grime, you can use a mixture of baking soda and water to pre-treat the area before mopping.
- Don’t forget to clean the mop head regularly to prevent the buildup of dirt and bacteria.
Using Natural Ingredients
Benefits of Using Natural Ingredients
When it comes to cleaning your home, there are many benefits to using natural ingredients as opposed to harsh chemicals. For one, natural ingredients are often more gentle on surfaces and materials, meaning they won’t cause damage or discoloration. Additionally, natural ingredients are often more cost-effective and environmentally friendly, as they can be found in your own home or purchased in bulk.
Top 3 Natural Mop Solutions
- Vinegar and Water Solution: Mix equal parts white vinegar and water in a spray bottle, and use it to clean your floors. The vinegar will help to break down dirt and grime, while the water will help to rinse it away.
- Baking Soda and Water Solution: Sprinkle baking soda on your floors, let it sit for a few hours, and then mop it up with warm water. The baking soda will absorb dirt and grime, making it easier to remove.
- Lemon and Water Solution: Squeeze the juice of half a lemon into a spray bottle filled with water, and use it to clean your floors. The citric acid in the lemon juice will help to break down dirt and grime, while the water will help to rinse it away.
How to Prepare and Use Natural Mop Solutions
To prepare any of the above solutions, simply mix the necessary ingredients in a spray bottle or bowl, and then apply them to your floors using a clean mop or cloth. Be sure to work in small sections at a time, and to rinse your mop or cloth frequently to avoid leaving residue behind.
To use any of the solutions, simply apply them to your floors using a clean mop or cloth, and then use a clean mop to rinse away the dirt and grime. For especially dirty floors, you may need to repeat the process several times.
Safety Precautions
When working with any cleaning solution, it’s important to take safety precautions to protect yourself and your home. Always work in a well-ventilated area, and avoid contact with your eyes or skin. If you experience any irritation or discomfort while using a natural cleaning solution, stop using it immediately and consult a medical professional if necessary. Additionally, be sure to keep all cleaning solutions out of reach of children and pets.
Making Your Own Mop Water
Importance of Mop Water
The type of water used to mop floors can significantly impact the cleaning process. Hard water can leave mineral deposits and spots on the floor, while soft water may not be effective at removing tough stains. It is crucial to use the right type of water to ensure that the floors are thoroughly cleaned and left sparkling.
How to Make the Perfect Mop Water
To make the perfect mop water, start by filling a clean bucket with hot water. The temperature of the water can be adjusted depending on the type of flooring being cleaned. For hardwood or tile floors, a temperature between 70 and 80 degrees Fahrenheit is recommended. For laminate or vinyl floors, a temperature between 80 and 100 degrees Fahrenheit is suitable.
Next, add a cleaning agent to the water. A homemade cleaning solution can be made by mixing equal parts of white vinegar and water. The vinegar will help to cut through grease and grime, leaving the floors looking brighter and cleaner. Alternatively, a few drops of mild dish soap can be added to the water for a more conventional cleaning solution.
Homemade Mop Water Recipe
Here is a simple recipe for homemade mop water:
- 1 gallon of hot water
- 1/2 cup of white vinegar
- Optional: a few drops of mild dish soap
Mix the vinegar and water in a clean bucket, and stir until the vinegar is fully dissolved. If using dish soap, add a few drops to the mixture and stir well. Once the solution is prepared, it is ready to be used with a clean mop.
Cleaning Hacks for Efficient Mopping
The Proper Way to Use a Mop
Step-by-Step Guide to Proper Mop Usage
- Begin by wringing out the mop head to remove any excess water.
- Next, dip the mop head into the cleaning solution and ensure that it is fully saturated.
- Start mopping in one corner of the room and work your way outwards in a systematic manner.
- Use a zigzag pattern to cover the entire floor surface and ensure that no area is missed.
- Use even pressure when pushing and pulling the mop to avoid leaving streaks or lines on the floor.
- Rinse the mop head regularly to prevent the build-up of dirty water, which can leave residue on the floor.
- When finished, rinse the floor thoroughly with clean water to remove any remaining cleaning solution.
Tips for Effective Mopping
- Avoid using too much water, as this can lead to a slippery floor and can take longer to dry.
- Use a cleaning solution that is appropriate for the type of floor you are cleaning. For example, for hardwood floors, use a solution of warm water and white vinegar.
- Avoid using harsh chemicals or abrasive cleaners, as these can damage the floor surface.
- Take your time and don’t rush the process, as this can lead to missed spots and uneven cleaning.
- Use a mop with a removable head, as this makes it easier to change the cleaning solution or rinse the mop without having to wring it out.
Enhancing Your Mop with Attachments
Enhancing your mop with attachments is an effective way to improve its cleaning capabilities and make it more versatile. Here’s how to choose the right attachments for your mop and some DIY mop attachment ideas.
How to Choose the Right Attachments for Your Mop
When choosing mop attachments, consider the type of surface you’ll be cleaning and the specific cleaning task you need to accomplish. Here are some factors to consider:
- Material: Some attachments are made of plastic, while others are made of metal or a combination of both. Choose an attachment that is durable and compatible with your mop.
- Shape: Different attachments have different shapes, such as rectangular, square, or round. Choose an attachment that is suitable for the shape of the surface you’ll be cleaning.
- Size: Consider the size of the attachment in relation to the size of the surface you’ll be cleaning. A larger attachment may be more effective for larger surfaces, while a smaller attachment may be more suitable for smaller surfaces.
Top 3 Mop Attachments for Different Surfaces
- Squeegee: A squeegee attachment is ideal for cleaning windows, mirrors, and other smooth surfaces. It allows you to reach high areas and easily remove excess water.
- Scouring pad: A scouring pad attachment is perfect for cleaning grout lines, tiles, and other surfaces that require more aggressive cleaning. It can be used with cleaning solutions to remove stubborn stains and dirt.
- Duster: A duster attachment is great for dusting ceiling fans, vents, and other hard-to-reach areas. It can be used with a dry mop to avoid leaving streaks or residue.
DIY Mop Attachment Ideas
If you can’t find the right attachment for your mop, you can make your own. Here are some DIY mop attachment ideas:
- Tile scrubber: Attach a sponge or scouring pad to your mop to create a tile scrubber. This attachment is perfect for cleaning grout lines and tiles.
- Squeegee: You can create a squeegee attachment by attaching a flat rubber mat to your mop. This attachment is ideal for cleaning windows and mirrors.
- Duster: Attach a soft cloth or a brush to your mop to create a duster attachment. This attachment is perfect for dusting ceiling fans and other hard-to-reach areas.
Enhancing your mop with attachments can help you tackle different cleaning tasks more efficiently and effectively. With the right attachments, you can create a customized cleaning solution that meets your specific needs.
Customizing Your Mop for Specific Needs
Understanding Your Mop’s Needs
Before customizing your mop, it is essential to understand its specific needs. Here are some factors to consider:
- Floor type: Different floor types require different mop heads and cleaning solutions. For example, hardwood floors need a different mop head than tile or linoleum floors.
- Soil type: The amount and type of dirt and grime on the floor will affect the cleaning solution and mop head you choose.
- Water source: Some mops require a continuous flow of water, while others can be used with a bucket of water.
Choosing the Right Mop Head
The mop head is the most crucial part of your mop, and choosing the right one can make all the difference in the cleaning results. Here are some factors to consider when choosing a mop head:
- Material: Mop heads can be made from various materials, such as microfiber, cotton, or synthetic fibers. Each material has its own benefits and drawbacks, so choose the one that best suits your needs.
- Size: Mop heads come in various sizes, from small ones for spot cleaning to large ones for mopping entire rooms.
- Design: Some mop heads have a flat design, while others have a pad that conforms to the floor. Choose the one that best fits your cleaning needs.
Adjusting the Mop Handle
The mop handle can be adjusted to make mopping more comfortable and efficient. Here are some tips for adjusting the mop handle:
- Adjust the height: The mop handle should be adjusted to the appropriate height for the user. This can help prevent back and knee pain and make mopping more comfortable.
- Choose the right angle: The mop handle can be adjusted to the right angle for the user’s comfort and cleaning efficiency.
Accessorizing Your Mop
Accessorizing your mop can help make cleaning more efficient and effective. Here are some accessories to consider:
- Mop wringer: A mop wringer can help squeeze out excess water from the mop head, making it easier to maneuver and reducing the amount of water left on the floor.
- Mop bucket: A mop bucket can help keep the mop and cleaning solution organized and make it easier to transport the mop from one area to another.
- Mop holder: A mop holder can help keep the mop upright and accessible, making it easier to use and reducing the risk of accidents.
Maintaining Your Mop for Long-Lasting Results
Proper Storage and Maintenance
How to Store Your Mop
When it comes to storing your mop, there are several options to consider. The first option is to hang it from a hook or nail in your cleaning supplies closet. This allows for easy access and helps prevent damage to the mop head.
Another option is to store your mop in a designated mop bucket. This not only keeps the mop clean and free from dust, but it also helps to keep the mop wet and ready for use.
If you have limited space, you can store your mop in a vertical position by using a mop holder or stand. This is especially useful if you have a small cleaning closet or storage area.
Mop Storage Ideas
When it comes to storing your mop, it’s important to find a method that works best for you and your space. Some other mop storage ideas include:
- Using a mop wringer to store the mop and wring out the excess water.
- Storing the mop in a mop bucket with a lid to keep it clean and protected from dust.
- Using a mop hanger or stand to store the mop in a vertical position.
Mop Maintenance Tips
In addition to proper storage, there are several maintenance tips to keep your mop in good condition. One of the most important is to regularly replace the mop head and strings. This ensures that the mop is able to clean effectively and efficiently.
Another important maintenance tip is to regularly wash the mop head and strings. This helps to remove dirt and debris, and prevents the buildup of bacteria and germs.
It’s also important to keep the mop wet when not in use. This helps to prevent the mop from drying out and becoming brittle or damaged. If the mop is left out in the sun or in a dry area, it can become dry and difficult to use.
Overall, proper storage and maintenance are crucial to keeping your mop in good condition and ensuring long-lasting results. By following these tips, you can keep your mop clean, wet, and ready for use at all times.
Troubleshooting Common Mop Issues
Maintaining your mop is essential for achieving long-lasting results when cleaning your home. However, even with proper care, mop issues can still arise. Here are some common mop problems and how to address them:
Most Common Mop Problems
- Mop head becomes disconnected from the handle
- Mop head is difficult to squeeze
- Mop head is frayed or frayed
- Mop head is not absorbent enough
- Mop handle is difficult to maneuver
How to Address Mop Issues
If the mop head becomes disconnected from the handle, make sure that the threaded insert on the mop handle is properly tightened. If the mop head is difficult to squeeze, try adding more water or using a different type of mop head. If the mop head is frayed or frayed, it may need to be replaced. If the mop head is not absorbent enough, try using a different type of mop head or adding more cleaning solution. If the mop handle is difficult to maneuver, try using a different type of handle or attaching a longer pole for extra reach.
Preventing Future Mop Problems
To prevent future mop problems, it is important to properly maintain your mop. This includes regularly washing the mop head with warm water and mild soap, rinsing it thoroughly, and allowing it to air dry completely before use. It is also important to check the mop handle for any loose or damaged parts and to tighten or replace them as needed. Additionally, make sure to store your mop in a dry, well-ventilated area when not in use.
DIY Mop Refresh and Upgrade
Signs It’s Time to Refresh Your Mop
A well-used mop can become dull and ineffective over time, which can hinder your cleaning efforts. Here are some signs that it’s time to refresh your mop:
- The mop head becomes dirty quickly
- The mop doesn’t pick up as much dirt as it used to
- The mop strings or head become frayed or worn
- The mop is stained or discolored
How to Refresh Your Mop
Refreshing your mop is a simple process that can help it perform better and last longer. Here’s how to do it:
- Remove the mop head and wash it in warm water with a mild detergent.
- If the mop head is stained or discolored, mix equal parts of white vinegar and water and soak the head in the solution for a few hours.
- Rinse the mop head thoroughly and wring it out.
- If the mop strings are frayed or worn, trim them to the appropriate length.
- Reattach the mop head to the handle and you’re ready to mop again.
DIY Mop Upgrade Ideas
Upgrading your mop can help you achieve better cleaning results and make mopping more efficient. Here are some DIY mop upgrade ideas:
- Replace the mop head with a new one made from microfiber or other high-quality materials.
- Attach a squeegee or scraper to the end of the mop handle to help remove tough grime and stains.
- Add a mop bucket or tray to the bottom of the mop handle to make it easier to carry and store.
Benefits of Upgrading Your Mop
Upgrading your mop can provide several benefits, including:
- Improved cleaning performance
- Increased durability and longevity
- Better ease of use and maneuverability
Top 3 Mop Upgrade Options
Here are three top mop upgrade options to consider:
- Microfiber mop head: This type of mop head is made from high-quality materials that can pick up dirt and dust more effectively than traditional mop heads.
- Mop bucket or tray: This accessory can help you carry and store your mop more easily, and can also keep your floors dry after mopping.
- Squeegee or scraper: This attachment can help you remove tough grime and stains from your floors, making your cleaning efforts more effective.
How to Choose the Right Mop Upgrade for You
Choosing the right mop upgrade depends on your specific cleaning needs and preferences. Consider the following factors when making your decision:
- Your cleaning goals: If you’re looking for better dusting capabilities, a microfiber mop head may be the best option. If you need to remove tough stains and grime, a squeegee or scraper may be more effective.
- Your budget: Upgrading your mop can be an investment, so consider your budget when choosing an upgrade option.
- Your cleaning routine: If you need to store your mop frequently, a mop bucket or tray may be a useful accessory.
By following these tips, you can upgrade your mop and achieve better cleaning results in your home.
FAQs
1. What are some common household items that can be used to make homemade cleaning solutions for mopping?
There are many household items that can be used to make homemade cleaning solutions for mopping. Some examples include white vinegar, baking soda, and lemon juice. These items are all natural and can be used to make effective cleaning solutions that can be used to clean floors and other surfaces.
2. How can I make a homemade mop solution using white vinegar?
To make a homemade mop solution using white vinegar, mix equal parts white vinegar and water in a bucket. You can also add a few tablespoons of baking soda to the mixture to help scrub away tough stains. Soak a mop in the solution and use it to clean your floors. The vinegar will help to cut through grease and dirt, leaving your floors looking sparkling clean.
3. Can I use baking soda to make a homemade mop solution?
Yes, you can use baking soda to make a homemade mop solution. Baking soda is a natural abrasive that can help to scrub away tough stains and dirt. To make a homemade mop solution using baking soda, mix equal parts baking soda and water to form a paste. Add a few drops of water to the paste to create a thick, paste-like consistency. Apply the paste to your floors using a mop and let it sit for a few minutes before rinsing with water.
4. What are some other household items that can be used to make homemade cleaning solutions for mopping?
In addition to white vinegar and baking soda, there are many other household items that can be used to make homemade cleaning solutions for mopping. Some examples include lemon juice, which can help to cut through grease and leave a fresh, clean scent, and castile soap, which is a natural cleaning agent that can be diluted with water to make a gentle, effective cleaning solution. You can also use essential oils, such as tea tree oil or eucalyptus oil, to add a pleasant aroma to your cleaning solutions and help to kill germs.
5. How can I make a homemade mop solution using lemon juice?
To make a homemade mop solution using lemon juice, mix equal parts lemon juice and water in a bucket. You can also add a few tablespoons of baking soda to the mixture to help scrub away tough stains. Soak a mop in the solution and use it to clean your floors. The lemon juice will help to cut through grease and dirt, leaving your floors looking sparkling clean and smelling fresh.

